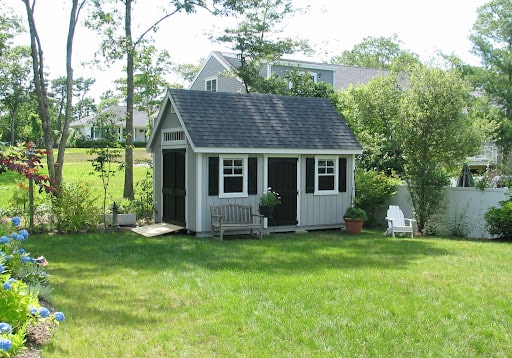
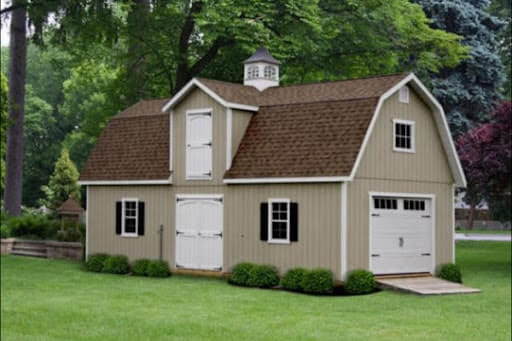
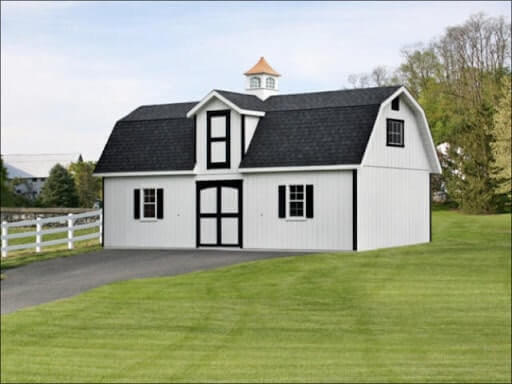
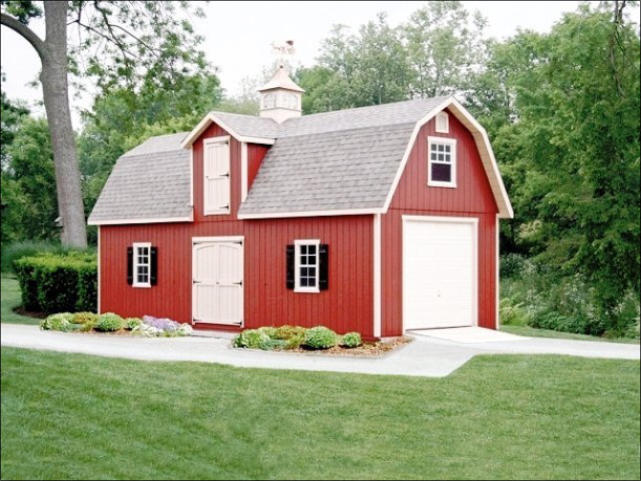
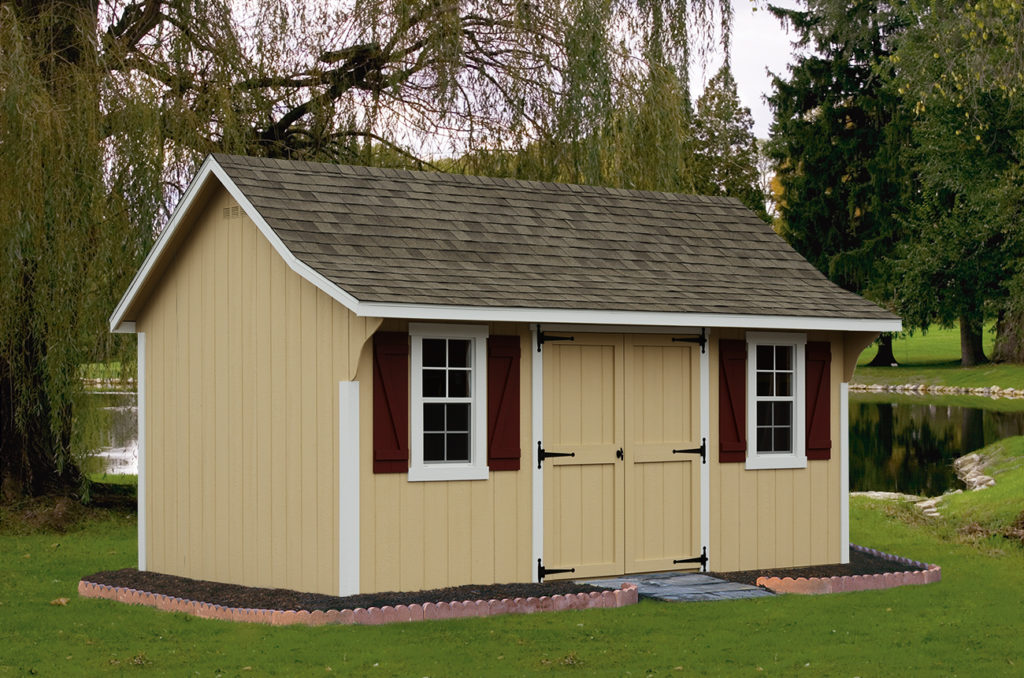
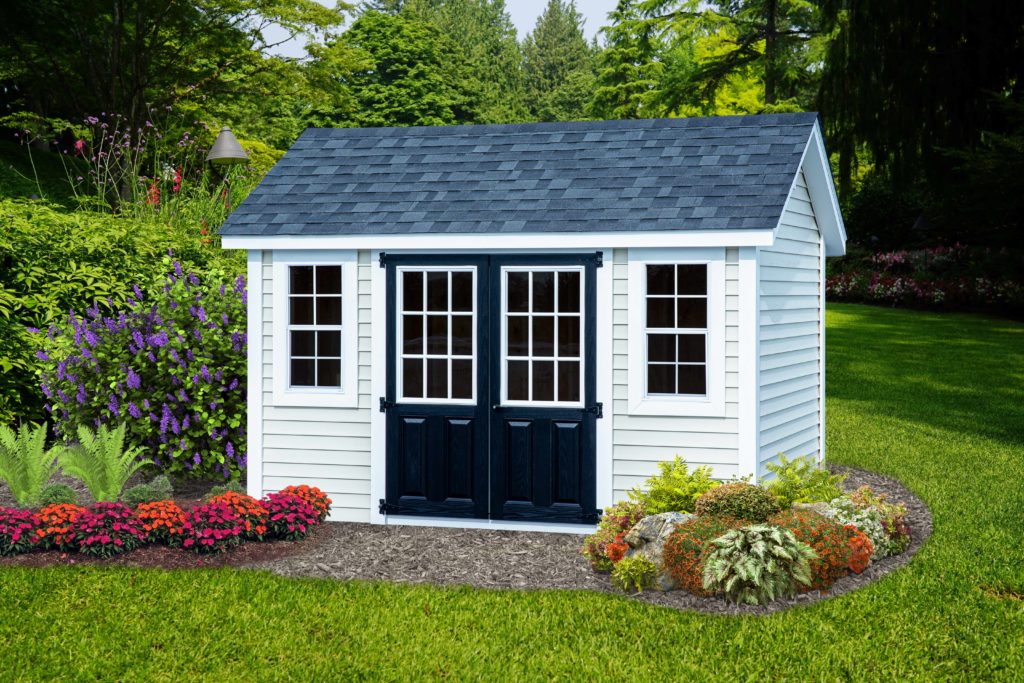
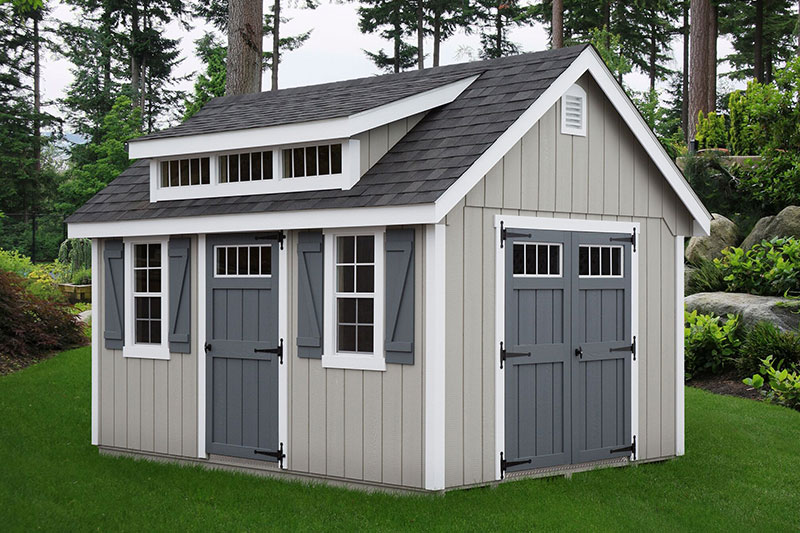
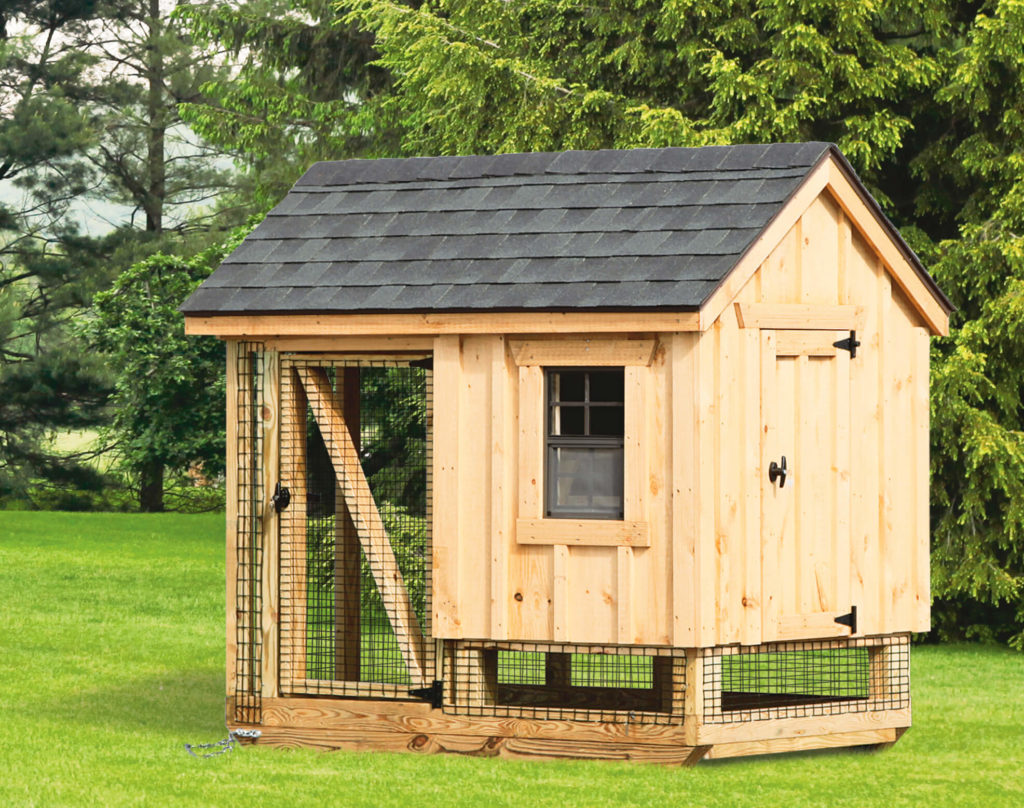
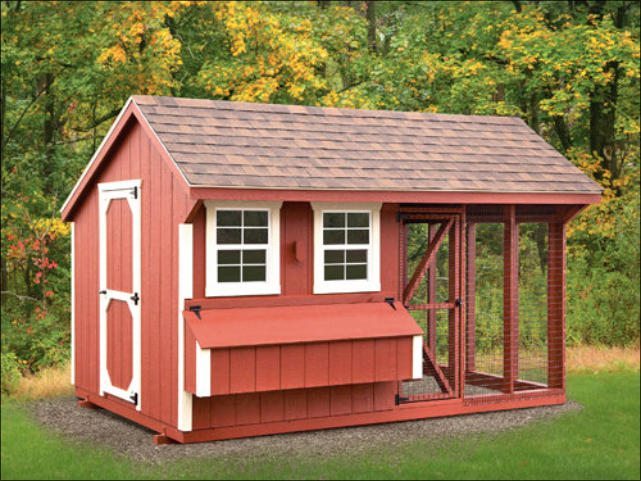
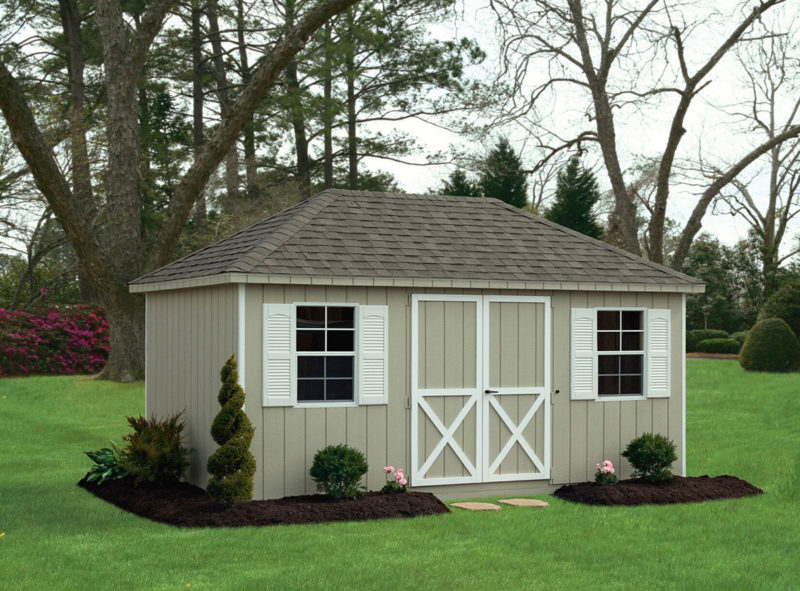
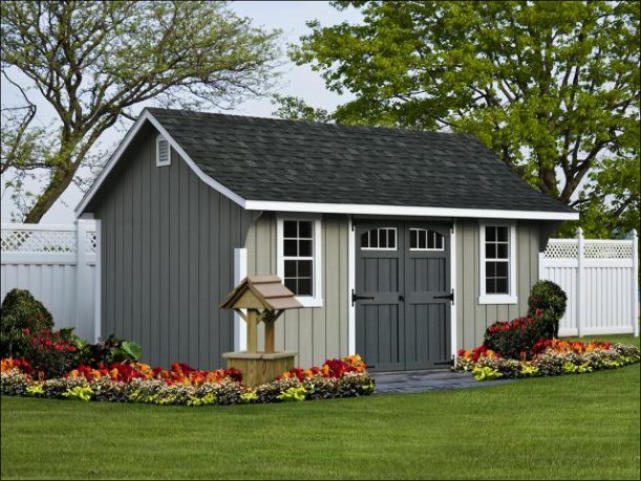
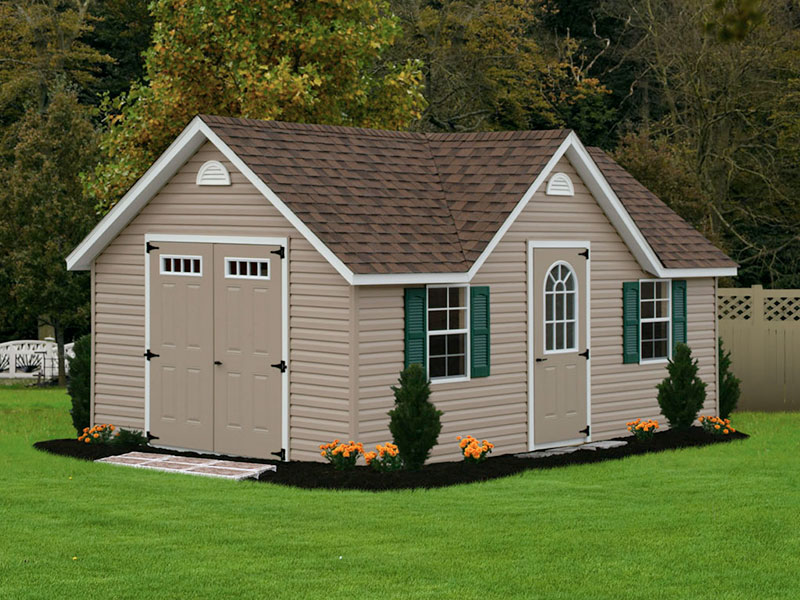
After you choose the perfect structure, it’s time to prepare your site for its arrival. This entails a bit more than setting up a few cones to mark the proper placement. Additional work is necessary to prepare a proper shed base that will help ensure smooth delivery and installation. 

After reading this blog, you’ll be able to prepare your site for a new shed and feel confident in your responsibility for a successful installation process. We’ll also answer some common questions you may have leading up to your delivery day.

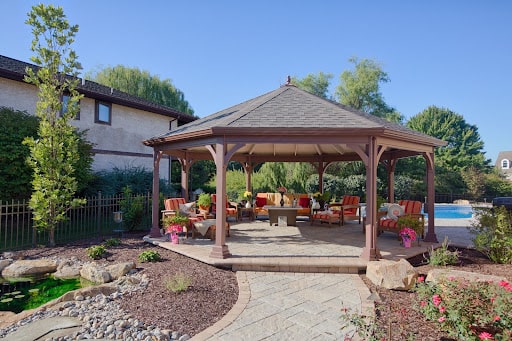
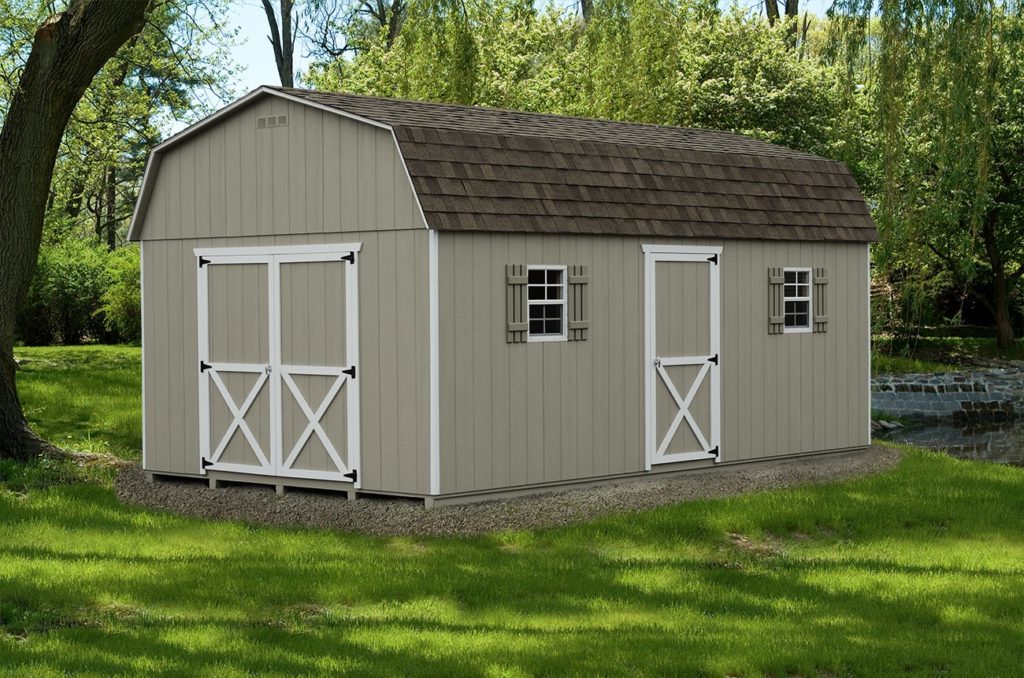
Preparing Ground for Your Shed

The first step in having a shed or large structure that looks its best for years to come is installing a quality shed base. Although Penn Dutch Structures does not excavate or prepare the site foundation, we work closely with Bedrock Siteworks.  

In most cases, your installation site will need to be leveled in preparation for your new shed. Site grading and excavating help level your space so it’s easy to place a shed foundation. Another service that goes hand-in-hand with site grading is installing a retaining wall. This may be necessary if intense site grading is needed on your land. 

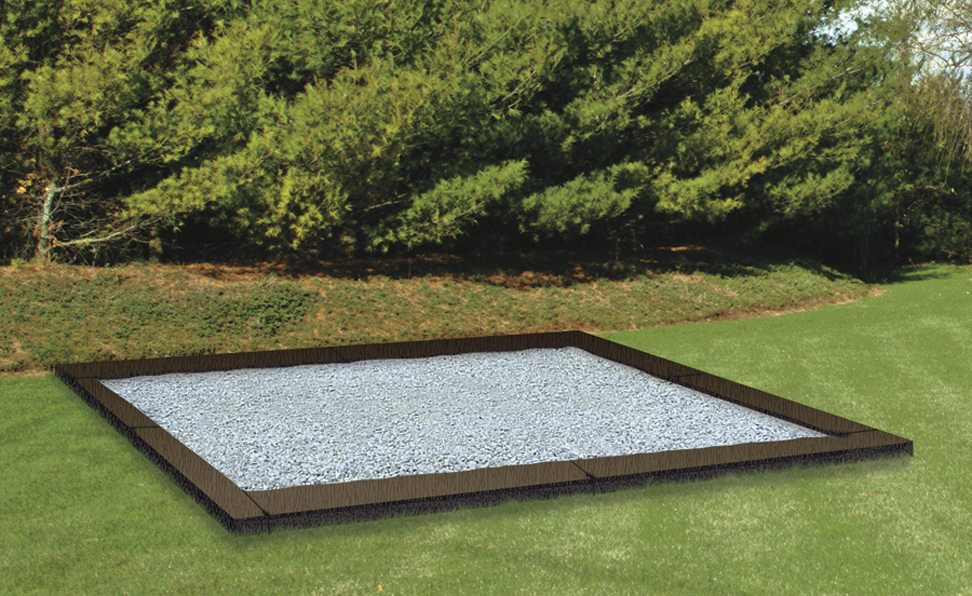
Once there’s a level surface, the next step is placing a foundation for your shed or large structure to sit on. When deciding what type of material to use, we recommend using a stone-based foundation on wood floor structures. 

Incorporating and selecting an appropriate material for your shed foundation will ensure that your structure doesn’t shift over time. Also, certain building materials can help drainage so your shed won’t rot from rain and moisture.

Homeowners Association Requirements

You’re probably familiar with Homeowners Association (HOA) Requirements if you’ve purchased a shed already. There may be additional restrictions on the size and placement of your shed or large structure. 

Specifically, the HOA could require you to put your shed a certain distance away from your different property lines. In order to prepare for delivery and installation day, make sure you know exactly where your property lines are so you can meet these expectations. 

Guidelines and rulings will be different depending on where you live. In some cases, regulations are made based on residential committees. It’s important to look up your local HOA to guarantee you are meeting all requirements. You can find more information about Pennsylvania’s Homeowners Association here

Cost of Site Preparation

The total cost of your site preparation will depend on whether or not you need professional help. For example, if you need to severely regrade your land to level it out, it will cost more than simply installing a shed foundation. 

The most cost-effective material is a gravel base for your shed. An area that is mostly flat, will cost between $5.00 to $9.00 per square foot. Since there are more types of concrete foundations, there is more variation in the cost. 

Some things that may affect your preparation costs are the location of your structure, which includes how far back it is compared to your property lines, any permits that you need in order to have the shed, and finally the total footprint or size of your structure. 

Answering Your Questions

Now that we have outlined preparing the ground for your shed, it’s time to answer some frequently asked questions we get from our customers. If you have additional unanswered questions, you can contact us, or reach out to the company that’s doing your site preparation.

How much gravel do I need for my shed?

On average, you will need between 3 to 4 cubic yards or 5 tons of gravel for your shed foundation. This amount may differ depending on the size of your structure, so if you’re installing a larger garage, you may need more gravel. 

If you’re planning to build your gravel base for your shed yourself, we’ve included a formula that can help you determine how much gravel you’ll need. If a professional is helping you, they’ll be able to tell you how much is needed! 

To calculate how much gravel you’ll need, multiply the shed foundation’s square footage (length x width) by the depth of your gravel in feet. Then divide this number by 27 to get the cubic yards needed. To get this amount in tons, simply multiply your cubic yards by 1.4.

What’s the difference between a gravel vs a concrete shed base?

In most cases, a concrete base is only necessary for a garage or large structure that doesn’t have a pre-built floor. A shed foundation can be gravel or stone. Although a concrete base is a better choice for a larger structure, we recommend using gravel whenever you can. 

Gravel and crushed stone allow for more drainage and prevents moisture from building up underneath your shed. As rain falls from the edge of your structure’s roof, it deflects off the ground and splashes onto the siding of your shed. 

Over time, this causes the doors and lower siding to mold and rot. When you prepare a shed foundation using stone, water and moisture are absorbed into the ground rather than staying on the side of your structure.

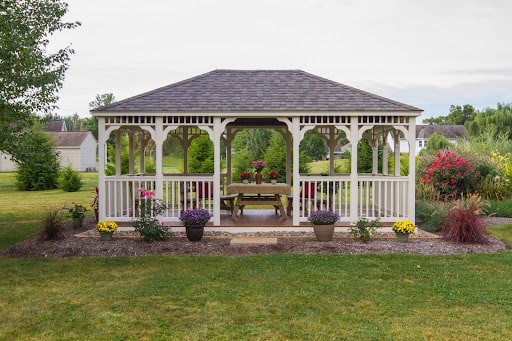
Should a shed base be bigger than the shed?

When deciding how large to make your shed foundation, use the guidelines underneath your specified Penn Dutch design. A shed base should be the exact shape and slightly bigger than the structure. Your base should be at least 12” wider than each side of your shed. 

Access to Your Installation Site

Before delivery and installation day, it’s crucial to examine any potential obstacles that may interfere with a smooth delivery and installation process. If you’re worried about access to your site, we are able to come and do a full site check prior to installation.

The final installation site must be clear of; 

  • Narrow walkways or stairs
  • Fences
  • Shrubs or elaborate landscaping
  • Low-hanging tree branches
  • Power lines
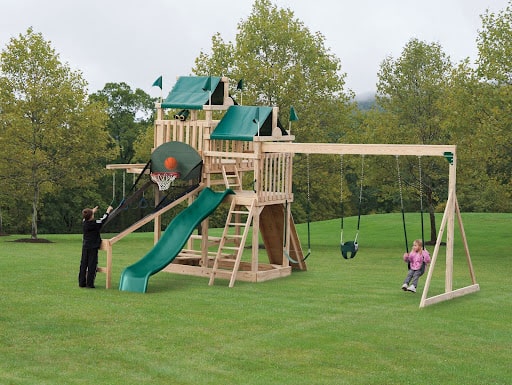
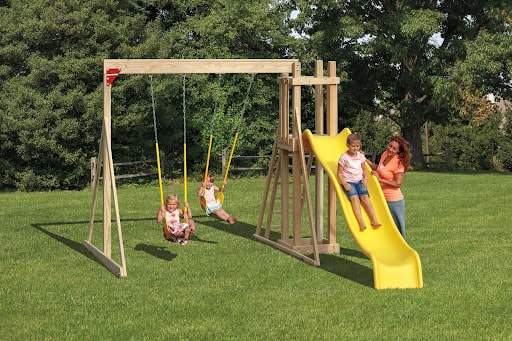
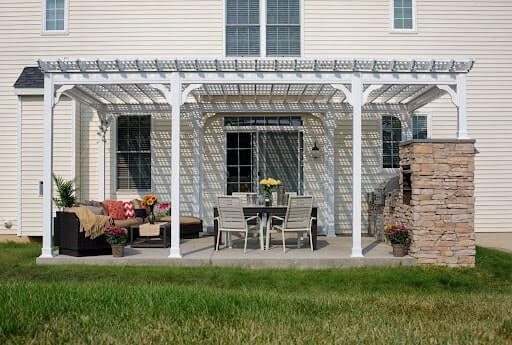
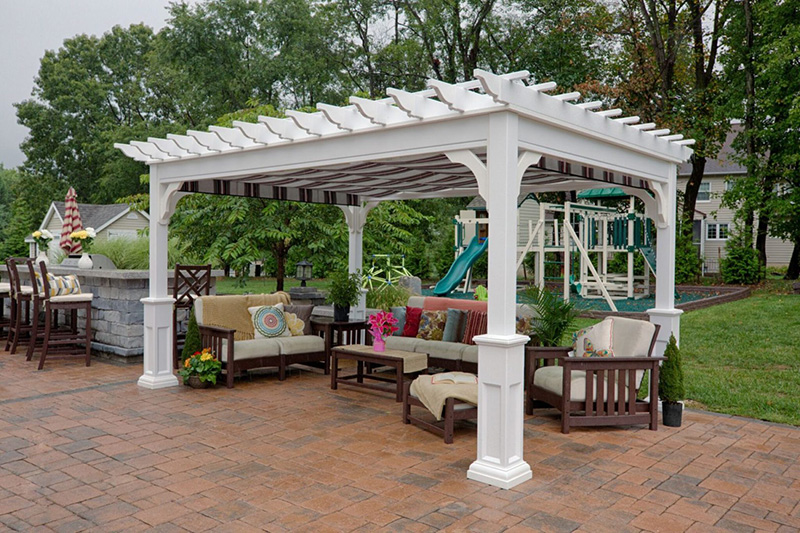
  • Additional structures such as carports, arbors, and swing sets 

In addition to thinking about the size of your structure, you’ll also need to consider the size of the delivery trailer and how it will maneuver through to your installation site. If the route is full of turns and tight bends, you want to plan accordingly before they arrive. 

If your structure is 10′ wide or wider, we will need an additional 2′ width to access the site with the trailer. And this is if the route is relatively straight. To ensure a smooth delivery, it’s best to talk with your dealer about the specific location of installation and how the trailer will move through your landscape.

Delivery FAQs

How are the sheds delivered?

At Penn Dutch, we make certain that your structure is delivered with care and precision so we don’t damage the structure or your property. It is then your responsibility to prepare the site for your shed, so we can make the installation and delivery as smooth and efficient as possible. 

Depending on the size of your shed, it will be delivered assembled or in separate pieces. In order for us to successfully deliver your fully-assembled structure, the access point to your shed foundation must be clear.

Do structures arrive already assembled?

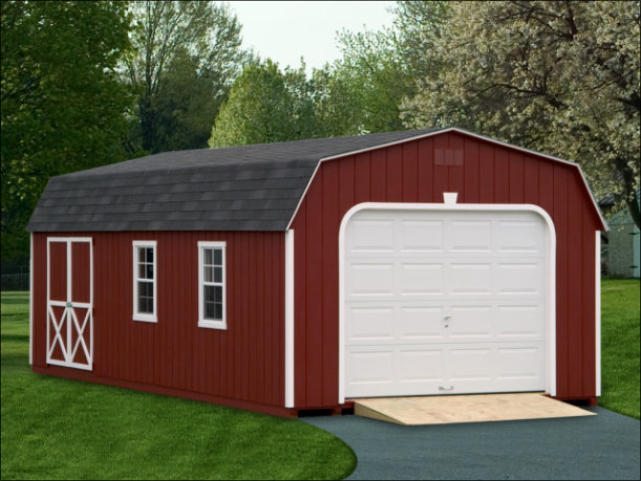
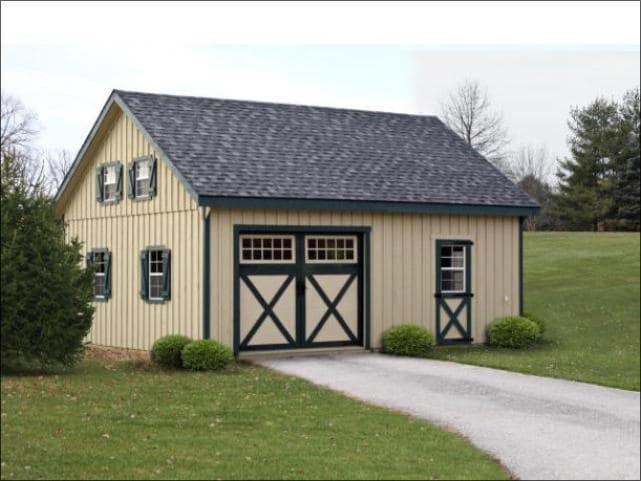
Sheds and other structures up to 14’ by 44’ are delivered already assembled. Sheds that are too tall to transport will require partial assembly at the final site.

What if I have an existing structure that I need to relocate?

When you request relocation of one of your structures, we will ask for photos of the structure so we can bring the proper equipment to relocate it. We will also require the following: 

  • The structure is emptied prior to relocation.
  • There is clear access to where the new structure will be going. 
  • The structure is less than 11’ tall, all other structures we are not able to relocate. 

Have additional questions about your shed’s delivery? Visit our FAQ page.

A large tan detached garage that's sitting on a lifted shed foundation.

A new shed or large structure helps make your landscaping look more organized and polished. Once you prepare the site for your structure, you’re well on your way to getting your dream backyard.

Still have questions about how to successfully prepare your site for a shed? Contact our sales representatives to find your answers.


Still Have Questions?

Contact our sales representatives to find your answers.

Wooden Outdoor Pergola With Hanging Lights Over A Fireplace With Outdoor Furniture
Summer Breeze Round Top Arbor In Cedar

This blog was originally posted on May 18, 2018, and was updated on November 23rd, 2022.

There are many different reasons purchasing a shed can be a long-term investment. Whether it’s a secure storage shed, a classic man cave, or an elegant she-shed, you’ll want to make sure your structure is going to last. One of the main factors to consider when browsing shed options is its siding. 

Comparing wood vs. vinyl siding can seem overwhelming because of their unique advantages and disadvantages. However, after reading this blog, you’ll be able to confidently weigh the differences between wood siding pros and cons and vinyl siding pros and cons.

4 Things to Consider When Comparing Wood Siding vs. Vinyl Siding

The easiest way to compare wood siding vs. vinyl siding is to break down the most important factors. Looking at the overall advantages and disadvantages of each material will give you a clearer picture of what shed siding is better suited for you and your outdoor space. This can be done by considering 4 main elements, which we will discuss below. 

1. Appearance

The appearance of your shed can say a lot about your outdoor space. When choosing which siding is best for you, consider thinking about the aesthetic you wish to incorporate into your backyard theme or design

For example, some homeowners prefer a more authentic, natural look which will drive them to be more attracted to wood siding. Others may want to complement or match the exterior of their home to their shed, which may be easier to do with a vinyl siding shed. 

It’s important to remember that when it comes to the appearance of your structure, there really isn’t a right or wrong answer— it’s completely up to you and your style. 

2. Durability

When buying a new shed, you want to be able to depend on it to last, which is why looking at vinyl siding durability vs. wood siding durability is important. There are two main factors you’ll want to consider when comparing these:

  • Rot resistance
  • Insect resistance

Any type of vinyl siding will be completely rot- and insect-resistant. Certain types of wood such as cypress, cedar, and redwood are naturally rot-resistant and insect-resistant. Engineered or composite wood is also extremely durable since it receives protective finishes in the factory. 

However, it’s important to note that all types of wood, including those mentioned above, will require regular maintenance to remain intact while vinyl siding requires little to no maintenance over the years. 

3. Price

Is wood siding cheaper than vinyl siding? It’s one of the most common questions asked by homeowners looking for a new shed. Unfortunately, the answer may not be as simple as you’d like. Generally speaking, the wood siding shed cost will be significantly less than the vinyl siding shed cost. However, it’s important to consider the costs of your shed in the long run as well as upfront. 

For example, some people may prefer to spend more money on a vinyl siding shed because they are known for their low maintenance and may not require as many repairs or touch-ups in the future. On the other hand, some homeowners would rather spend less on a wood siding shed upfront and choose to put the extra work in so it stays in good condition for years to come. 

4. Life Span

At Penn Dutch Structures, all sheds are built with quality materials that are made to last. However, you will find that wood and vinyl sheds have different lifespans. Even if you’re dedicated to maintaining your siding, the average wood shed will last a minimum of 20 years. On the other hand, vinyl sheds can last much longer, staying in good condition for up to 25+ years. 

Classic a-frame white and black shed

Wood & Vinyl Siding Options

Whether you’re remodeling an old shed or looking for something new, you want to make sure you’re happy with the end result. Because of this, it’s important to take the time to narrow down what you’d like the final product to look like. 

Both wood and vinyl sidings offer a variety of options from board or plank styles to exterior colors. Continue reading to see what kind of choices you have as you decide on your shed siding. 

4 Types of Siding Styles

The most common types of siding styles are available in wood or vinyl options. This means the installation of your siding won’t depend on the type of material you decide on using. Below, we’ve listed the 4 most popular siding styles you can choose from. 

  1. Clapboards

Clapboard siding, also known as bevel siding, comes in long, thin planks that are installed horizontally into the structure’s exterior walls. This style of siding is unique because the boards are created at a slight bevel angle, resulting in planks that are thinner at one end. When the siding is installed, the thicker bottom edge overlaps the thinner upper edge. 

  1. Tongue-and-Groove 

Tongue-and-groove siding features planks that have interlocking or overlapping joints. When the planks are created, they’ll be designed with a tongue along one edge and a groove along the other. 

This design allows the boards to fit securely into one another when they are installed. One of the advantages of this type of siding style is that the planks can be installed horizontally, vertically, or diagonally depending on your preference. 

  1. Board-and-Batten

One of the most traditional siding styles is board-and-batten. This style consists of wide boards and narrow strips (battens). It gets its name from the technique used during installation. 

While the wide boards are nailed vertically to the exterior walls, the battens are used to cover the vertical seams between each board. People prefer this type of siding because there’s no standard size. 

  1. Shingles

Using shingles, or shakes,  as your siding will give your structure a quaint, cottage look. The shingles are installed individually so they overlap each other, resulting in an excellent job of shedding rainwater. The nails will be completely covered, allowing for a clean-cut look. 

A-frame garden shed

Types of Wood Used For Siding

There are many species of wood people can use as siding for their sheds. The price and maintenance needs will vary depending on the type of wood you choose, so make sure you weigh all the wood siding pros and cons before making a final decision. 

  • Cypress
  • Cedar
  • Fir
  • Spruce
  • Pine
  • Redwood
  • Engineered (Composite)

Types of Vinyl Siding 

While vinyl siding is made up of the same material across the board, you still have a chance to customize your choice. When discussing vinyl siding pros and cons, you’ll come to realize a big perk is that you have a variety of color options to mix and match. 

  • White
  • Sage
  • Pewter
  • Gray
  • Cream
  • Clay
  • Blue
  • Birchwood
  • Almond
  • Aspen
  • Camel
  • Mountain Berry
  • Sandalwood
White
Sage
Pewter
Gray
Cream
Clay
Blue
Birchwood
Almond
Aspen
Aspen
Camel
Camel
Mountain Berry
Mountain Berry
Sandalwood
Sandalwood


Build Your Dream Shed

Now that you have an idea of what type of shed you want for your backyard space, take a look at the shed styles and sizes we offer today.

Backyard carriage style shed
Backyard Carriage Style Shed

This blog was originally published on May 1, 2018. It was updated on Nov. 1, 2022.

Nothing makes a child smile bigger than a brand new backyard playhouse. It’s a great investment for parents or grandparents who have little ones running around, but what do you do when they have no more use for it? Just because your kids may have outgrown their playhouse, doesn’t mean you have to. 

Instead of letting it go to waste, why not turn your playhouse into a shed that you can use for years to come? In this blog, we’ll provide you with creative ideas you can use when you decide to turn your playhouse into a shed, plus some simple steps that will help you get started. 

Skip Ahead:

How to Repurpose Your Playhouse In 5 Steps

Playhouse Conversion Ideas

How to Repurpose Your Playhouse in 5 Steps

Before you begin to turn your playhouse into a shed, you’ll need to take care of a few logistics. Below, we’ve listed some of the recommendations we have for homeowners who want to get the most out of their repurposed playhouse. 

1. Repair Any Structural Issues

Most likely, your old playhouse has been through years of wear and tear. Because of this, you’ll want to make sure you take care of any damages that could cause problems in the future. 

We recommend you take some time to examine the exterior and interior of your playhouse and make note of any repairs that need to be tackled. If you’re not sure what to look for begin by checking the following things:

  • Roof– Make sure the roof doesn’t have any leaks that could result in interior damage or rot. 
  • Windows– If there are windows, make sure they aren’t broken or cracked. 
  • Floors– Check the floor for cracks, splinters, loose pieces, or rot damage.

Turning your playhouse into a shed will only be a successful project if it’s durable and dependable. Think of your repairs as investments. Take your time with them so they’ll hold up in the coming years. 

2. Install Thermal Insulation

This step may or may not be necessary, depending on what you plan to do with your repurposed playhouse. However, adding thermal insulation allows you to be comfortable all year round, and creates a space to spend time and work rather than a simple dumping area for old equipment. 

Thermal insulation will keep your shed cool in the summer and warm in the winter, making it a great place to work on projects no matter what the temperature is outside. It’s also an eco-friendly way to be more energy efficient and save you money in the long run. 

If you do choose to install thermal insulation, you’ll want to consider adding weatherstrip adhesive to your door or windows. This will make sure there are no leaks or drafts coming from outside. 

3. Install Electricity

Similar to adding insulation, installing electricity isn’t absolutely necessary, but if you plan on getting a lot of use out of your shed, you may want to consider it. Electricity will allow you to install proper lighting, heating, and electrical sockets. This can become very beneficial if you want the space for projects. 

Once you have electricity, you can decide what type of lighting is best suited for your space. When you’re choosing your lights, you’ll want to consider a few factors such as

  • Energy efficiency– What’s the most efficient and cheapest way to light your space?
  • Brightness– How many lumens does your light have? 
  • Usage life– How long will your light last?
  • Color and temperature– Do you want a “warmer” or “cooler” appearance?
  • Wattage– What amount of electricity will be used?
  • Installation– How will you install your lights?

Keep in mind that if you’re not trained in this area, you will most likely need a professional electrician to help you with this step. 

4. Add a New Coat of Paint

It may seem simple, but a fresh coat of paint can make all the difference. When you renovate your old playhouse you should put a piece of your personality into it. This is your chance to get creative. 

Look at some popular shed colors and decide what style you want. If you’re not sure where to begin check out some of the color schemes we’ve listed below.

Once you choose your color scheme, make sure you follow the proper guidelines when painting an outdoor structure like a playhouse or shed. Doing this will ensure that the paint continues to look fresh over time.

5. Add Shelves For Storage

The most common way to create more storage space anywhere is to install extra shelving. Adding shelves greatly increases your storage capacity, and with the proper instructions, you can do it by yourself. 

As you begin your renovation process, inspect the playhouse interior walls. Doing this will allow you to map out the most practical place to add shelves. Before installing anything, ask yourself a few basic questions:

  • How high do you want the top shelf?
  • How wide will each shelf be?
  • How much space do you need between each shelf?

The way you measure and mark the walls of your playhouse will heavily depend on the type of shelves you want to install. Make sure you have a plan before you begin making any significant changes. 

Also, it’s good to know that if you don’t have time to build your own shelves, or you’re not a DIY kind of person, there are great storage shelves available in all sizes and styles.

Red and white shed with porch.

Playhouse Conversion Ideas

Before you begin to turn your playhouse into a shed, you should have a clear idea of what you want to use the space for. Whether you’re looking to create a space for gardening projects or somewhere to kick back and relax, we have a few unique ideas that are guaranteed to add value to your backyard

The Man Cave

The concept of a man cave isn’t new, but that doesn’t mean it’s any less appealing. This is a great idea for men who need a place to watch sports, work out, or have a guy’s night. Consider adding a minibar, some classic games, and of course, a comfy seating area where you can put your feet up for a few hours. 

The She Shed

This idea is exactly what it sounds like. The she shed is a trend that popped up a few years back, and it’s still going strong. Known as the man cave for women, this is a space where you can focus on yourself. Whether it’s an art studio, yoga studio,  or a place to cozy up with a good book, this space is designed to make you feel comfortable and relaxed. 

The Gardener’s Workshop

If you want to stick to the classic garden shed, that’s okay too. Create a new and improved area where you can work on outdoor projects. You deserve a natural and stylish place to focus on your plants, flowers, and other backyard chores. If you have a themed backyard, consider styling your new shed to complement whatever design you already have.


Interested In Purchasing A New Shed?

Check out our selection of Amish-built shed styles that come in various sizes to fit into any yard.

Elite a-frame gray shed.
Elite A-Frame Shed

For years, outdoor weddings have been trending because of their cost efficiency and natural beauty. Incorporating a backyard wedding gazebo into your plans has become key to a successful celebration. 

In this blog, we’ll review everything you need to know before installing a backyard wedding gazebo, as well as some gazebo wedding decor ideas you can use for inspiration.

Skip Ahead:


Wedding Gazebo Styles

Before you begin thinking about outdoor gazebo wedding decorations, you need to decide what type of gazebo fits your occasion. Below, we’ve outlined some factors that you should consider when researching wedding gazebo styles. 

Shapes

The first thing you need to decide on is your gazebo shape. Typically you can pick from:

  • Oval
  • Octagon
  • Rectangle
  • Dodecagon

When debating which shape would work best for your wedding celebration, consider the size of your backyard as well as where you’re planning on putting your gazebo. Specific shapes will likely fit into your space better than others. 

Roof Styles

The next factor to consider is your roof style. Your options usually include:

  • Pinnacle
  • Standard
  • Pagoda Roof w/ Cupola
  • Cupola
  • Bell Style

As you think about your gazebo roof style, try to envision which will fit the overall aesthetic of your wedding. In a more traditional style wedding, a pagoda roof with a cupola is a classic and elegant choice.

Also, keep in mind that you can add a permanent roof decoration to any styled roof. This includes cupolas, finials, and/or weathervanes.

Shingles

After determining your roof style, next, it’s time to pick shingle colors. Options you’ll see include:

  • Weatherwood 
  • Harvard Slate 
  • Charcoal Gray 
  • Dual Brown
  • Dual Gray
  • Dual Black
  • Driftwood
  • Earthtone Cedar
  • Aged Redwood
  • Cedar Wood (wood only)

When picking a shingle type for your backyard wedding gazebo, think about the color scheme you’ve chosen for your wedding as well as the season. You may want a lighter color for a Spring or Summer wedding and a darker color for a Fall wedding

Railing Styles

Similar to your roof style, your railings should correspond with your wedding theme. Consider railing styles you like such as: 

  • Baroque 
  • Colonial 
  • Dutch 
  • New England 

You want to make sure your railing style fits your roof style. For example, Dutch railings offer a minimalist and natural look whereas colonial and New England railings offer more detail and provide an extravagant look. 

Post Styles

The post style of your gazebo usually goes hand-in-hand with the railing style. There are only two options you can choose from:

  • Standard 
  • Turned 

Generally, people who choose a Dutch-style railing will go with a standard post, sticking to the simple style. Conversely, if you decided on a more detailed railing, you may want to consider choosing the turned post. 

Brace Styles

While often overlooked, the braces of your gazebo can do a lot to add to the overall style. You can choose from a variety of options such as: 

  • Dutch 
  • Colonial 
  • Victorian 
  • Standard

Just as you want to be consistent with your railings and posts, your braces should also be cohesive with your gazebo style. For example, Dutch railings and standard posts look best with Dutch or standard braces, and so on. 

Modern wood gazebo

Wood Gazebos

After you’ve decided on your wedding gazebo style, it’s time to decide whether you want a wood or vinyl gazebo. Depending on which material you choose, you’ll have different options for things such as color/paint, decking/flooring, or in some cases roofing. 

Below, we’ve outlined the custom elements you can choose from if you decide on a wood gazebo. 

Paint & Stain 

One of the perks of a wood gazebo is the natural and authentic look it will add to your wedding decor. Dealing with wood means you can go the route of paint or stain. Some of the most common paint/stain options are as follows: 

  • Almond Paint
  • White Paint
  • Canyon Brown Stain
  • Cedar Stain
  • Golden Oak
  • Cinder Stain
  • Mahogany Stain
  • Sepia Brown
  • Mushroom
  • Sky Gray

When choosing a paint or stain for your backyard wedding gazebo, you can draw inspiration from your wedding theme. A more rustic-styled wedding may call for a darker stain while a white or lighter color may be more appropriate for a formal wedding. 

Decking 

The options for wood gazebo decking usually consist of composite or cellular PVC. There are a variety of color options available for whichever decking material you decide to use: 

  • Brown Composite
  • Cedar Composite
  • Chestnut Composite
  • Sand Cellular PVC
  • Stone Cellular PVC

The main difference between composite and PVC comes down to appearance. If you’re looking for a more authentic wooden appearance your best bet would be to choose a composite deck since PVC can tend to look more enhanced. 

Metal Roof (Standing Seam or Ribbed) 

Another option you have if you choose a wood gazebo is to opt for metal roofing instead of shingles. This type comes either ribbed or standing seam and in an assortment of colors such as: 

  • Red
  • Bronze
  • Slate Blue
  • Evergreen
  • Black
  • Charcoal

There are some advantages to using a metal roof vs. shingles, such as durability and maintenance. Metal roofing also has a very distinct appearance, and depending on your theme, it may be more suitable. However, it is important to note that in some cases metal roofing can be more costly. 

Traditional white gazebo

Vinyl Gazebos

Just as there are certain elements you can customize for wood gazebos, the same can be said for vinyl gazebos. While wood gazebos can offer a natural and authentic look, vinyl gazebos are praised for their crisp, modern, and polished appearance.

Below, we’ve listed some of the unique features you can choose from when purchasing a vinyl gazebo.

Color Options

While the color options for vinyl gazebos are abundant, the most common choices include: 

  • White
  • Almond

These colors both offer a bright and beautiful look to any type of wedding decor. You may be worried about the light colors becoming dirty, but one of the advantages of vinyl gazebos is that they require very little maintenance and they’re easy to clean

Flooring

The flooring for vinyl gazebos also offers a variety of color options. These colors range from natural browns and grays to darker caramels and tans. Some of the common options are: 

  • Brown
  • Gray
  • Cedar
  • Redwood
  • Caramel
  • Tan
  • Amberwood
  • Slate
  • Cypress
  • Rosewood
  • Walnut

Your choice of flooring for your vinyl gazebo depends solely on what you prefer appearance-wise. Consider your wedding color scheme and decide which flooring color fits with the overall theme best. 

Wedding Gazebo Decor

Once you’ve chosen the gazebo for your wedding, it’s time to focus on the decorations. Outdoor weddings offer you unique options for decorating, especially if you have a gazebo to work around. Below, we’ve shared a few of our favorite wedding decor ideas you can use with your new gazebo.

Classic white gazebo

Wedding Gazebo Draping

One of the most popular techniques for outdoor gazebo wedding decorations is using drapes or curtains. Adding delicate fabrics from the top of your gazebo will give your wedding a whimsical and elegant look. 

You can tie your curtains back with ribbon or let them flow free Either way, you’re incorporating a simple, yet beautiful addition to your wedding decor. The best types of fabric to use for wedding gazebo draping are tulle, cotton, or linen. 

Wedding Gazebo Flowers

It’s not a wedding without flowers. Having your wedding outdoors means you can take advantage of the natural greenery and flowers surrounding your space, but you also have the opportunity to add more if you’re using a gazebo. 

Hanging flowers or vines can be gorgeous additions to your gazebo posts or railings. You can also position potted plants or planters around your gazebo’s perimeter if you have a certain flower arrangement you desire. 

Wedding Gazebo Lighting

Whether your wedding is taking place during the day or as the sun goes down, adding delicate lights can do wonders for the aesthetic. Hanging string lights around your gazebo is an easy task that will bring your decor to a new level. 

If you’re looking to create a luxurious style outdoors, consider installing a hanging chandelier as a focal point in your backyard wedding gazebo.

No matter what type or style of gazebo you choose for your wedding celebration, there’s no doubt it will bring your decor to the next level. Plus, you can continue to enjoy the benefits of your gazebo even after the wedding is over. 


Build Your Dream Gazebo

Interested in purchasing a custom-built gazebo? Check out our custom gazebo builder tool to start designing your dream event gazebo today.

16′ Octagon, Country Style Tan Vinyl Gazebo With Black Shingled Pagoda Roof In A Backyard Garden
Country Style Vinyl Gazebo

Having a traditional wood swing set brings a timeless charm, and fun, to any outdoor space, but how do you know which one is right for you? Choosing the right type of wood for your swing set can be overwhelming. 

In this blog, we’ll help you decide what is the best wood for an outside swing set and what factors you should consider. 

Skip Ahead:

4 Things to Look for When Choosing Wood Playground Lumber

When deciding what is the best wood for an outdoor swing set, there are multiple factors you should consider. Buying a swing set is a great way to elevate your backyard and encourage your kids to spend more time outdoors

However, you want to make sure the swing set you’re purchasing is the right fit for your family and outdoor space. Below, we’ve covered the 4 main factors you should think about before making any final decisions. 

1. Rot-Resistance

Redwood

Redwood trees are known for their naturally occurring complex astringent chemicals called tannins. They are concentrated mostly in the tree’s bark, protecting the living plant, and in the heartwood, the dead core of the tree. Tannins protect the tree from wood rot caused by fungi and insects. 

Today, most trees harvested are “second growth” which means they have a high percentage of sapwood. Sapwood is the living ring between the core and the bark of the tree, it transports water from the roots to the leaves. 

This means that while redwood swing sets are rot-resistant, you may find that some of the available lumber from these trees isn’t as resistant as you think. When purchasing it, you can specify that you want heartwood but it may be more costly. 

Another important thing to know is that redwood swing sets shouldn’t be in direct contact with the ground because it can cause them to degrade and rot. 

Cedar Wood

Similar to redwood, cedar wood also has tannins that protect it from wood rot. However, it should be noted that cedar wood doesn’t have as many tannins as redwood which means it won’t hold up as well over time. 

Cedar wood is even more so harvested from smaller “second growth” trees which have a high percentage of sapwood. It should be noted that cedar wood swing sets shouldn’t be placed in direct contact with the ground, like redwood. Doing this may cause the wood to rot and degrade sooner, especially because it doesn’t contain as many tannins. 

Pressure-Treated Pine Wood

In many cases, pressure-treated pine wood is known as the most rot-resistant wood. Pressure-treated pine is chemically treated to resist rot. The boards go through a process where they’re placed in pressurized tanks. In these tanks, preserving chemicals are forced into the wood’s fibers.

Pressure-treated lumber typically comes in two grades: above-ground and ground contact. The main difference between the grades is that ground contact lumber retains more chemical treatment, making it able to be placed in direct contact with the ground. 

If you do choose above-ground grade lumber for your pressure-treated pine wood swing set, you shouldn’t place it in direct contact with the ground, similar to redwood and cedar wood. 

Note: To avoid placing your swing set directly on the ground, consider using alternative materials such as artificial grass, sand, wood chips, or rubber mulch

2. Insect-Resistance

Redwood & Cedar Wood

When it comes to insect-resistant wood, redwood and cedar wood swing sets have the same properties and characteristics. 

While the tannins in these types work to naturally repel termites, they can still eat through the wood, and even the heartwood, if they have no other alternatives. This is rare but should be taken into consideration. 

Carpenter bees and carpenter ants can pose an issue because they aren’t deterred by tannins and don’t eat the wood they nest in. Since redwood and cedar wood are both softer woods, it makes it easier for these insects to dig into the wood and build tunnels or nests. 

Pressure-Treated Pine Wood

Pressure-treated pine works very well to repel termites because the chemicals used to treat the wood are deadly to them if ingested. Similar to redwood and cedar wood, pressure-treated pine wood swing sets do not deter carpenter ants and bees. 
While pressure-treated wood doesn’t have tannins, the chemicals in the treated wood don’t kill the insects either because they don’t eat the wood they nest in.

Custom outdoor wood swing set

3. Appearance

Redwood

People tend to be attracted to redwood because of its unique color. If you’re purchasing heartwood, you’ll typically be choosing colors ranging from pinkish-brown to a deeper reddish-brown. If you opt for the sapwood you’ll be choosing colors that range from pale white to yellow. 

However, it’s important to remember that whether you choose heartwood or sapwood, some maintenance is required to keep your redwood swing set’s color. Without the proper upkeep, it will likely turn to a silverish-gray. 

Cedar Wood

Cedar wood is also known for its range in color. Certain cedar wood swing sets have a deep reddish-brown color, similar to redwood. However, you’ll find that most cedar wood options have a yellowish tone. 

If you plan to paint or stain your swing set, choosing a lighter yellow shade of wood is your best option. Keep in mind, just like redwood, cedar wood swing sets will lose their color if not taken care of properly.

Pressure-Treated Pine Wood

Pressure-treated pine may not be as popular for its color, compared to redwood and cedar wood, but it’s still appealing to many homeowners. The heartwood options are light brown while sapwoods range from yellow to off-white. 

One thing to remember is that the process of pressure-treated pine leaves the wood wet, making it difficult to paint. If you decide you want to paint your pressure-treated pine wood swing set, you’ll need to ensure it dries completely before doing so.

4. Maintenance & Upkeep

Swing set maintenance is important, not only for your structure’s appearance but also to ensure anyone using it is safe. If you’ve ever had to restore your outdoor furniture, you’ll find that swing set upkeep is very similar. 

When cleaning and/or removing mildew, you can use a stiff-bristled brush. If you’re only cleaning your swing set, feel free to use soap and warm water. However, if there’s stubborn mildew you may want to consider using a stronger cleaning solution. 

After some time, you may want to restore the swing set’s color. For redwood swing sets,  you can clean the set (using the instructions above) and then apply a solution consisting of 4 ounces of oxalic acid crystals and warm water. Once the wood is dried thoroughly, rinse the solution with warm water. 

If you have a cedar wood swing set, the process is fairly similar. However, instead of using the solution mentioned above, you can use a heavy-duty cleaner/stripper to remove any stains or discolored spots. Again, after the wood is dried thoroughly, rinse the solution off with warm water. 

Restoring color to pressure-treated pine wood swing sets is even simpler. Instead of using a cleaner/stripper or homemade solution, you can use liquid dishwashing soap. Apply the soap and water to the wood and let it sit for 15 minutes before rinsing it off. 

It’s also recommended that you use wood sealers on your swing sets annually. When you’re doing this, you should also check for any wood rot, cracks, or splinters. Rot will be most common where the swing set meets the ground. 

Traditional outdoor wood swing set

When deciding what is the best wood for an outdoor swing set, it’s important you take into account your personal preferences. Each type of swing set wood has its advantages and disadvantages, it comes down to what you believe would be the best investment for your home. 


Find Your Perfect Wood Swing Set

Don’t wait to bring your backyard to life. Check out the variety of high-quality wood swing sets we have to offer today.

Challenger 22'x19' Playset (AKA 5x5 Challenger) with 5x5 Tower, Step Ladder, Hand Rail, 5x5 Sandbox, Wood Roof, Green Poly Slats, Captain’s Wheel, Rock Wall, 7’ Tornado Tube Slide, 10’ Wonder Wave Slide, 4-Position 8’ high Swing Beam, Two Belt Swings, Trapeze, Plastic Glider, & (6) Anchors
Challenger Wooden Swing Set

Pergolas are great additions if you’re looking to add shade to your backyard, but they have other great uses too. Outdoor kitchens have become increasingly popular, and as a result, people are finding that using pergolas can make their kitchen designs even better. 

In this blog, we’ll share tips to consider when building your outdoor kitchen pergola as well as some design ideas that you can use for inspiration.

Skip Ahead:

6 Pergola Outdoor Kitchen Design Tips

Creating a pergola kitchen can greatly increase your home’s curb appeal and upgrade your resale value. Knowing the right things to look out for before and during your design process will ensure your project goes smoothly and guarantees you end up with the space you deserve. 

Below, we’ve provided some helpful tips you can keep in mind when planning your outdoor kitchen designs with pergolas. 

1. Research Outdoor Kitchen Pergola Types

Outdoor kitchens are becoming more popular, but before you decide on how you want your outdoor kitchen pergola to look, you need to do some research. You want your space to be aesthetically pleasing, but also functional. 

In order to create the ideal outdoor cooking environment for your home, you’ll want to consider a few key elements such as your lifestyle, budget, and space. Try asking yourself, do you want a fully functional kitchen or a simple setup for occasional use? 

Once you determine what type of pergola kitchen space you want and/or need, you’ll be able to decide which amenities are essential and if your budget and style allow you to add some extra elements. Your setup can be as luxurious or simple as you’d like, it all depends on what you want to get out of it. 

2. Evaluate Your Space

Space is a very big determining factor in your pergola kitchen design. You have to be realistic and strategic when you’re planning your layout. You’ll want to measure the entire space you plan to build your outdoor kitchen. 

Knowing rough measurements will help you prioritize which accessories you need and which ones you can do without. If you live in a smaller area, you may want to consider attaching your pergola to your house. This will open up the area and ensure you aren’t wasting any space. 

3. Consider Portable & Permanent Options

Oftentimes, if you’re planning on building an outdoor kitchen under a pergola, you’re expecting it to be a permanent piece of your home. However, if you’re renting your home, you can still take advantage of creating a great outdoor dining experience.

There’s a variety of portable and permanent options available for outdoor kitchen pergolas. For example, if you don’t plan on moving anytime soon, you can build permanent counters, barbeque islands, or ovens. If you want something less permanent, try pairing a standalone grill with a portable cart that acts as a counter, or use a barbeque island that rolls.

Wood pergola with outdoor seating and fire pit.

4. Determine Your Cooking Style

Since your pergola kitchen is most likely the second cooking space you’ll have, you get to choose what your preferred cooking style will be. Do you prefer grilling fish or burgers? Maybe you would enjoy having a brick oven to cook pizzas. You might even want a tandoor oven or outdoor smoker

No matter what your preferences are, you want to make sure your design can accommodate your desires. Outdoor grills can range from gas, propane, electric, or even charcoal. You’ll also want to consider how you’ll be preparing your meals. 

Do you plan to prep indoors or outside? If you’re planning on doing everything outside, you’ll probably want to install a sink and proper counter space. Think about some of your favorite outdoor meals and ensure your space allows you enough room to cook, serve, and entertain your friends and family. 

5. Think About Your Environment

When designing your outdoor kitchen pergola, you need to be aware of where you’re located. If you’re somewhere that’s warm most of the year, creating a larger pergola kitchen and dining area is more appropriate. 

Living somewhere that gets cold in the winter months doesn’t mean you shouldn’t build an outdoor kitchen, it just means you need to be smart about your design. If you don’t plan on using your outdoor kitchen year-round, you may want to settle for a smaller area. You’ll also want to consider where you choose to place your pergola kitchen. Avoid areas that are too windy, hot, or cold. 

6. Commit to the Upkeep

As mentioned above, knowing your environment is important, not just for your design but also so you can be prepared for the maintenance involved. Outdoor kitchen pergolas are great additions to your home, but they do require upkeep. 

Before you build your pergola kitchen, you need to be committed to the work required to keep it looking good. This means taking the proper steps for protecting your outdoor furniture during the Winter and then preparing your patio space for the Spring

You’ll need to do some research depending on what materials you choose to use. Keeping up with any repairs will ensure your space continues to look new and ready for any guests you wish to entertain throughout the year. 

Custom wood pergola over outdoor kitchen.

Pergola Outdoor Kitchen Designs Ideas

Once you have done the necessary research and planning for your outdoor kitchen pergola, it’s time to start designing your space. Choosing the correct materials for your design depends on the maintenance required as well as your personal taste. 

Below, we’ve outlined three popular designs of pergola kitchens and shared the different materials you can use to complete your dream outdoor kitchen space.

Contemporary 

If you’re going for a contemporary or minimalist kitchen design, you’ll want to consider using slate or cast-concrete tiles for your flooring options. These tiles are great choices for an outdoor kitchen because they’re made to withstand natural elements and they present a modern, sleek look. 

Concrete, stainless steel, or granite are the perfect choice for contemporary styled outdoor kitchen countertops. These materials are stylish and all three are durable and effective, however certain surfaces, such as concrete, may require more upkeep than others, like granite.

Using a vinyl pergola may be the best option for you when creating a contemporary look. Vinyl pergolas don’t require much maintenance, and they allow you the options of different colors and styles. 

Tuscan

To create a Tuscan or Mediterranean-style outdoor kitchen, you should try using tumbled pavers, unhoned travertine, or stone-textured stamped concrete for your floors. These materials will give you the look of a Tuscan patio while still being highly durable and requiring little maintenance. 

Tile, quartz, or wood are all materials that fit into a beautiful rustic aesthetic for your countertops. Using tile provides you the opportunity to incorporate different patterns for a more eclectic look, while wood and quartz guarantee a clean, natural appearance. 

When creating a Tuscan-style outdoor kitchen consider purchasing a wood pergola. These can come in a variety of stains and finishes. Using wood will allow you to keep the natural and rustic aesthetic you’re trying to achieve. 

If you still do not know what pergola material is best for you, read our guide on how to choose between vinyl and wood pergolas.

Traditional

Choosing a traditional, old-English design means embracing darker flagstones or brick for your flooring. You could also consider using exposed aggregate concrete or cobblestone-stamped concrete. These materials are highly functional and are guaranteed to bring some timeless charm to your outdoor space. 

Porcelain, stone, or marble will provide your outdoor space with elegant and classy countertops. These materials work well outdoors because they’re known for their durability and can withstand most weather conditions year-round. 

Traditional spaces give you the opportunity to use either wood or vinyl pergolas. Depending on your personal style, you can determine which pergola material better suits you and your home. 

White vinyl pergola with an outdoor kitchen.

The important thing to remember is that no matter how you choose to style or design your outdoor kitchen pergola, there’s no doubt the addition will benefit you and boost your home’s curb appeal. 


Create Your Dream Space

Interested in installing a pergola in your backyard? Discover the variety of pergola styles we offer and begin creating your dream space today.

12’ x 17’ Wooden Hearthside Amish Pergola With Superior Posts, Canyon Brown Stain With Fireplace, Overhead Lights
Heartside Amish Pergola

Contemporary barn living is becoming the next big thing, and we can see why. Converting a barn into a house isn’t only a trendy and creative way to add value to your home, but it can also be beneficial to your lifestyle. 

Whether you have an old barn that’s taking up space, or you’re interested in purchasing a new barn for your backyard, these barn remodel ideas are guaranteed to get you excited. In this blog, we’ll review what converted barn homes are and what you need to know to create one for yourself and your family.

Skip Ahead:

What Are Converted Barn Homes?

Converting a barn into a house is a trend that continues to grow. Known commonly as “barndominiums”, people have been attracted to renovating a barn to create a residential space to live in. Whether it’s used as a guesthouse, pool house, or even your primary residence, there are many benefits of turning a barn into a house

Once you rid a barn of equipment and other supplies, you’re left with a spacious structure that offers a lot of design potential. While it may be a fairly big undertaking, many people are raving about their converted barn homes, making the projects become more and more popular in a variety of locations. 

How to Convert a Barn into a Home in 5 Steps

Learning how to convert a barn into a residential space can seem daunting, which is why we’re here to help. Below, we’ve outlined a guide you can use to get your barn remodel project started in just 5 steps.

1. Determine Your Budget

Before you begin looking into any barn renovation ideas, you should determine your overall project budget. Setting a budget will help you stay in control of your costs and help you create a realistic vision of your final project. 

You can start creating a budget by listing all the costs that will be related to your project. These will include any necessary repairs, installations, design elements, and any costs that may be specific to your structure or location. 

On average, the cost of converting a barn into a home is about $10 – $50 per square foot. Some of the costs you can expect to incur include:

  • New foundation: $4,000 – $12,000
  • Insulation/weatherproofing: $900 – $2,000
  • New roof: $5,000 – $10,000
  • Fumigation: $10 – $20 per linear foot
  • New doors/windows: $2,500 – $7,500
  • New HVAC system: $5,000 – $10,000
  • Structural engineering, plans, and permits: These costs will vary depending on the location

These prices will obviously vary depending on details like the size and current state of your barn, as well as your personal taste. Remember to be as realistic about your budget as possible, that way you won’t run into any surprises along the way, ending up with a project that costs more than you expected

Traditional red and white barn home

2. Choose Your Style

Once you’ve decided on your project budget you can start planning the fun stuff. You want your converted barn home to be a place you can enjoy so it’s important you choose a style that resonates with your personality and is aesthetically pleasing to you. 

One of the reasons people are attracted to converting barns into a house is because they offer a unique design, that being said, it’s imperative that you keep your specific style and vision in mind before and during the construction period. 

There are many different styles you can browse for inspiration while deciding what you want your barn to look like in the end. Some of these could include: 

When choosing your barn style, you also want to consider the type of barn you’re going to be working with. Based on popularity, you’ll usually see A-frame barns, Dutch barns, and pole barns converted into homes. Knowing the type of barn will help narrow down which style works best for you and the structure. 

A-frame custom barn home

3. Research Your Area’s Building Regulations

Depending on where you live, you’ll need to research the building regulations that are required when converting a barn into a house. As you do this, you should make sure to look into your local zoning regulations as well as property lines. You may also want to check with your local zoning and planning department to ensure you won’t run into any issues after you begin your project. 

4. Hire the Professionals 

Unlike building a horse barn, converting a barn into a house requires a lot of additional complex tasks. Hiring professionals like contractors, plumbers, electricians, and engineers can give you peace of mind that the complicated and difficult tasks are being handled properly. 

Below, we’ve listed some of the tasks that you’ll need to complete in order to properly turn your barn into a residential home. 

  • Pour a foundation: Most barns have dirt floors so you’ll need to create a more durable foundation. To do this, you’ll need to raise the barn a few inches off the ground and pour a cement foundation underneath. This process can be complicated and difficult, so you will most likely need to get a professional’s help.
  • Rebuild the frame: If you’re renovating a barn that’s been around for a while, the frame may need to be strengthened, or in some cases completely rebuilt. Similar to the barn’s foundation, this process is strenuous and complex. It’s best to get the help of a professional to oversee the project.
  • Reroof: Updating your barn’s roof may be necessary to ensure it withstands inclement weather as well as maintaining the proper temperature inside. You’ll want to look into your roofing options. We recommend using architectural shingles because of their high-quality performance and durability. 
  • Install plumbing/electricity/HVAC: Turning a barn into a house requires you to add elements that wouldn’t have originally been installed. You’ll want to make sure your barn is climate-controlled, has plumbing, and offers a number of electrical outlets for you to use. Any pipes, wires, and heating and cooling systems should be installed within the walls before the walls are insulated or closed off. 
  • Insulate: In order to remain comfortable inside your converted barn, you’ll need to insulate your walls. Doing this will allow you to control the temperature and make sure that it doesn’t get too cold or hot when the weather changes. There are numerous insulation options available for you to choose from based on your specific needs. 
  • Interior finish work: Keeping your chosen style in mind, you’ll need to finish off any interior work you have planned. This work will include things like flooring, ceiling, walls, counters, cabinets, lighting, and more. You’ll most likely need the assistance of a professional for this part as well. 

Hiring professionals will ensure your converted barn home is safe and can be comfortably used as a residential space. While it may seem costly, hiring these professionals will most likely save you time and money in the future. 

Modern converted barn home

5. Design Your Space

Once all of the technicalities are taken care of, you can move on to the fun part of converting a barn into a house. Depending on the purpose of your space, you can add specific furniture, accessories, and more. The barn remodel ideas you can use for inspiration are endless but don’t forget to put in your own personal touches. 

Black and white remodeled barn home

Remember, you don’t need to originally own a barn to enjoy contemporary barn living. While many converted barns are older structures that people decide to renovate, there is also the option of purchasing a new barn and then beginning your remodeling process. 

If you’re looking to speed up the remodeling process, you’ll want to consider this. Purchasing a new barn will allow you to skip the steps an older barn requires such as repairs and checking the durability of an older structure. Ready to bring your barn living dream to life? Check out our elite backyard barn styles today to find a structure that completes your vision.


Start From Scratch With A New Barn

If you’re looking to speed up the remodeling process, you’ll want to consider this. Purchasing a new barn will allow you to skip the steps an older barn requires such as repairs and checking the durability of an older structure. Ready to bring your barn living dream to life? Check out our elite backyard barn styles today to find a structure that completes your vision.

Two Story Red Wood Elite Dutch Big Barn With White Single Car Garage
Two Story Elite Dutch Big Barn

Shed renovations are becoming more popular for homeowners because of the many benefits they offer to your outdoor space. Not only do shed upgrades boost your curb appeal, but they give you more space to use without undergoing a huge and costly home remodel. In this blog, we’ll review how you can begin your backyard shed remodel in three simple steps

Skip Ahead:

1. Plan Ahead

In order for your shed renovation to run smoothly, you should make sure you have a plan in place. People choose to remodel their sheds for numerous reasons. You may be looking for a more suitable storage area or a new place to unwind. 

No matter what you decide, you’ll need to do some research to ensure you’re getting everything you want. Try asking yourself some basic questions to help you decide what your end goal is:

  • What’s your remodeling budget?
  • What things do you like that you want to keep?
  • What things do you dislike that you want to get rid of?
  • What will be your main use for this shed?
  • Will you be doing this yourself or getting outside help?

Once you have answers to these questions you’ll be able to begin making a more detailed plan for your shed upgrades. You may want to have a specific design or layout for the shed or a list of products you’ll need to pull it all together. 

Make sure you’re being realistic about your project. It’s important to have a grasp on how big or small the remodeling will be, that way you won’t run into any surprises along the way.

Backyard carriage style shed

2. Clean & Organize

The next step in your shed renovation project is to clean your space and keep things organized. You can’t begin redoing a shed if it’s dirty or cluttered. 

The first thing you should do is remove all of your belongings from the shed and take inventory. We often forget about items we have stored away so if you find certain belongings that have no use to you, try recycling them or dispose of them in the proper way. After you’ve narrowed down which items you’ll be keeping, it’s time for you to clean your shed. 

It’s important to clean the interior and exterior of your shed. This will not only work as preparation for your upgrades, but it will also ensure your structure is looking clean and new. Below we’ve listed some basic shed cleaning tips that can help when cleaning both the inside and outside of your shed.

Exterior shed cleaning:

  1. Hose off or power-wash the shed siding– If your shed has vinyl siding you should be able to power wash the exterior. If you have a wooden shed that’s painted you may want to consider hosing off the exterior because it won’t be as tough on the siding. 
  1. Scrub off any remaining dirt (if needed)– You can mix a basic cleaning solution using dish soap and warm water to help remove any stubborn dirt or grime. 
  1. Wash windows by hand– If your shed has windows you should get glass cleaner and wipe them down by hand. You’ll want to do this in the interior as well. 

Interior shed cleaning: 

  1. Sweep out the inside– Using a broom, sweep out any loose dirt or debris that has built up inside. If you find that your interior is very dirty you may consider using a leaf blower to clean more efficiently.
  1. Dust– You’ll want to make sure you wipe away any cobwebs, dirt stains, or dust that has accumulated in corners, on shelves, or on the ceiling. 
  1. Eliminate mildew and mold– The build-up of mildew and mold is common in sheds. You can eliminate both by using a cleaning mixture from a hardware store or you can make a mix of your own. The best way to rid your space of mildew and mold is to mix 1 cup of bleach for every gallon of water. Using a sponge or rag you can scrub areas until they’re clean. 

Once you’ve finished cleaning the exterior and interior of your shed you’ll be ready to begin your shed upgrades. Remember, keep your belongings outside of your shed space so that you have optimal room to work on your shed renovation from the inside if needed. 

Elite Cape shed

3. Start Your Shed Renovation

Your shed renovation should focus on functionality and style. Whether it be a she-shed, man cave, hobby space, or an area to hold equipment, there are many different shed remodel ideas you can look to for inspiration. Below we’ve listed some helpful, but simple ways you can start upgrading your shed for any use. 

Add a New Coat of Paint

A fresh coat of paint can make all the difference. If your shed is close in proximity to your home you may want to consider using colors that complement your house. 

However, if your shed is further away, you can create a whole new color scheme. There are a lot of different garden shed paint color ideas you can choose from. Some of the most popular color combinations include:

  • Earthy greens 
  • Neutral blues
  • Vibrant reds
  • Subtle grays and tans
  • Traditional black and white

Make sure if you are planning on doing the job yourself, you learn how to paint a shed properly. There are a few painting tips and techniques you can follow to ensure your paint job ends up looking like a professional did it. 

Check Out Different Shed Siding Options

When it comes to shed siding options the two most popular choices are wood and vinyl. As you compare these, you’ll want to consider a few key factors. 

First, you’ll want to think about maintenance and upkeep. Vinyl siding sheds require little to no maintenance. Besides washing the exterior, you won’t have to worry about many other issues or repairs. 

Wood siding sheds may require more upkeep. Depending on the weather and other natural elements, you may need to re-paint or re-stain the exterior. However, this is usually only necessary about every 10 years. 

Next, you’ll want to consider your budget. Vinyl sheds are usually more expensive than wooden sheds. This will obviously depend on where you purchase your siding, but for the most part, wooden sheds are estimated to be a hundred to a thousand dollars cheaper. 

Lifespan and risk of rot are also important factors. While vinyl sheds tend to be more expensive, they do typically last around 25+ years, whereas wooden sheds offer around 15-20 years. Vinyl sheds also don’t run the risk of deteriorating from mold or rot. Even treated wood can often be damaged by mold or rot.

Finally, you’ll want to think about your desired style. While both shed siding options are attractive and effective backyard structures, it comes down to what you’d rather see in your outdoor space. 

Some people prefer wood because of its natural look and the flexibility to paint it whatever color they desire. On the other hand, vinyl offers a sleek look that takes less work to stay in better condition. 

Install Better Lighting

Proper lighting can be extremely beneficial, no matter what you’re using your shed for. If you’re renovating your shed to be a cool new hangout place or simply for storage, having suitable lighting will help you navigate your way around your space. 

There are many options when it comes to shed lighting. You can install lighting inside and outside your shed. Interior shed lighting comes in a variety of options. Some of the most common types include:

  • Incandescent 
  • CFL (compact fluorescent light)
  • LED (light-emitting diode)

Before you choose which type of light is best for your shed, you’ll want to consider a few factors. All lights have different lifespans, which is how long the light source will last. For instance, LED lights usually have the longest lifespans, whereas incandescent lights usually have the shortest. 

Another thing to keep in mind is energy usage. LED lights tend to be more expensive than CFL lights, but they use 40% less energy and they don’t get as hot as CFL or incandescent bulbs. 

If you’re worried about shed security, you may want to consider installing motion sensor lights on the exterior of your shed. These will allow you to keep an eye on your belongings and limit the number of break-ins you may have. Motion sensor lights can also work to help you navigate your way around your shed’s exterior when it’s dark out. 

New England style shed

Having a shed in your backyard allows you to have more space. However, purchasing a shed can be a big decision and it requires time to plan. If you’re debating on adding a structure to your outdoor space, make sure to look into some resources that will help guide you through the process of purchasing an affordable and high-quality shed


Too Much To Renovate?

Check out our wide variety of in-stock or custom-built sheds and start planning your renovation project today!

10' x 14' Elite A-frame Shed - Wood
Elite A-Frame Shed

Deciding to raise chickens is a big decision that can benefit you in many ways. Whether you have one, two, or ten chickens, the most crucial thing to take into consideration is how you will keep them safe. Learning how to protect chickens from predators is imperative if you want to keep your chickens around for the long run.

In this blog, we’ll review different animals that eat chickens, and provide a variety of steps you can take to ensure your poultry is protected from any risks that come their way.

Skip Ahead:

What Animals Eat Chickens?

The first step in learning how to protect chickens from predators is to know which animals you should be on the lookout for. Chickens are very vulnerable animals and are at a higher risk of being attacked than most birds. The animals that eat chickens will depend on where you live and your surroundings. Some of the most common predators include: 

  • Weasels
  • Birds of Prey
  • Raccoons
  • Skunks
  • Coyotes
  • Opossums
  • Foxes
  • Bears 
  • Snakes

Once you know which animals to look out for, it’ll make protecting your chickens that much easier. You’ll be able to set up defenses specific to those animals that pose the largest threats. 

How to Protect Chickens From Predators In 8 Easy Steps

Your location will have a lot to do with finding the best way to protect chickens from predators. However, there are some best practices you can put to use regardless of your location. Following these steps is the perfect way to get a better understanding of what your chickens need to survive and live happy and healthy lives. 

1. Collect Eggs Daily

Don’t give your predators another reason to sneak around your chickens. Collecting your eggs daily will ensure that certain predators like snakes, rats, raccoons, and opossums won’t find their way into the coop at dusk. This will also eliminate the risk of your eggs being broken or cracked in the coop. 

2. Know Your Enemy

Chickens are one of the most vulnerable animals because of the numerous predators they have. Knowing which animals in your area pose the greatest threat will allow you to take the necessary steps to keep those specific predators away. 

3. Keep Them Out of the Dark

The most dangerous time for chickens is early morning and late at night because most predators try striking when it’s dark out. If you allow your chickens to roam free from time to time, make sure you’re doing this during daylight hours. They’ll be less likely to get attacked when the sun is out. 

Another thing to remember is to keep track of all your chickens, when you close the coop up for the night, make sure all of your chickens are accounted for and safely locked inside their secure chicken coop.

4. Secure the Perimeter

Whatever you decide to use to keep predators away, make sure the perimeter is secured. This could include burying chicken wire, adding electric tape, or even installing motion sensor lights. Most predators will trigger a motion sensor and be scared away by a bright light. 

Another thing to consider is your entire outdoor space. If you have a large open yard, you may want to install a larger fence around your property. This may not keep out every predator, but it will act as another line of defense for your chickens. Even securing other outdoor structures you may have can be beneficial. Doing this ensures you don’t leave an area where predators can make a home. 

5. Check Your Defenses

Putting up defenses is only the first step in protecting your chickens. In order to ensure their safety, you need to keep up with whatever defense you put in place. This means you should frequently check your fence or netting, as well as any holes around the perimeter. Checking on your chickens will help to make sure you don’t miss any easy openings for predators to get inside. 

6. Don’t Feed the Predators

If you feed the animals that come around your outdoor space, you’re giving them a reason to return. Even if you think feeding certain animals is harmless you could be putting your chickens at risk. 

Making sure your garbage and recycling are stored properly, as well as cleaning your chicken coop regularly, can also play a role in keeping predators away.

7. Provide Cover

Keeping your chickens covered won’t only protect them from predators, but can also protect them from inclement weather. There are multiple ways to provide cover for your chickens from netting to roof sheathing

Another way to add coverage is by adding shrubs or small trees around your chicken coop. Doing this will make them less visible to predators and could make it more difficult for animals to get to them.

8. Protect the Chicks 

Chickens can be easy targets for predators, but baby chicks are even easier for animals to get. If you have chicks, you should do everything you can to keep them out of harm’s way. Using a strongly built chicken coop will usually guarantee their safety, but there are other tips you can follow to stay on top of any threats.

Baby chicks in protected coop.

What is the Best Predator Netting for Chickens?

Learning how to protect chickens from predators takes some research. Many chicken owners have found that using predator netting for chickens is one of the easiest tactics to keep your birds safe. 

There are different varieties of netting and each has its own advantages and disadvantages. Below, we’ve listed some of the most popular types as well as their uses. 

Chicken Wire

Chicken wire is probably the most inexpensive option for containing chickens. However, it is the least effective when it comes to keeping predators out. Chicken wire is a great way to contain your chickens, especially if you’re not at risk for large predators or you have a livestock guardian dog

It usually comes in a variety of heights ranging from 2-4 feet. If you have larger chickens that aren’t prone to flying, you could use a 2-foot high fence to keep chickens in. If your chickens are flighty you’ll want to double up and build a 4-6 foot fence. 

Chicken wire is inexpensive and easy to handle, but it may not be the best choice for you. Take into consideration how at risk your chickens are when it comes to predators, as well as the weather since the wire is prone to rust. Evaluating these things will help you decide if the chicken wire will actually be effective. 

Hardware Mesh

Hardware mesh is typically used for pens and outside areas of containment like large chicken runs. Since this type of mesh is more expensive it’s not very cost-effective to create an entire fence out of it. However, it does keep out virtually every predator (besides bears) if it is used effectively. 

In order to keep out predators that dig, you should dig approximately 6-12 inches and lay the wire in the trench. Then, bend the wire outwards to form a small shelf-like structure that is approximately 6-12 inches.

If something is preventing you from digging, lay the wire on the ground of the run and make sure it is securely attached to the bottom frame. You can also cover the wire with a layer of dirt, allowing the birds to still scratch. Hardware mesh is the more expensive option, but it’s perfect for chicken coops, runs, and small areas where chickens may need more protection.

Plastic Poultry Netting

Plastic poultry netting comes in a variety of colors and lengths. It can be very useful if you’re trying to blend your netting in with your yard’s surroundings and keeping chickens contained or out of certain areas. 

It’s not the most effective way to keep large predators out, but it can be the most cost-effective way to fence in larger areas. This type of netting is also good at keeping aerial predators from swooping into chicken runs and taking your birds. 

Chain link fencing may not seem like the most aesthetically pleasing option, but it is one of the better ways to keep predators out. Since chain link is tough and strong enough to withstand even the largest predators, it’s a safe bet if your chickens are at high risk. The cost is also fairly inexpensive and you can get it secondhand sometimes making it even cheaper.

It may be more difficult to set up, but once it’s in place, it will last for years. You will need to bury some wire to prevent digging predators. You can do this by attaching a separate piece of hardware cloth to the bottom of the chain-link fencing. 

If you can’t build your fence to about 6 feet, you may want to consider adding electric tapes to the top and bottom of the fence line. You should keep the bottom wire about nose height for a fox or coyote, and the top wire about 6 inches above the chain link. This will ensure desperate predators won’t be able to breakthrough. 

Chicken coop wire fencing.

Aviary Netting

Aviary netting is similar to plastic netting. It’s not very effective when it comes to withstanding physical attacks from larger animals, but it’s useful when keeping aerial predators out. People tend to prefer aviary netting over plastic netting because it’s made from fine polypropylene mesh and blends into the background. 

This type of netting is generally inexpensive and a good choice if you’re trying to protect smaller chicks from being picked up by larger birds. However, it should only be used to cover the top of certain areas, such as a chicken run, and not used as a fence. 

Electric Poultry Netting

Electric poultry fencing has become more popular and affordable over the past few years. There are many different kinds of electric fencing, but all types do pretty much the same thing. They are made of metal wire that is woven with plastic fibers throughout the height and length of the fence. When an animal touches the wire, it will experience a quick shock. 

This type of fencing can be powered by a main electric source, battery, or solar. There are temporary and semi-permanent options you can choose from when looking at electric fencing. We suggest you choose the temporary option if you frequently move your chickens because it’s lightweight and easier to manage. 

Semi-permanent fencing is tougher and can withstand more abuse from animals or weather. The posts are also stronger and less likely to bend, however, setting them up can be more complex and time-consuming. 

Small wooden chicken coop.

Want to Keep Your Chickens Safe?

Check out our custom-built chicken coops that come in a variety of styles & sizes to match your home’s aesthetic.

COMBINATION 8’ x 12’ QUAKER COOP The Combination series boasts a hen house with an attached chicken run to allow the chickens a safe place to scratch.
Combination Quaker Chicken Coop

Whether you’re considering buying a new shed for your outdoor space, or you’re looking to remodel an old shed, making sure it’s secure is a necessity. No matter what you use your shed for, you’ll want to keep your belongings safe inside. There are many ways an intruder can break into your shed, but taking the proper precautions can eliminate almost any security issues.

Secure storage sheds will allow you to keep your mind at ease when you’re away from your home or any other time someone has the opportunity to break in. In this blog, we will share some ideas you can use to keep your shed secure and safe from intruders. 

Skip Ahead:

  1. Implement Alarm System
  2. Shed Security Cameras
  3. Shed Locks
  4. Fix Shed to Foundation
  5. Upgrade Hinges
  6. Shed Security Bar
  7. Window Security
  8. Obscure Windows
  9. Avoid Plastic Roofing
  10. Use Foot Anchors

10 Shed Security Ideas

Shed break-ins are a common issue for homeowners. There are many ways you can secure storage sheds, and depending on what you’re using your space for, you can decide what lengths you’d like to go to keep your shed protected. Below we’ve listed 10 of our favorite ideas to give you some inspiration to get started.

1. Implement an Alarm System and/or Sensor Lights

The first thing you should do to secure your shed is implement an alarm system. These systems don’t just detect intruders as they attempt to break in, but they also keep people from targeting your shed in the first place. 

Most alarm systems that are activated set off a siren internally and externally while also flashing a strobe light. There are two main types of systems you can install: 

  • Movement sensors (PIR)– Also known as passive infrared sensors, these sensors look for movement in or around the shed. If movement is detected an alarm signal is sent to the alarm panel. They can be hard-wired or wireless depending on which type you choose. 
  • Door and window contact sensors– These sensors are mounted on the door or windows of your shed. If they detect that either entryway is opened, they will set off an alarm.
Shed security system

2. Try Using a Shed Security Camera

Using a security camera for your shed is another one of the most efficient ways to keep your belongings safe. They come in a variety of configurations so you can find the one that fits best with your shed layout.

  • ADT cameras– These cameras can be used indoors or outdoors. They have night vision and allow you to store video clips any time on your mobile devices. 
  • Alder cameras– These cameras are fully wireless and have smart motion detection. You also get free cloud video storage with your camera system. They also can be used indoors or outdoors, have night vision, and incorporate 2-way audio. 
  • Vivint cameras– These cameras have 24/7 video recording and can be used indoors or outdoors. They also have 4K HD sensors and infrared night vision which allows you to see the video clearly day and night. 
  • Cove cameras– These cameras are easy for anyone to set up and offer a lifetime equipment warranty. The high-resolution video can be stored in the cloud or on a memory card. These cameras can be used indoors or outdoors and include night vision. 

3. Choose a High Security Shed Lock

It may seem obvious to use a lock on your shed, but knowing the proper lock to install could go a long way. High security shed locks come in a variety of types and styles. You’ll want to do enough research to find which locks are most difficult to cut through or forced open. 

  • Rim lock– These locks are fixed inside the door with wood screws. The door catch is secured into a strike plate or keep that is fixed to the frame of the door. This is the least secure option for shed locks since the lock is only held in place by wooden screws.
  • Pad bolt– These bolts consist of a flat or circular bar that slides horizontally inside the mounting fixed to the outside of the door and door frame. When the door is locked the bolt is slid horizontally into a receiver that is fixed to the door frame. 
  • Hasp and staple– Similar to the pad bolt lock, these locks are fixed to the outside of the shed. However, a hinged hasp is different because when the door is closed the hinge goes over a staple that’s fixed to the door frame. This makes it much harder for anybody to cut through. 

4. Fix Your Shed to the Foundation

Oftentimes, storage sheds that are installed by the homeowner are not properly secured to the ground or foundation. If the shed isn’t fully secured to the ground, it gives intruders an opportunity to simply lever or lift up one of the walls. 

If you’re setting it up by yourself, make sure you anchor your shed to the foundation the right way. Or ask for help from an experienced professional to prepare your site for the shed delivery

Site Preparation

5. Upgrade Your Hinges

The hinges you use on your shed door play a key role in shed security. It’s not only the strength of the hinge you choose that matters, but also the components that make up the hinge. If your hinges are old or worn out, it’s smart to upgrade them in order to ensure they can’t be knocked out or pried open. Look for the:

  • Gauge of hinge metal – The gauge of hinge metal determines how strong the metal is, and can play a key role in shed security. Oftentimes, the shed door hinges that come with shed kits are made of thin metal. Investing in heavier-duty hinges will help boost your security and ensure they last.
  • Accessibility to the hinge pin – The hinge pin is the metal rod that holds the two sections of a hinge together. Higher quality hinges make sure the hinge pin is inaccessible and covered by weld. This ensures that the pin won’t be easily knocked out.
  • Type of fixings used to fit the hinge to the door and shed – Hinges are usually supplied with standard screws to fit them to the shed and door. These screws can be easily removed. Consider replacing these screws with security screws (such as Clutch Head or Sentinel Screws), to ensure your hinges won’t be pried open. 

6. Upgrade Your Door with a Shed Security Bar

A shed security bar offers extra security in addition to your locks. Made of heavy metal that cannot be broken, the bar is attached to the exterior of your shed door. There are locks on both sides of the bar and can only be opened by unlocking both sides. 

Since the lock bar is usually heavier than other locks, you will need heavy-duty fasteners to properly install. They typically cost between $40-$200 depending on the lock bar construction. 

7. Install Window Security

Securing your shed door is important, but installing window security can be just as necessary. If someone cannot break through your door, they’ll most likely attempt to get through the window. Since windows are usually made of glass and therefore easy to break, you may want to consider using a window guard or security bar. 

  • Grisham Window Guard– These security bars are popular for their aesthetic and safety. Their spear-point edges and decorative center make them seem like an intentional design choice rather than a security measure. They mount on the exterior of your window and incorporate a quick-release function. Though the size isn’t adjustable, they’re offered in a variety of sizes at reasonable prices.
  • Mr. Goodbar– This window guard is one of the more expensive options available. They offer many different qualities such as: adjustable sizing, vertical or horizontal installation options, tamper-resistant mounting materials, and a swing-away function. These heavy steel bars go on the interior of your home and have a white finish to blend into most window designs.
  • Defender Security Segal Window Guard Window guards are fairly priced, functional, and safe. They have a quick-release function, adjustable sizing, and come with tamper-resistant screws. While they’re typically not too fancy, they do offer more security with their steel bars that go on the interior of your home.
  • Jeacent Adjustable Window Security Bar– These window bars are popular for their accessibility. The sturdy painted steel comes with reusable Velcro to hold it in position and is easy to use and install. The security bar is adjustable and can double its length, allowing you to make it however long or short is necessary for your window size. 

8. Obscure Your Shed Windows

Making it harder for people to see through your shed windows will make them less likely to break in because they won’t be able to examine what’s inside. The best way to do this is by adding frosted windows or covering the windows with curtains. You can also install impact-resistant windows or glass-break sensors for even more protection.

9. Avoid Plastic Roofing

It may seem unlikely, but the roof of your shed is another entryway for an intruder. Installing builders bands or metal brackets to the inside of your shed will ensure someone cannot simply lift up the roof to gain access. You may also want to consider replacing a plastic roof with a heavier metal material which will make it much harder for anyone to cut through. 

 10. Put Floor Anchors in Place

Depending on what you’re storing inside your shed, you may want to consider installing floor anchors. Larger and more valuable items such as lawnmowers, leaf blowers, and other equipment, can be chained to these anchors and secured with a quality lock. Floor anchors work well with timber and concrete floors, and they add an extra set of security if someone manages to get into the shed. 

Villa Style Wood Shed

Taking the necessary steps to have a secure storage shed may take some time and money. But doing so can help ensure you won’t become a victim of theft. In the long run, it’s better to know your belongings are safe rather than risking a break-in and having things stolen. 


Find A Quality & Secure Shed

Looking to find a quality and secure shed for your outdoor space? Browse our variety of shed styles and sizes today!

10’ x 16’ Wood Elite Cape Style Shed
10’ x 16’ Wood Cape Style Shed

You don’t have to make any major changes to upgrade your home. Sometimes, adding small and simple touches is all you need to boost your curb appeal. Ditch the hassle of a major renovation and consider adding a permanent roof decoration instead. In this blog, we’ll cover all the types of roof decorations you can choose from to bring your home to the next level.

Skip Ahead:

Why Should You Invest in Roof Decorations?

Most often, when people bring up roof decorations, they’re talking about the Christmas season. People love to spruce up their home exterior with all kinds of lights and other decors. But you don’t have to wait for the holidays to boost your curb appeal. You can do it year-round with roof decorations that will last. 

Curb appeal is the visual representation of your home. More simply put, it’s how your home looks to people outside. You can boost your curb appeal by doing a number of things such as manicuring your landscape, purchasing a new garage door, or in this case, adding a structure to your roof. 

Studies have shown that increasing your curb appeal is associated with an increase in your house’s value or price. Investing in decor for the exterior of your home adds value to your property and may be just the thing to bring your home design together.

Traditional Rooftop Decorations

If you’re looking for permanent rooftop decorations, there are some traditional pieces you could use. These structures are made to bring people’s focus to your home and make an average roof stand apart from the rest. 

While each decoration can be placed by itself, it can also be combined to decorate your roof, for instance, you could choose to have a cupola with a weathervane or a finial. Let’s take a closer look at the rooftop decorations to choose from so you can figure out what will work best for your home.

Cupolas

What is a cupola? This structure is a hollow frame that sits on the top of your roof. Oftentimes, it can work as a base for other roof decorations, (like a light or weathervane) but it looks just as nice when installed alone.

Traditionally, cupolas are hexagonal or square-shaped, but they come in a variety of sizes, styles, and colors. They’re smaller than your roof, but add a focal point for people looking at the outside of your home.

There are two main types of cupolas:

  • Functional
  • Decorative

If you’re looking for a functional cupola, it will help with ventilation throughout your home. A decorative cupola is used solely for the purpose of adding curb appeal to your home. 

Cupolas can be made of almost any material, but most often are copper, wooden, or vinyl. The size and style of your cupola will depend on how big or small your house is, and the type of overall exterior design or function you’re trying to obtain.

D-Model Cupola (Six-sided vinyl)

Finials

Sometimes known as spires, finials are a more simple decorative piece for your roof. They are decorative caps that are placed on the points or ends of a roof. Finials were traditionally used to emphasize the top of a dome, spire, or tower. 

They can be made of any material, but the most common are copper finials. These come in an assortment of sizes and styles and can be placed on top of cupolas. They work to bring a unique and elegant addition to your roof without overpowering the entire home. 

Weathervanes

Also known as a wind vane or weathercock, these pointers were historically used to show which direction the wind was blowing. They can be made from a variety of materials, but the most common are copper weathervanes

There are countless types and lots of  styles you can look at when picking out a weathervane, but typically there are four main styles to choose from:

  • Simple-Swell Bodied Style– The weathervane sculpture piece has two shaped sides which are soldered together. Details are kept at a minimum and the sculpture pieces are hollow inside. 
  • Silhouette Style– The sculpture piece is flat with an emphasis being on the silhouette. There is very little texturing or shaping. 
  • Full-Bodied Style– These three-dimensional pieces are the most complex. They are based on true proportions on a reduced scale.
  • Detailed-Swell Bodied– Similar to the simple-swell bodied style, they have two shaped sides but consist of many individual pieces that are shaped, contoured, and soldered together.

Installing Rooftop Decorations

#580PA Horse w/ Arrow Dimensions: 45"L x 18"H x 4"W Polished Copper

Once you’ve decided which rooftop decorations are right for your home, it’s time to install them. If you’re planning on installing your structure by yourself, you’ll want to follow a few steps to make sure you’re doing it correctly and safely. 

Below we’ve provided some steps for installing each specific structure, as well as a sizing guide to help you decide how big or small your decoration should be. 

Cupola Installation

  1. Prepare the roof. If your cupola is being used for decorative purposes only, there is no preparation needed. If your cupola will be used to help with ventilation or accessibility you will need to cut an opening in the roof that is at least 12” smaller than the cupola base. Make sure the main roofing material protrudes into the cupola up to the roof opening.
  2. Determine your roof pitch. Roof pitch is the number of inches the roof rises vertically for every 12” it extends horizontally. Screw 2 boards together and straddle the roof with each board. Make sure each side is flat against the roof and the center is at the center of the peak. Mark the boards and apply a screw. This will be your cutting template.
  3. Mark the cupola base. Draw a centerline on the cupola base. Using your cutting template, make a line from each corner to the centerline. This will be your cutting line. Your base should now be ready to cut. Tip: Start cuts at the corners and end at the center.
  4. Position. Position pieces of 2x4s on sides to be flat against the inside walls of the cupola base. Screw them to the roof.
  5. Mounting and assembly. Attach the base to the 2x4s. Secure the base to the roof and use silicone caulk to seal the sides of the base sections. Leave an area in the 2 lower edges unsealed to allow any water to drain. Attach the mid-section to the base, and the top to the mid-section using screws. Apply silicone caulk to all exposed screw heads.

Weathervane Installation

  1. Check nuts and bolts. Make sure all nuts and bolts that hold the weathervane together are clean and easy to screw and unscrew. 
  2. Align. Before installing, align the weathervane so that each arrow is pointing in the correct direction.
  3. Locate your rafters. Use a tape measure to determine the center of your roof. From the inside, drill a pilot hole and put a metal rod through to the outside. Make sure to stud the beam you’ll be trying to fasten to.
  4. Secure the weathervane. Use 3 ½” of galvanized wood screws or self-driving lag screws to secure the weathervane to the roof over the shingles. 

Finial Installation

  1. Anchor the finial. Determine if it’s possible to drill a ¾” hole into solid wood in the peak of your roof for the bottom of the finial’s post. Drill a plumb hole into the peak. Smaller finials should be 6” to 9” in depth. Larger finials should be 10” to 12” in depth. 
  2. Determine the finial’s post. Measure the post below the finial and deduct 1” to 2”, which will give you the depth of that finial’s post. The finial’s bottom-most ornament should be approximately 1” to 2” above the roof peak.  
  3. Caulking and mounting. Place adhesive silicone caulking inside the hole in the roof. Press the post into the caulked hole. Make sure the joint where the post goes into the roof is well caulked before finishing. 

Sizing Guidelines

The most popular formula to use when finding the correct cupola size is: 1” to 1 ½” of cupola base per foot of the roofline. Steeper roof pitches or multiple levels will usually need a larger scale cupola, whereas low pitched roofs or single stories will be better with smaller scale cupolas.

When installing a weathervane or finial on top of your cupola, make sure the length and width of weathervanes and finials don’t exceed the widest part of the cupola.


Take Your Home To The Next Level

Check out our wide variety of rooftop decorations today and find the perfect decorative addition to your home.

Waterford Cupola
Brass Waterford Cupola

Looking to enjoy a place made just for you and anyone you choose to share it with, without the hassle of remodeling your actual home? Whether you’re finding the perfect shed for your outdoor space, or choosing to renovate a shed already in place, we have all the tips, tricks, and ideas you need to create your dream man cave shed.

Skip Ahead:

Man Cave vs. She-Shed

You’ve probably heard of a she-shed, but have you thought about creating an outdoor man cave as well? She-sheds are for things like crafting, meditating, or countless other activities, whereas man caves may be focused more on gaming areas, hangout spaces, or even a workout area.

Man caves and she-sheds both follow a similar idea — it’s a place outside your home, that you can call your own. There are just as many
she-shed ideas to choose from as there are man cave ideas, but both require some planning.

9 Steps to Follow When Renovating Your Man Cave Shed 

Once you’ve decided what purpose your renovated shed will serve, you can begin putting together some of your man cave shed plans. Here’s our recommended course of action to get started.

Painting shed with new coat and color.

1. Try a New Coat of Paint

A nice fresh coat of paint can make all the difference. Begin your shed makeover by giving it a new look, both inside and out. You can choose a color that matches or compliments your home, or even mix in a different color scheme depending on what you’ll be using your new space for. Either way, a new coat of paint will elevate your shed’s look. 

2. Seal Up Cracks

Before you begin making any big changes to turn your shed into a man cave, you need to ensure it’s ready to last. Sealing up any cracks, divots, or other damages helps you make your man cave look good as new. Once your shed is cleaned out, you can use weatherstripping to keep your space sealed up from any dust, bugs, drafts, or other problems.

3. Add Windows

Even though your man cave may have originally been a shed, that doesn’t mean you can’t make your new space feel like home. There are many great man cave shed interior ideas but the most important may be adding windows. You can brighten up the inside to create a more relaxing and livable space. Plus, windows can also help with ventilation and air circulation if necessary.

4. Install Insulation

Ensure you’re comfortable inside your shed during every season by installing insulation. Since you’ll be spending time in your new space, you want to make sure your belongings are protected from inclement weather or extreme temperatures. You may even consider adding drywall to create a real room inside your shed with proper walls.

Installing insulation into shed walls.

5. Add AC/Heating

Similarly to installing insulation, you may be interested in adding AC and/or heating. Mild climates may only require insulation, but when temperatures rise or fall, you’ll need to make some adjustments. Adding a small air conditioner and/or heater will allow you and any guests to remain comfortable while inside the man cave shed.

6. Install Better Lighting

Most average sheds don’t necessarily require decent lighting. You can add overhead lights and lamps to brighten up the area allowing enough light to enjoy any hobbies or activities. You can also add exterior lighting if you plan on spending time in your space when the sun goes down.

7. Revamp the Entrance

Guests should feel welcomed when they enter your renovated space, and the best way to do that is by revamping the entrance. Whether you’re adding a new coat of paint or purchasing a new door altogether, make sure it’s inviting and accessible. 

You can choose any door style depending on how you’d like to use the space overall, but don’t forget to properly seal your door to avoid any exterior damage.

8. Convert the Floor

Durable flooring is a necessity when it comes to turning a storage shed into a man cave. You want to ensure your floor is protected from mold, moisture, and other elements that cause damage. There are many types of flooring you can use in your shed such as: wood, concrete, vinyl, or even carpet. Whichever type of floor you choose, remember you can add throw carpets or rugs for maximum comfort. 

9. Install Shelves and Storage Spaces

No matter how you choose to use your new space, you’ll want to have areas for storage and organization. Installing shelves is a great way to add more room for items or decor.

Red Elite Dutch Shed

Man Cave Shed Ideas

Now that you know the steps to convert your space into a man cave shed, it’s time to decide how you’d like to use your new space. While there are countless ideas you can use for inspiration, here are our top 3 favorites!

Gaming Shed

Turn your shed into the ultimate game room for you and your guests. By adding a dartboard, television station, game tables, and countless board games, you can enjoy an entertaining space complete with all the necessary elements for a great time.

Workout Shed

Get your daily exercise in without having to deal with the hassle of going to the gym. Sometimes, having our own workout space is more beneficial than having a gym membership. You can convert your renovated shed into a workout area that includes all of your necessary equipment. 

Hangout Shed

Create a space where you can relax. Comfy couches, chairs, and soft carpets can help transform your shed into the perfect area for you to spend lazy Sundays or unwind after a long day at work. Incorporate your own style and some of your favorite elements to complete an oasis for yourself.

No matter how you choose to remodel your shed, remember to have fun and be creative with your ideas. Don’t hesitate to add details that make it the perfect fit for you!


Build Your Perfect Man Cave

Looking for a quality new shed for your outdoor space? Browse our selection of Amish-built sheds that are durable and dependable.

12' x 20' Classic with Reversed Gable – Vinyl
Classic Sheds

The terms barn and stable have a tendency to be used interchangeably. While they both have some overlapping similarities, the differences between them stem from their distinct purposes. It’s important when searching for a barn or a stable to understand which structure will be most beneficial to you and your needs. 

When looking at barns vs. stables, you can see the variety of designs and styles each provides, allowing you to discover the perfect match for housing animals and any tools or gear. By seeing the differences, you will be able to specify which structure you want.

Skip Ahead:

Barns

Barns are typically large structures used for storage or keeping livestock as opposed to housing horses. Some barns are also used for decorative purposes, like front barns or carriage houses. Barns were originally designed for practicality and aesthetic. Barns can be used for numerous reasons, and because of that, they come in a variety of styles. 

  • Bank Barns
  • Round Barns
  • English Barns
  • Dutch Barns
  • Prairie Barns

The designs of barns speak to their identity, but also their functionality. Depending on the purpose of yours, you can choose which style suits your needs best while also elevating your outdoor space. 

Barn Design

The main difference between barns vs. stables is the design. A traditional agricultural barn has certain characteristics that work to make your job easier. 

Tack Room

Every barn needs a tack room. This is where bridles, saddles, and other equipment is stored and kept organized. The planning and location of your tack room will depend on how many steps you want to minimize in the process of getting horses ready. With the correct layout plan, you will be able to save time and space. 

Drive Bay

These are large corridors where storage for animals and machinery are placed. Everything from driving lawn mowers to hand tools, and from bagged compost to hay, is stored in the drive bay. These are important to keep tools and equipment safe and in an accessible area for use.

Silo

Silos are used to store or fermented grasses to feed animals during the winter months. They can be vertical or horizontal and made of different materials. They’re filled from a hole in the top and allow you to keep lots of nutritious silage on hand for animals.

Grain Bins

Though similar to silos, grain bins only store dry grains while silos store fermented pasture. Grain bins are cylinders with pointed metal roofs and an exterior staircase that leads to the top. They come in varying heights but are usually wider in diameter and made of corrugated steel. 

Horse barn.

Stables

Stables are structures used to house and care for horses. They usually consist of individual stalls where the horses stay. There are mainly two types of stables:

Traditional stables are used exclusively for horses whereas stable barns or small horse barns are a mix between barns and stables, creating a different horse care experience. While these stable designs are used for different purposes, they usually incorporate the same elements.

Stable Design 

Looking at the differences between barn vs. stable designs you will see that it comes down to purpose. When designing a stable, the goal should be functionality, but also comfortability for the horses. There are many different options for each design element within a stable, allowing you to stick to the traditional structure while adding your own unique aesthetic.  

Stalls

There are two common types of stalls you can choose from when designing a stable. These are box stalls or loose boxes and standing or tie stalls. 

  • Box Stalls- According to the Canadian National Farm Animal Care Council, the size of a box stall for an average size horse should be at least 10’x10’ to 12’x12’.
  • Standing Stalls- The size of standing stalls should be wide enough for a horse to lie down. This means they are typically 4’ to 5’ wide and 8’ long, depending on the size of the horse. 

Both box and standing stalls should be at least 4.6’ high with a grill or sturdy mesh above. This allows the horses to see each other as well as have better ventilation. 

Stall Doors

When choosing what kind of doors you want for the stalls, you can either pick swinging or sliding doors. Whichever you choose, it’s important to have a latch that opens easily, but that the horse cannot tamper with. 

  • Swinging Doors- These should always open towards the alley or aisleway. 
  • Sliding Doors- These should slide smoothly when opening or closing.

Both swinging and sliding doors should be at least 4’ wide. Always make sure the doors are securely closed at all times, ensuring that the horses will not escape. 

Ceilings

Ceiling height will depend on the size of the horse. It should be high enough that the horse can raise its head comfortably without the worry of hitting its head on the ceiling. The standard ceiling height of 8’ will be fine for ponies or smaller horses, but if the horse is larger you may have to make the ceiling higher. 

Lighting

When lighting your stable, you must make sure you’re prioritizing the safety of your horses. This means all plug-ins should be GFIC receptacles, and all wiring should be rodent and moisture resistant. Safety cages should be around each light, and out of any horse’s reach. Lastly, the light fixtures should be placed in a fashion that reduces dark areas.

Flooring

Most stable floors are made of concrete or stone. The surface can be roughened to make it non-slip, but drains will have to be placed in the floors because they won’t drain naturally. This also means stall floors will need to be well-cleaned to inhibit ammonia build-up. Using hard flooring makes it easier to disinfect and be hosed down, but it’s harder on the horses’ legs.

You can also use sandy soil as the flooring which is easier on the horses’ legs and are often warmer and quieter. However, earth floors are more difficult to clean and may require digging out and replacing if the soil becomes too saturated with urine and water.

Aisles or Alleyways

The aisles or alleyways are the pathways between the stalls. These should typically be at least 10’ wide. When it comes to aisle width, the larger the better because it’ll ensure room for horses to pass or be tied to groom.

Windows

Windows are great for natural ventilation and light, which is why it’s important to add as many as possible into your stable design. Make sure your windows are covered with a grill or sturdy mesh so that the horses don’t break the glass. It’s also better to use windows that swing open rather than slide up and down.

Barns vs. Stables: How to Pick

Choosing between a stable or barn ultimately comes down to what the purpose of your structure is. If your main concern is the housing of multiple horses, a stable may be your best option. However, if you’re looking for a space where you can store equipment as well as house a horse or two, a horse barn will likely be the better choice for your property.


Add A Horse Barn To Your Space

Check out the wide variety of styles and designs we offer in our Amish built horse barns.

Inside a custom horse barn with new wood and freshly painted iron bars.
Interior Of Custom Made Horse Barn

Every homeowner deserves to have an outdoor space where they can relax and enjoy themselves, and adding a pergola is the perfect way to do this. Whether you want to make your backyard into a shady sit-down space, or you’re looking to create a private patio area, a pergola has the potential to turn your outdoor space into a beautiful oasis.

Still, if you choose to add a pergola to your backyard, how do you know which one is right for you? Wood vs. vinyl pergolas is a hot topic, but with the right information, you can determine which one is best for you.

In this blog, we’ll cover the differences of wood vs. vinyl pergolas to help you know which one is the perfect fit for your outdoor space.

Skip Ahead:

Wooden Pergola Details

Using wood as a material for pergolas is immensely popular due to its versatility and visual appeal. The natural and authentic appearance of the wood itself paired with the lower cost makes it a worthy contender when it comes to choosing pergolas.

There are, of course, advantages and disadvantages to using wood as your pergola material. It’s important to take into account a variety of factors to make sure a wooden pergola is the best fit for you.

Pros of Wooden Pergolas

There are many reasons people choose wooden pergolas over vinyl pergolas. One of the greatest advantages is their versatility. Wood can be stained or painted, and can be made into almost any style you desire.

Its versatility also means it has the potential to match multiple types of decor, whether you are seeking something more rustic or you prefer a modern wood pergola. Depending on the wood species, it is typically tough on insects and rotting, as long as it’s maintained properly. Wood also tends to be the cheaper option when choosing materials for your pergola. Finally, people are attracted to wood because of its natural look.

Cons of Wooden Pergolas

While there are countless pros to wooden pergolas, it’s also important to be aware of the cons. As a pergola material, wood requires the most maintenance in order to keep its appearance appealing.

Failing to keep up with maintenance will shorten the lifespan of your wooden pergola. The maintenance may include repainting or restaining periodically. Even though it is usually the cheaper option, wood prices vary greatly depending on which wood species you desire. In addition, the availability of wood species also varies.

Choosing the Best Wood for Your Pergola

Another thing to consider when looking at wood vs. vinyl pergolas is which type of wood is the right fit for you.

When choosing the best wood for your pergola, you must consider where you are located, your budget, and the overall appearance of your pergola. Depending on these factors, you can narrow down your wood options.

Pressure Treated Wood Pergola

Pressure treated wood is the most popular choice when the budget is a big factor. Not only is it easy to work with, but it’s also available at almost every home improvement store or lumber yard. The process pressure treated wood undergoes makes it more resistant to rotting, decay, and insects. This makes it a durable choice for outdoor wooden pergolas. However, pressure-treated wood doesn’t have the same natural look as other wood species.

Cedar Wood Pergola

Cedar wood is one of the most commonly used woods for pergolas. It’s popular for its naturally-appealing appearance as well as its durability. Not only is it a stunning wood species, but it is naturally rot- and insect-resistant. Depending on where you are located, it may be more of an expensive choice and have limited availability. Yet, a cedar wood pergola will give your outdoor space a natural and rustic look.

Tropical Hardwood Pergola

Tropical hardwood has become increasingly popular for solid wood pergolas. Being widely known for outdoor projects, this wood species is not only admired for its natural beauty, but also for its density and resilience to the elements. Unfortunately, tropical hardwood tends to be the most expensive and the most difficult to get.

Composite Wood Pergola

Composite wood is a popular pergola wood material for many reasons. It is the most eco-friendly choice and requires the least amount of maintenance. While it is weather-resistant, one of the cons of composite wood is its artificial and manufactured look.

Vinyl Pergola Details

10’ x 14’ Traditional Wood Pergola With Canyon Brown Stain

While it hasn’t always been the most traditional choice, using vinyl as a pergola material has become increasingly popular over the years. The flexibility in choosing different colors while also requiring little maintenance has made vinyl pergolas the first choice for many people.

Similar to wooden pergolas, there are advantages and disadvantages to choosing a vinyl pergola for your outdoor space. Make sure you take into consideration all the factors before you make your decision. 

Pros of Vinyl Pergolas

The main reason people are attracted to vinyl pergolas is the little maintenance they require. Unlike wood, vinyl never needs to be repainted or restained and will withstand the turmoils of natural elements far longer than wood is able to withstand. 

Vinyl is also mold-, insect-, and rot-resistant. When it comes to choosing your vinyl pergola, you are given countless options for colors, making it easy to match your backyard theme or style. 

Cons of Vinyl Pergolas

Unfortunately, vinyl pergolas also have their cons. While you are given many options pertaining to color, you can never repaint vinyl. This means whichever color you choose, you must keep unless you get an entirely different vinyl pergola

The other reason people are against vinyl is that it may lack a natural look depending on what colors you choose. It doesn’t have the same traditional and authentic look that wood provides. Finally, vinyl tends to be the most expensive option. 

Choosing the Best Vinyl Pergola Color

When debating between wood vs. vinyl pergolas, you will want to pay attention to your backyard theme. One of the great advantages to choosing a vinyl pergola is the color options you can choose from. Depending on the theme of your backyard, you have the ability to decide which color scheme you want to incorporate with your pergola. 

The placement of your pergola should also play a part in choosing the best vinyl pergola color. Its surroundings and the type of style you are trying to master will influence your choice.

Woodgrain/Natural 

You can still have a vinyl pergola and keep the natural look in your backyard. Using a woodgrain or natural color will give you a pergola that blends in with the elements in your backyard. 

Soft Hues

Keep it simple with soft hues. Shades like ivory and pale colors will give your outdoor space a clean and calm look. Appealing to the eyes, and easy to match, incorporating soft hues is a perfect way to add to your outdoor scene. 

Make it Stand Out

If you want your pergola to stand out, make it the focal point of your outdoor space by choosing a vibrant color. This could mean choosing a nontraditional color or simply choosing a white vinyl pergola. The stark white will add a contrast to the natural elements. 

Two-Tone

Choosing one color can be hard, so why not choose two? You can pick two complementary colors to create a two-tone pergola. This is a unique way to incorporate more colors into your outdoor space without overwhelming the eyes. 

Pergola Designs: 3 Ways to Incorporate a Pergola Into Your Outdoor Space

When looking at wood vs. vinyl pergolas, you want to think about how you are going to incorporate your pergola into your outdoor space. There is no doubt adding a pergola will elevate your backyard, but you want to make sure you place it in the right area for practical reasons, as well as visual appeal.

Poolside Paradise

If you have a pool or hot tub in your backyard, a pergola may be the final touch to creating your personal paradise. No matter what pergola material you choose, having a structure to provide some shade and shelter will no doubt add to the perfect poolside aesthetic. 

Outdoor Dining

Outdoor dining is not only a nice change to your regular routine, but it’s a refreshing way to enjoy a meal with family or friends. Make your outdoor dining dreams come true by adding a pergola. You can keep a table and chairs underneath, and even add an outside kitchen to make cooking easier. 

Shady Hangout

Having a shady hangout outside makes your backyard even more appealing. Whether you have a patio or not, adding a pergola will allow you to create the perfect place to enjoy the outdoors. Placing patio or lawn furniture underneath will make being outside irresistible.


Create A Backyard Worthy Of Your Home

Check out Penn Dutch Structures’ selection of wood and vinyl pergolas to find the perfect one for you.

10’x14′ Traditional White Vinyl Amish Pergola With Superior Posts and White, Brown EZ Shade System
Traditional White Pergola

Purchasing the perfect patio furniture for your outdoor space can be satisfying and exciting for homeowners. This is why keeping that furniture in great condition is so important. As we begin to prepare ourselves for the cold winter months, we must remember that there is more to do than decorate the house for the holidays.

Learning how to protect patio furniture during winter is necessary if you want to keep your furniture looking new and lasting longer. The sooner you make winterizing your outdoor space a part of your transition into the cold months, the more time and money you will save in the future. 

Skip Ahead:

How to Store Patio Furniture Over the Winter

Many people wonder what to do with patio furniture in the winter. Oftentimes, we think all we need to know is how to store patio furniture over the winter. However, there are steps that should be taken before you begin the storage process. Preparing your patio furniture for winter can be broken down into 3 steps:

  1. Clean
  2. Coat
  3. Store

This process will vary depending on what material your outdoor furniture is made of. Properly preparing your winter patio furniture has many benefits in the long run. Doing this will allow your furniture to stay intact for years to come. 

Cleaning and Coating Outdoor Furniture Based on Material Type

The first step in learning how to protect patio furniture during winter is knowing how to clean it. There are multiple methods to use when cleaning your patio furniture, but each depends on the type of material it is made from. For example, after your furniture is clean, it may be beneficial to add a coat or sealant for certain materials. This will help protect your furniture from cold temperatures, as well as rain and snow. 

Wood Furniture 

Wood furniture must be sealed in order to keep moisture out of its cracks and ridges. If moisture seeps in, it may freeze when temperatures drop, causing the wood to crack. 

Using furniture oil and protective sealants can help prevent this from happening. Before applying sealants, it’s important that you thoroughly clean your furniture. To clean wood, simply: 

  • Mix warm water with a couple of drops of an oil-based soap.
  • Gently scrub with a soft brush or rag in the direction of the wood grain.
  • Allow it to air dry or dry with a towel.

Once your wood furniture is dry, you can proceed to do any work to prepare for the Spring season, such as sanding, painting, or staining. This is also when you will add your furniture oil for wood or an effective wood sealant

Teak Furniture

While teak is a type of wood furniture, it requires some extra care when cleaning. It is more weather-resistant and durable, but oftentimes it attracts mold and mildew. To clean teak furniture correctly, follow the steps below:

  • Combine 1 cup of vinegar with 1 gallon of warm water.
  • Use a soft brush to scrub the wood. 
  • Let it sit for 15 minutes before rinsing.
  • Allow to air dry or dry it with a towel. 

After the furniture is dry, you can apply Linseed oil or Tung oil to keep your teak furniture in the best condition. 

Plastic Furniture

Plastic furniture can become brittle when exposed to freezing temperatures. Repeated changes in temperature wear down the plastic making it crack or break. Before storing your plastic furniture, follow these easy steps:

  • Rinse off furniture with a hose.
  • Mix ¼ cup of mild laundry detergent in a gallon of warm water.
  • Gently scrub the furniture with a soft brush or sponge. 
  • Rinse again, and allow to air dry or dry with a towel.

Make sure your plastic furniture is completely dry before storing. This will keep it ready for the Spring when it will make an appearance again. 

Wicker Furniture

Wicker furniture can either be made of natural rattan or synthetic material (known as resin wicker). It’s important to know which material your furniture is made of because it will depend on how you clean it.  

Natural rattan wicker furniture needs extra care when washing because it tends to chip over time. True rattan should be washed as infrequently as possible to avoid any splintering or chipping. To wash, simply:

  • Mix a few drops of mild oil-based soap in a gallon of warm water.
  • Dampen a soft cloth and gently scrub the furniture.
  • Use a spray bottle to lightly rinse the soap off. 
  • Dry immediately with a soft towel. 

Synthetic or resin wicker is usually more durable because it has UV and weather-resistant coatings. You can clean this type of wicker by simply spraying it down with a hose. If it’s very dirty, you can follow the steps above. 

Aluminum Furniture

While it is mostly rustproof, aluminum furniture often contains holes to help drain water, which ends up allowing water to get in. This becomes an issue when winter temperatures fluctuate above and below freezing because the water inside will freeze and melt, making the frames weak. To clean your aluminum furniture properly and avoid this issue:

  • Mix a few drops of mild laundry detergent with warm water. 
  • Scrub your furniture gently using a soft brush, rag, or sponge.
  • Allow to air dry or use a towel to dry. Make sure furniture is completely dry before storing.

After your aluminum furniture is dry, keep an eye out for any scratches. You can touch them up with paint, and you can apply a coat of wax for extra protection. 

Wrought Iron Furniture

Since wrought iron furniture is known to rust, you should not leave it exposed during the winter months. While some iron furniture has rust-resistant coatings, other elements such as bird dropping can also damage the coating because of their acidic properties. 

Before cleaning your iron furniture, use fine-grit sandpaper to remove any rust. Follow the steps below to make sure you’re continuing the cleaning process correctly.

  • Mix mild soap with warm water.
  • Scrub the furniture, wiping it clean of any rust residue.
  • Allow to air dry or dry with a towel.

As you finish cleaning, you can touch up any paint scratches, as well as add a rust-neutralizer and thin coat of car wax for extra protection. 

Natural Stone Furniture

Most stones are porous, meaning they allow water to seep in. As temperatures freeze, the water will also freeze, causing cracks and fractures in the stone. The steps below will help you clean your natural stone furniture properly before you cover or coat it.

  • Rinse the stone with water to remove any dirt.
  • Mix a few drops of mild detergent with water. 
  • Scrub with a soft cloth or sponge.
  • Allow to air dry.

Once the stone is dry, you can apply a stone sealer to protect your furniture from stains, salt, and moisture seeping into its pores and freezing. 

Outdoor Fabrics

While outdoor fabrics are designed to be weather-resistant, they can still be damaged by rain, snow, and ice. To clean your fabrics before storing them:

  • Mix ¼ cup of mild laundry detergent with 1 gallon of lukewarm water.
  • Use a soft brush or rag to get out tough stains.
  • Allow the solution to sit for 15 minutes before rinsing with a hose.
  • Allow the fabrics to air dry in the sun and do not store until completely dry.

Always check the manufacturer’s instructions before washing. Some curtains and removable covers can be machine washed in cold water. Make sure if you do machine wash any of your outdoor fabrics that you do not place them in the dryer. 

Patio furniture set-up with cushions.
It is critical to protect patio furniture with fabrics during the winter.

3 Ways to Store Patio Furniture in Winter 

Cleaning and coating are the first two steps in learning how to protect patio furniture during winter, but you must also figure out how you would like to store them. While some of the more durable furniture can be left exposed to the cold, it’s usually best to keep them protected. Here are three simple ways you can choose to do this. 

1. Plastic Wrap or Tarps

Plastic shrink wrap is an easy and common way to protect your patio furniture. You can either buy the plastic wrap and do it yourself, or you can hire a team to cover it for you. Keep in mind that plastic isn’t breathable. This means if water gets through it won’t have anywhere to escape. Mold and mildew are often a result of trapped water. 

Using a tarp, you will face the same breathability issue as the plastic wrap. The water that may enter won’t be able to evaporate. In order to avoid this, you will need to use multiple bungee cords or ropes to secure the tarp. Make sure you are not using too large a tarp either, otherwise it could catch air and blow off your furniture. 

2. Patio Furniture Covers

Patio furniture covers for winter ensure that rain, snow, ice, road salt, debris, and more will not ruin your outdoor furniture during the cold months. You also are able to leave your furniture in the yard making it easier and less of a hassle when preparing for winter. 

In order to avoid mold and mildew issues, choose a cover that is made of breathable fabric and includes mesh vents. Make sure your cover also has 1-2 inches of space between the bottom hem and the ground. Doing this will help airflow and allow any moisture to evaporate. 

Keep an eye on your furniture during the winter months, brushing off any snow or water build-up that appears on your covers. Pooled water has a harder time evaporating and proves to be more of a risk when it comes to mold and mildew. 

3. Indoors, Garage, or Shed

Bringing your outdoor furniture inside is not a necessity, but if you have room in your garage or shed, the extra protection won’t hurt. Even if you bring your winter patio furniture inside, you should keep some kind of covering on it. Doing this will keep it safe from water leaks and dust. There are simple steps you can take to winterize your shed, making it easier to use for storage in the cold months. 

It may require some effort, but properly protecting your patio furniture during the winter is worth it. By cleaning, coating, and storing it properly, you can prolong its lifespan and keep it looking like new. Additionally, it will make it easier for you to ready your patio for spring.


Want the Absolute Best Storage Option?

Penn Dutch Structures offers a variety of storage options from storage sheds to detached garages. Find the perfect storage solution for you by browsing our outdoor structures.

Single Red Wooden Dutch Style Garage