As you start to shop for a new outdoor structure, you’ll likely come across little details that need to be decided. What type of siding is best? What color trim will you have for your windows? And even, what type of roofing should I choose? 

All these decisions can become overwhelming. In this blog, we’ll dive into the details of architectural shingles vs. 3-tab shingles and which is better for your next outdoor structure. That way, you can feel confident you’re making the right financial and visual decision.

What Are Each Type Made Of?

Let’s start our comparison with each material type. A significant difference between the two shingles is the quality of the materials. In short, you’ll find that architectural shingles are of a higher quality than 3-tab shingles.

3-Tab Shingles

These shingles used to be the standard for roofing but are now less likely to be used by home builders. This is because the lower cost of 3-tab shingles is often outweighed by their disadvantages. 

3-tab shingles are made out of asphalt and adhesives with a fiberglass backing. They are relatively thin and measure about 3/16 of an inch. When they are installed, they are doubled up to create better durability, making them about 6/16 of an inch thick. 

Since the shingles are all the same dimension and depth, you’re going to get a very flat-looking roof. Because of this, these shingles are more prone to blowing away from strong winds or buckling over time.

Architectural Shingles

On the other hand, architectural shingles are growing in demand and are quickly becoming the standard material for many new home builders. Unlike 3-tab shingles, they are most recognized for having a multi-dimensional design. 

Another reason for their increased popularity is architectural shingles are made with heavier fiberglass, ceramic-coated granules, and water-resistant asphalt. With these enhancements, the cost of architectural shingles is higher, but ultimately more durable and aesthetically pleasing. 

The heightened durability of architectural shingles means that you are less likely to require costly maintenance repairs or replacements down the road. On average, this type of shingle can last anywhere from 20 to 30 years if it is well-maintained.

How do Costs Differ?

When you start shopping between the different types of shingles, you’re going to notice a bit of a cost difference. The cost of 3-tab shingles is less than the cost of architectural shingles, but again, you’re going to get what you pay for. 

Architectural shingles are more durable and less susceptible to warping, peeling, or buckling. They are also more resistant to intense weather and strong winds. With 3-tab shingles, you may find yourself having to make repairs or replacements after severe storms.

a large shed with architectural shingles and red shutters and trim.

Pros and Cons of Each Shingle

For each type of shingle, there are advantages and disadvantages. Below, we’ll list out each so you can have a better apples-to-apples comparison.

Pros and Cons of 3-tab Shingles

Pros: 

Cons:

  • Flat layer shingles that are thinner and weigh less.
  • More prone to blowing away, curbing, or buckling.
  • Need to be replaced more often — lasts an average of 12 – 15 years.

Pros and Cons of Architectural Shingles

Pros: 

  • The dimensional design adds more visual appeal.
  • Designed with a thicker, sturdier mat, finer quality asphalt, and stronger adhesive.
  • The extra weight provides more strength against wind lift.
  • Rated to resist higher wind speeds — up to 130 mph.
  • More color options are available.
  • Carry a longer warranty — 20 – 50 years.

Cons: 

  • Have a higher upfront cost.
  • Since they are heavier, some structures may require additional installation support to hold this type of roof.
a red barn with a metal roof and a cupola on top.

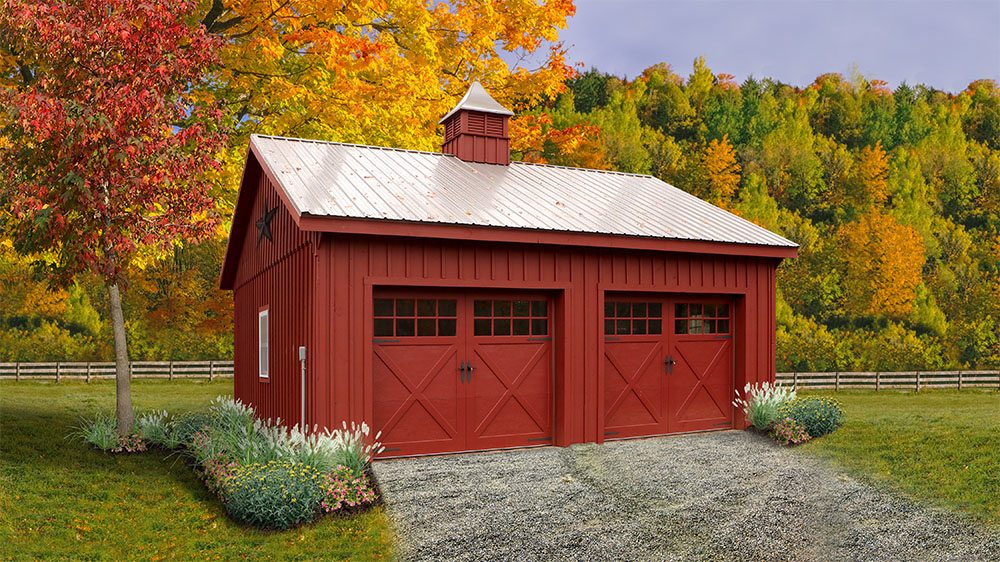
Metal Roofing Options

Another roofing option that we haven’t mentioned, but is offered and popular, is a metal roof. This style of roof is going to provide an entirely different look compared to both architectural and 3-tab shingles. 

Metal roofing is the most expensive option, but also lasts the longest compared to architectural or 3-tab shingles. 

At Penn Dutch Structures, we offer standing seam metal roofing for all of our products. Panels of standing seam metal roofing feature a raised seam that rises above the initial level of the roof. This also creates texture and dimension for your roof.

Another style of metal roofing is ribbed metal roofing. The panels are ribbed or corrugated, with wavy U-shaped curves. The main difference between ribbed metal and standing seam metal panels is the position of the fasteners. 

They are exposed on ribbed panels and hidden on standing seam panels. This means a ribbed metal roof may require additional maintenance. They are, however, a less expensive roofing option when compared to other metal options.

There are other advantages to metal roofing, including:

  • Fasteners are not exposed to UV, moisture, and weather elements. Ultimately this means there is less wear exposure, less water damage,  and a cleaner appearance.
  • Proven to withstand extreme weather.
  • Panels expand and contract better in hot and cold temperatures — there is less chance of waving or rippling of the metal.
  • Cleaning and maintaining your metal roof requires low maintenance. We recommend cleaning your roof every so often to clear debris and dirt from the top. You can use a simple water and detergent solution.

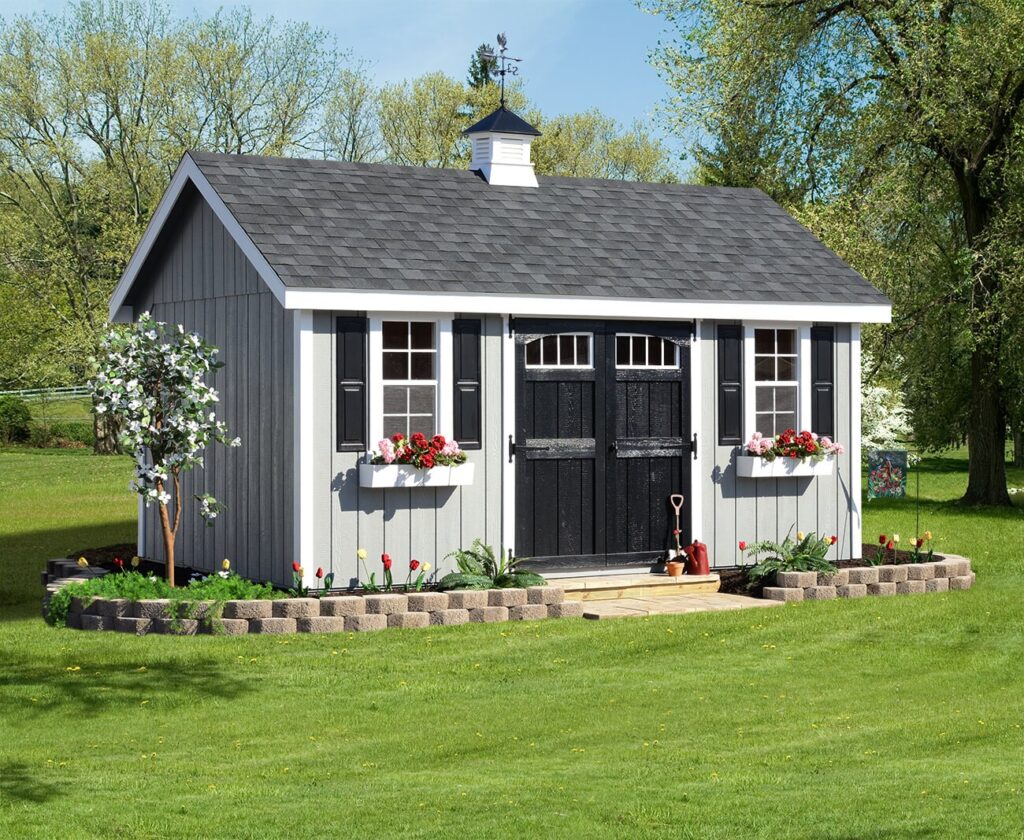
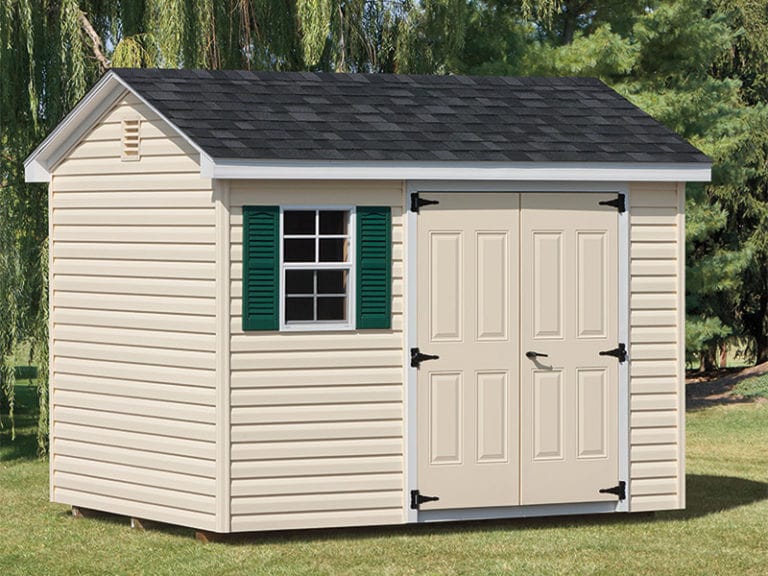
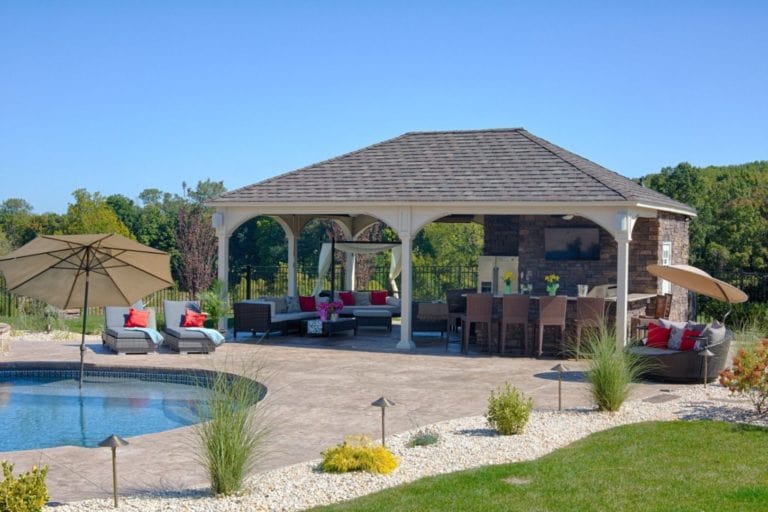
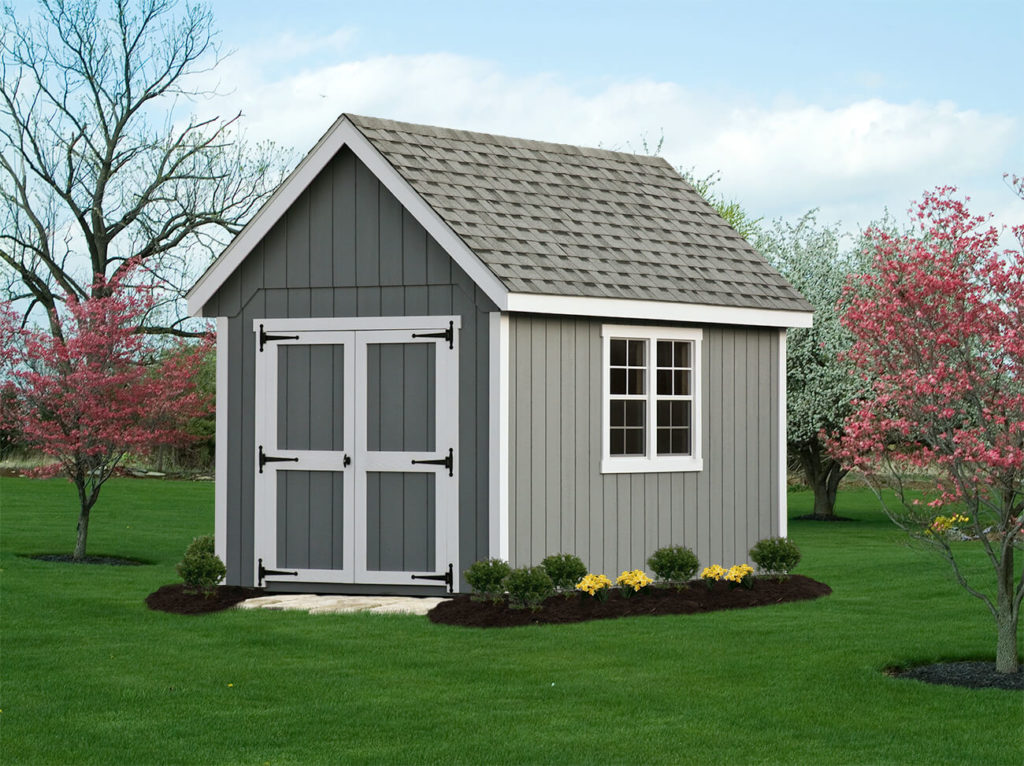
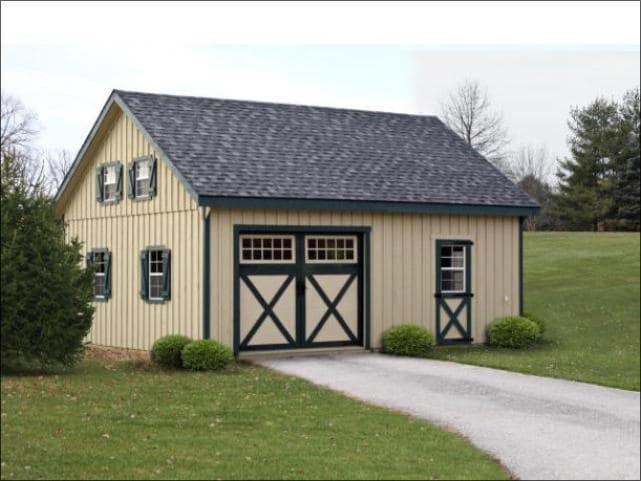
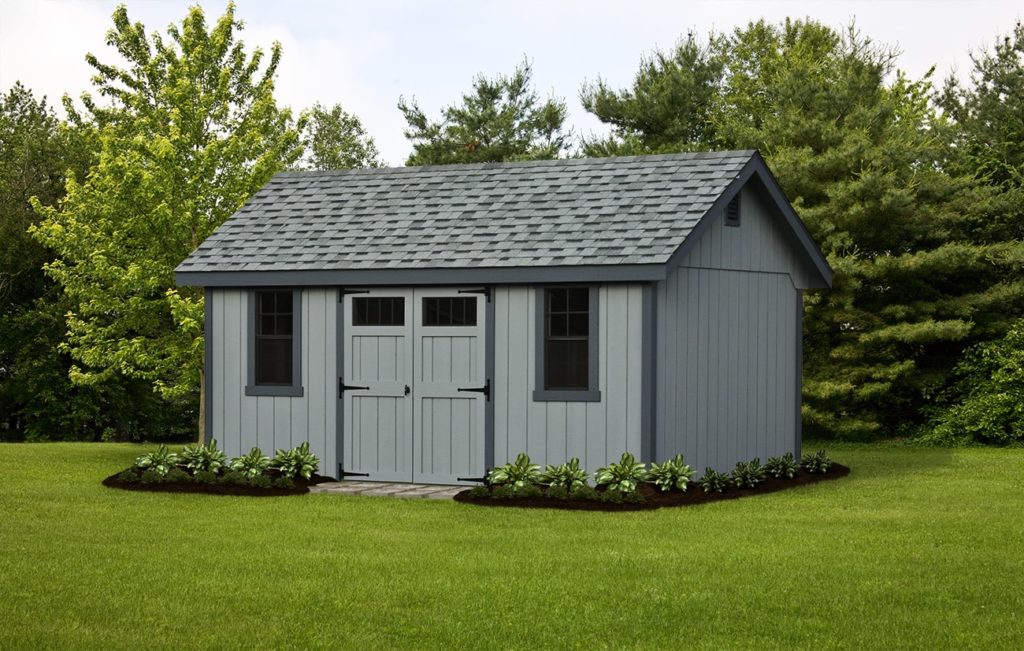
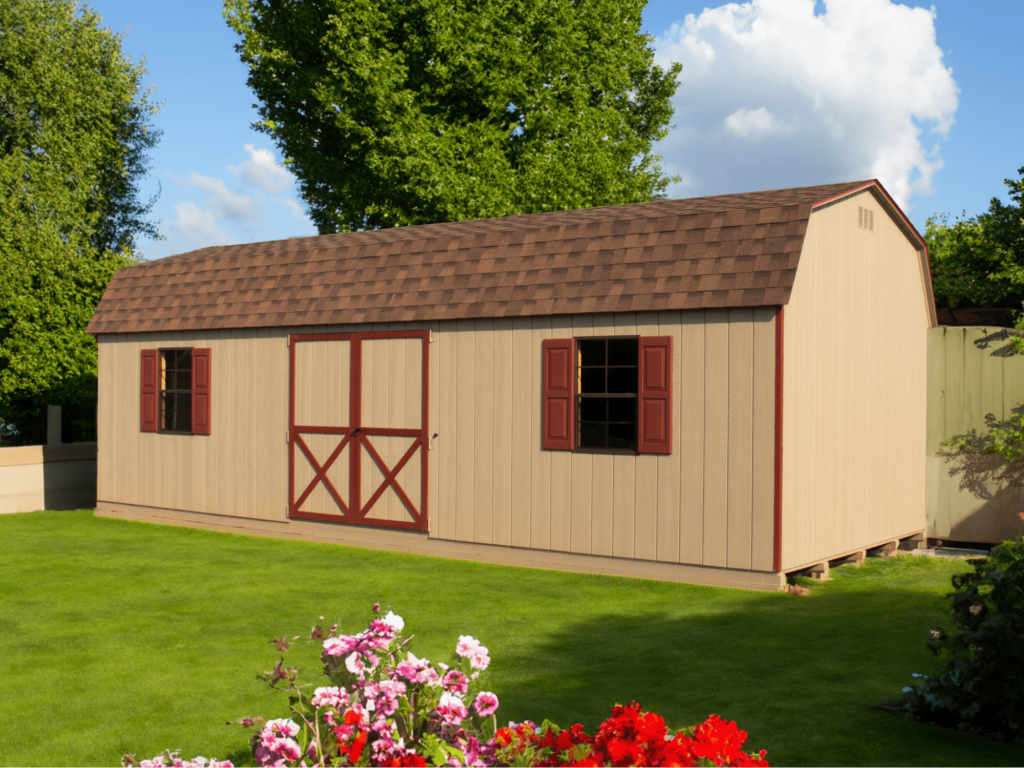
Choosing Styles & Colors of Roofs with Architectural Shingles

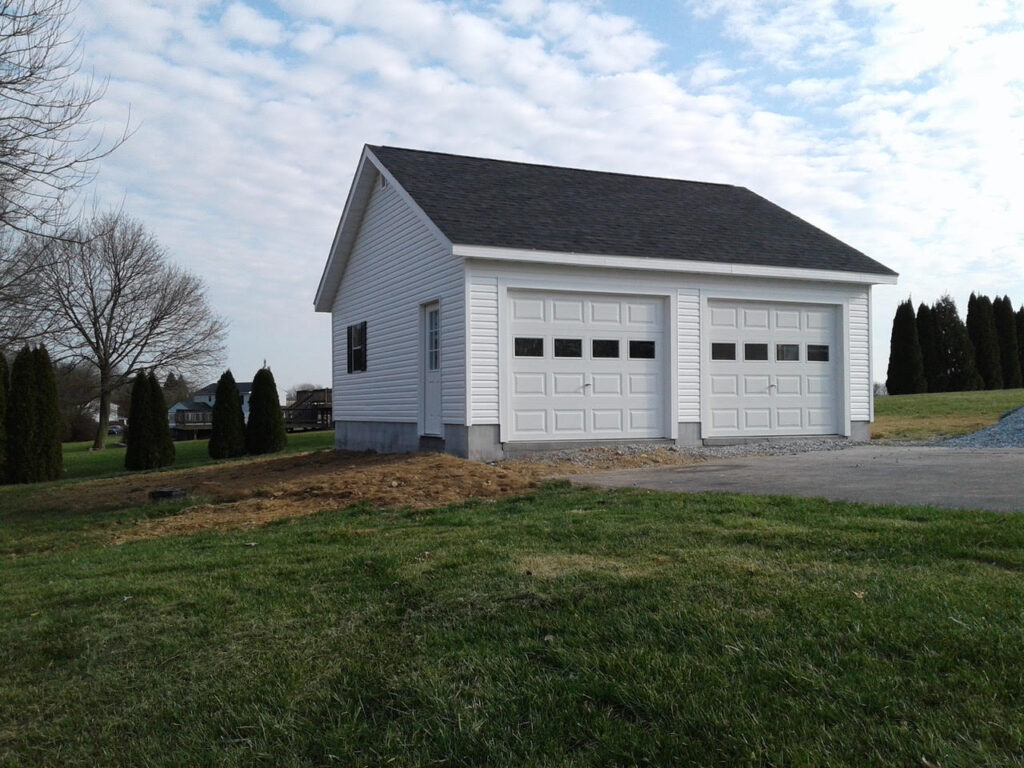
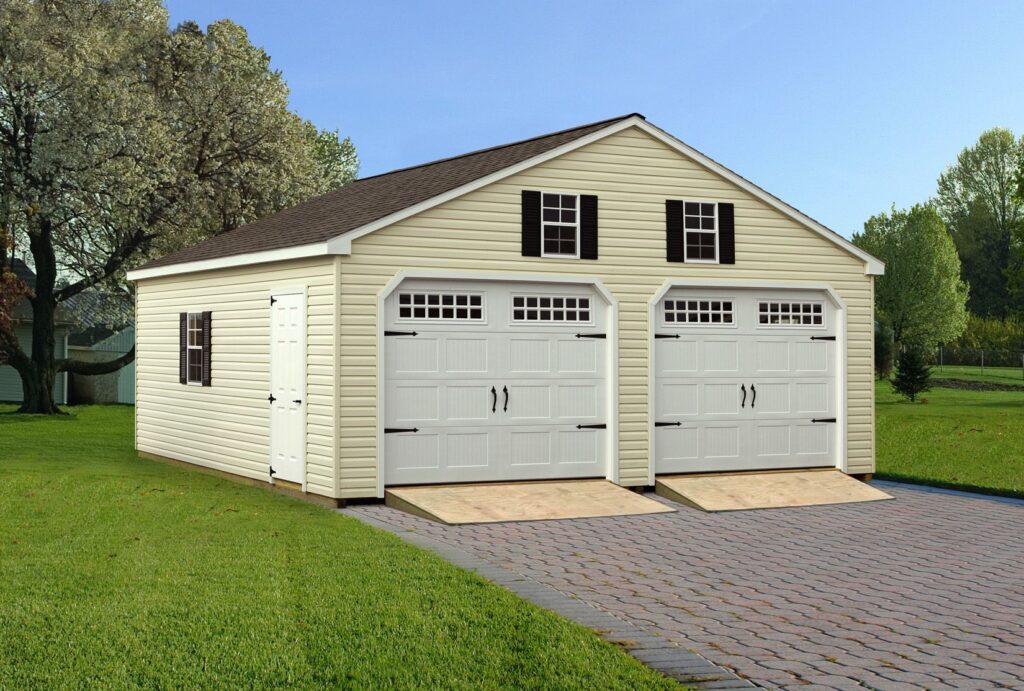
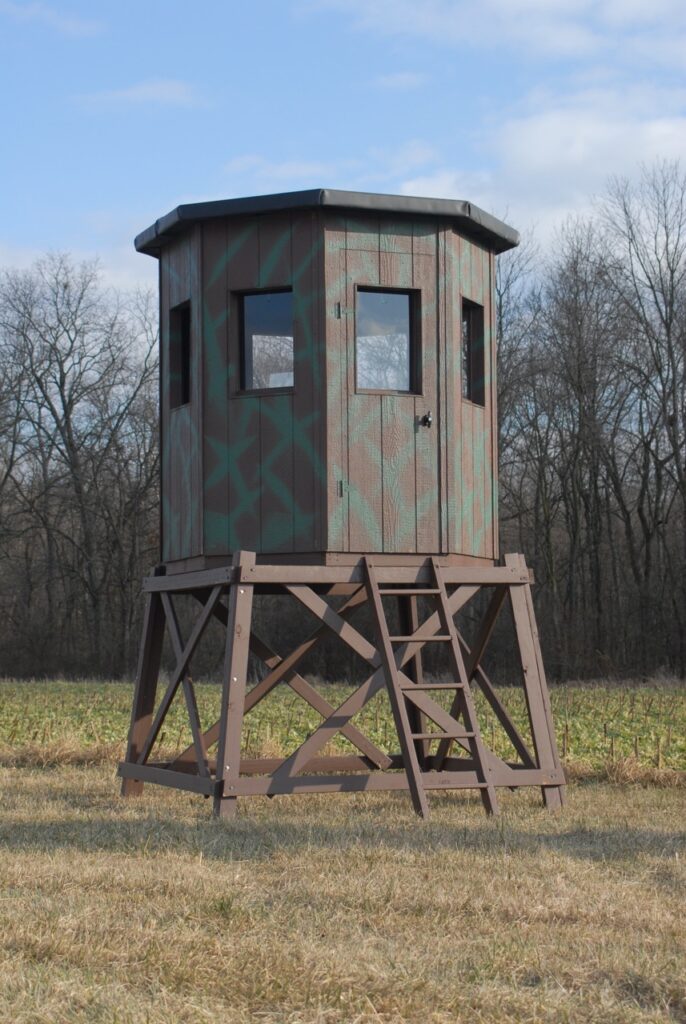
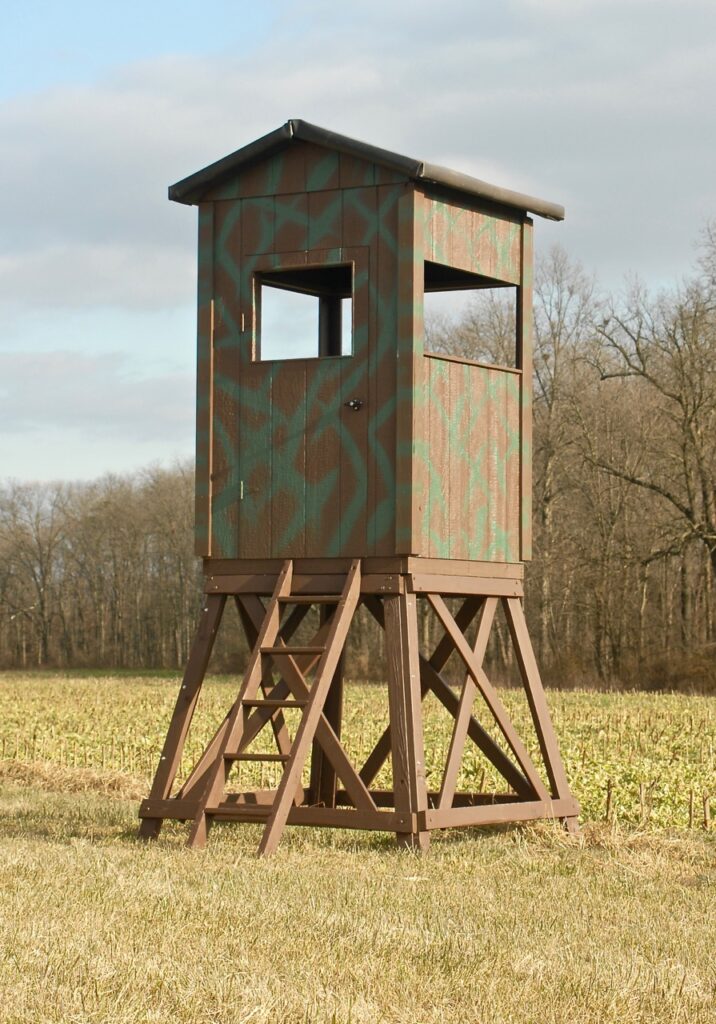
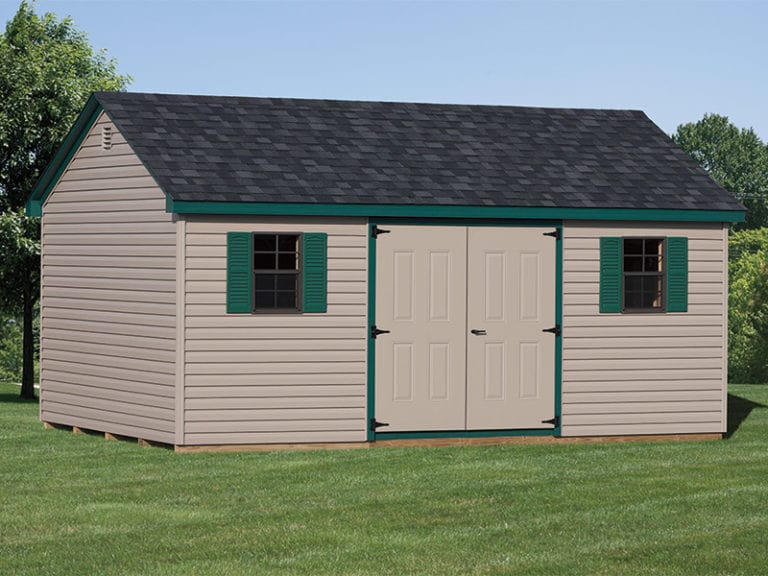
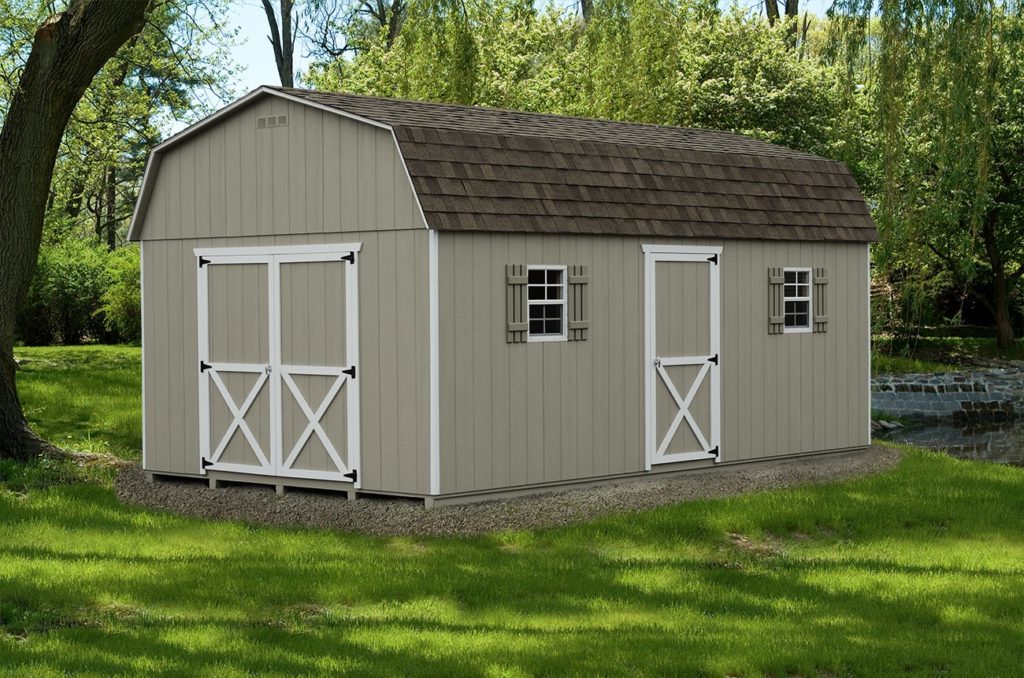
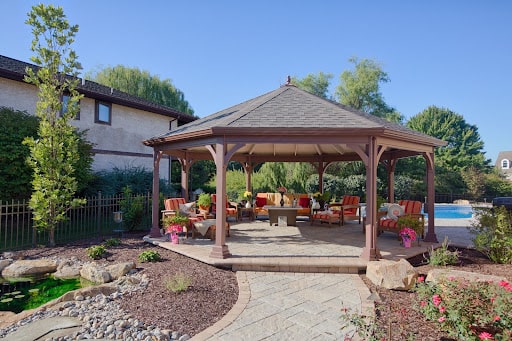
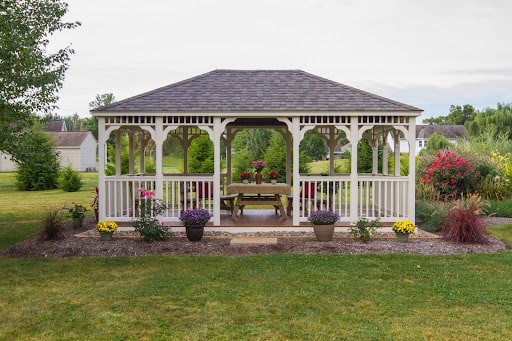
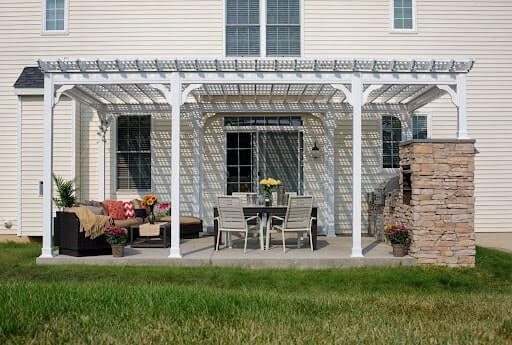
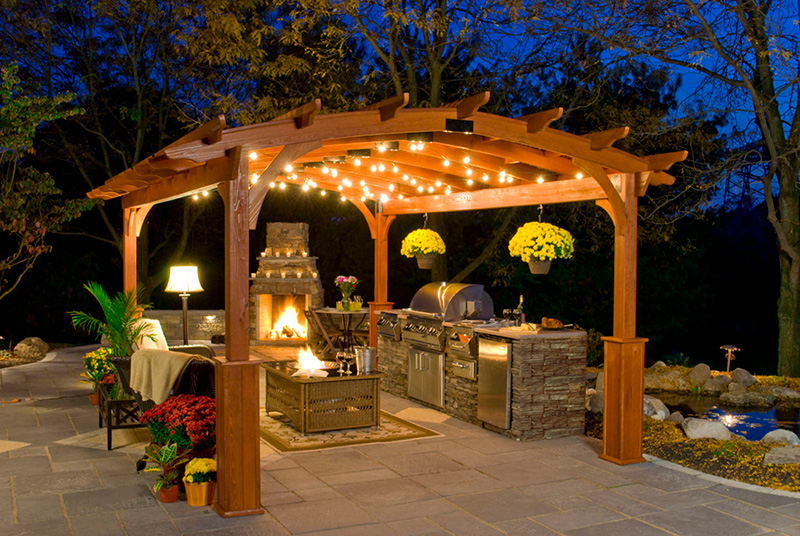
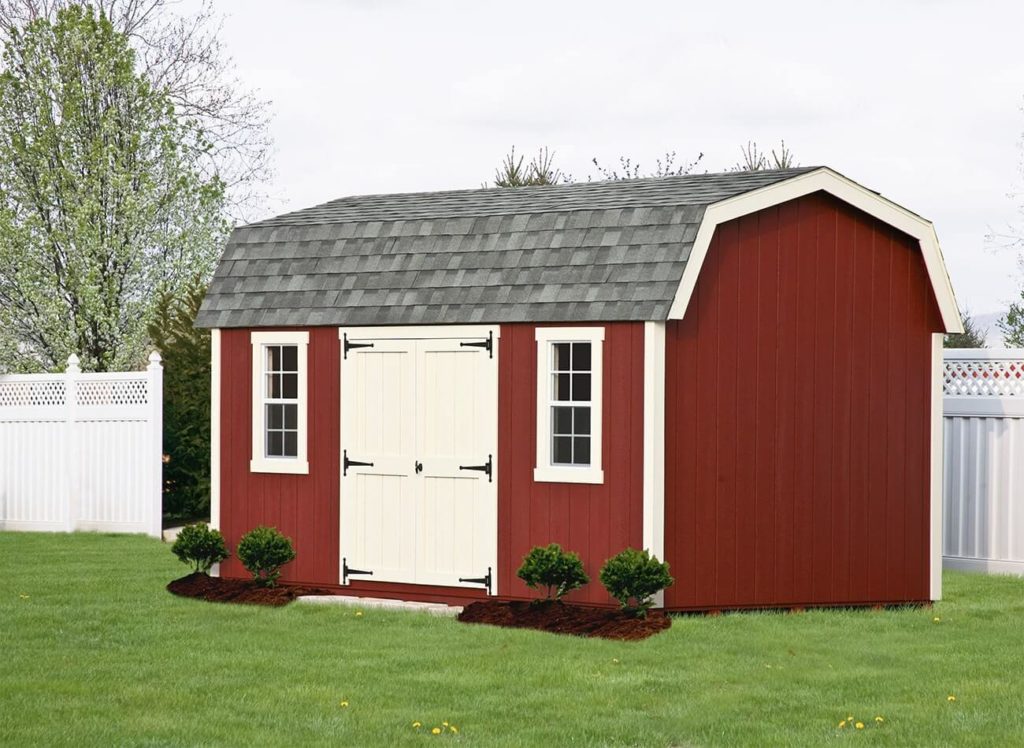
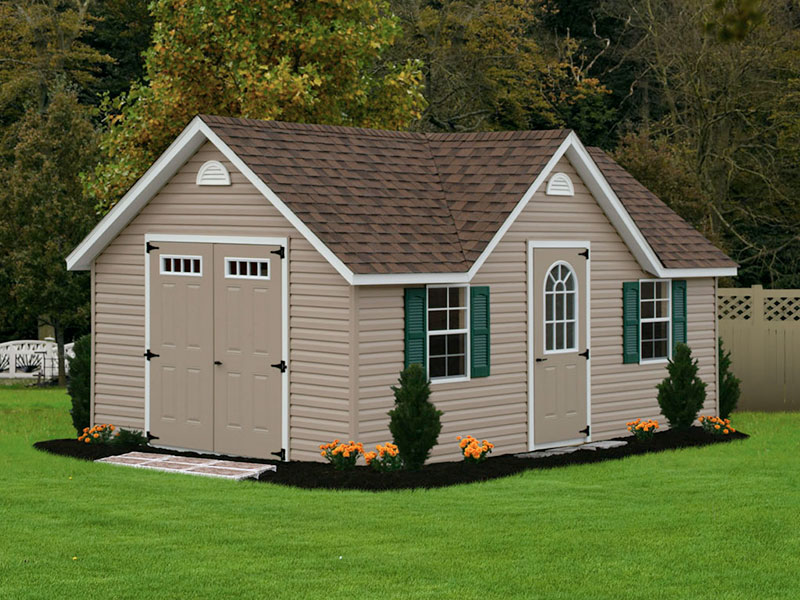
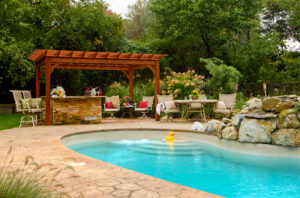
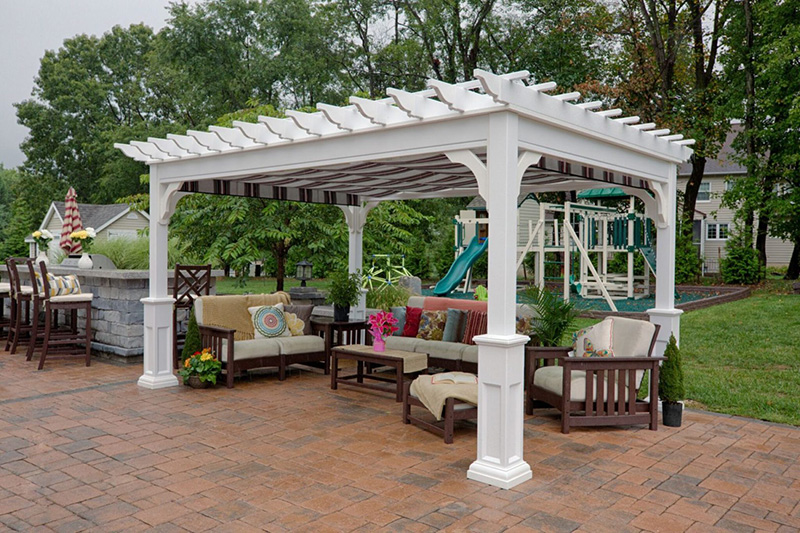
Roof styles are more than just for your home, you can also choose different styles and architectural shingle colors for your shed, garage, horse barn, log cabin, or gazebo. At Penn Dutch Structures, you can customize your structure to match the rest of your home’s aesthetic.  

Here are some factors to take in as you are deciding what architectural shingles color to choose. Consider your home’s style, the color of your structure’s siding, and the location of your outdoor structure. 

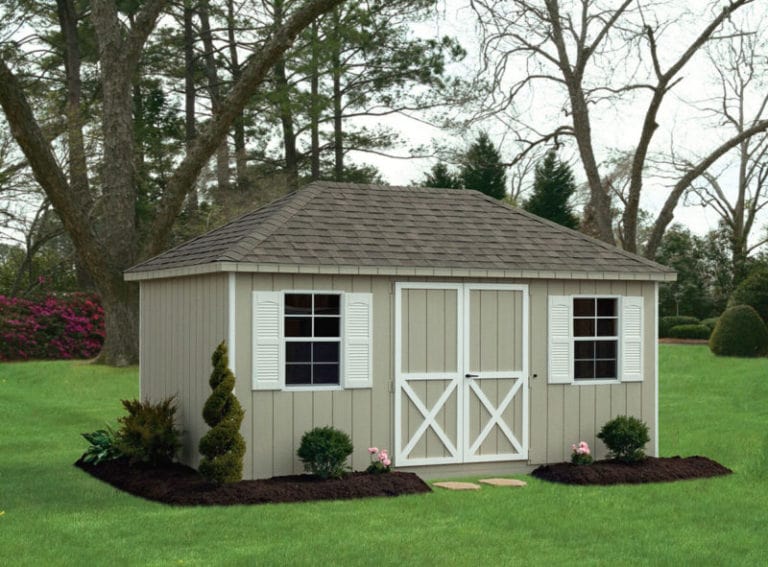
For example, a black, or darker color roof will attract heat. So, if your shed is sitting in the sun all day, the things within the shed may get more heat and rise in temperature with a darker roof. 

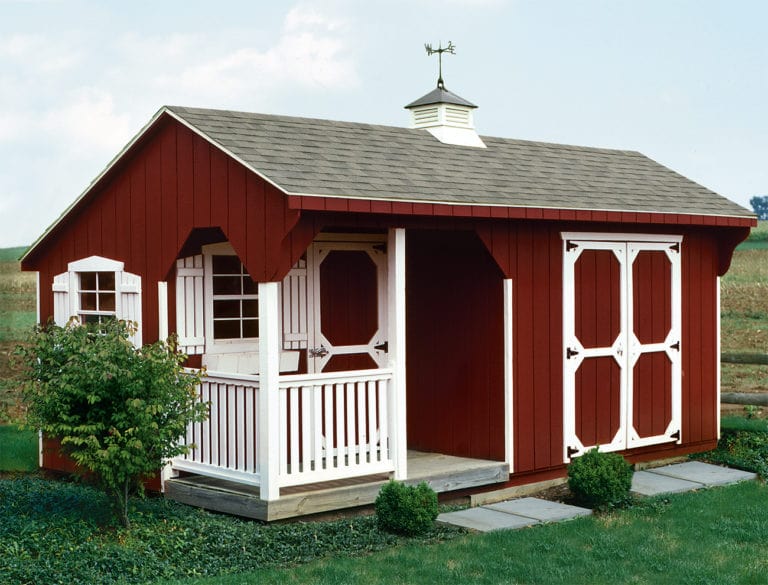
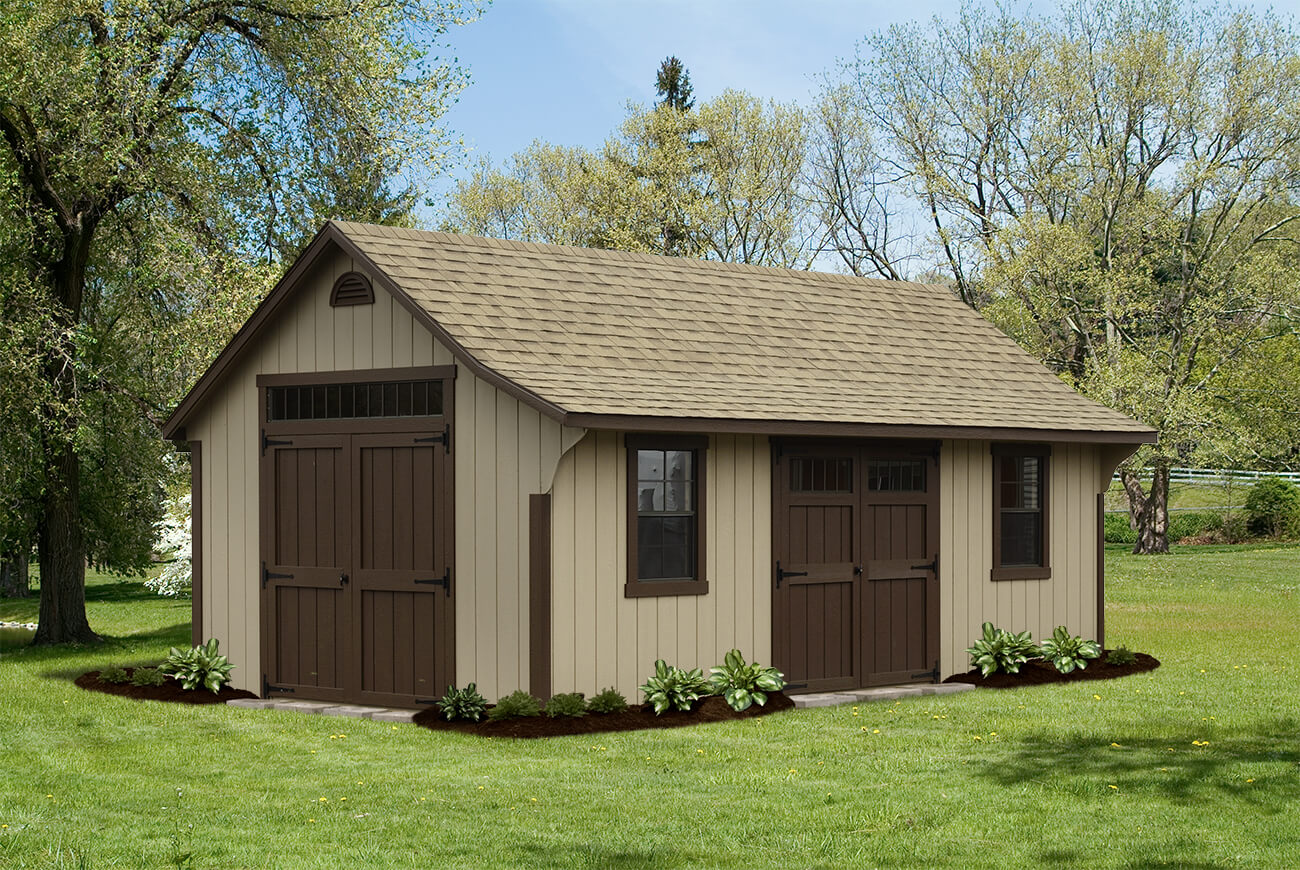
Another factor we mentioned above is your home’s style. What design elements are incorporated into your home that you would want to continue to use in your outdoor landscape? Are there specific colors that should be used on your exterior structures? 

Ultimately, you’ll have more vibrant color options with metal roofing, but shingles can give you a neutral and earthy tone to match your landscaping. Our team can help provide insight on what shingle color will look best with the rest of your structural elements, such as trim, siding, and any door colors. 

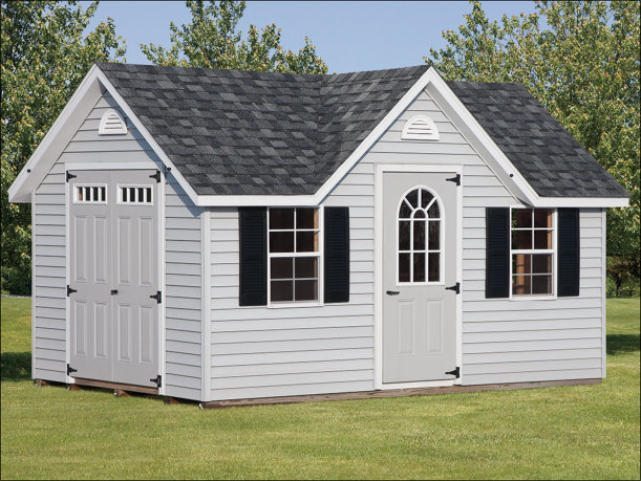
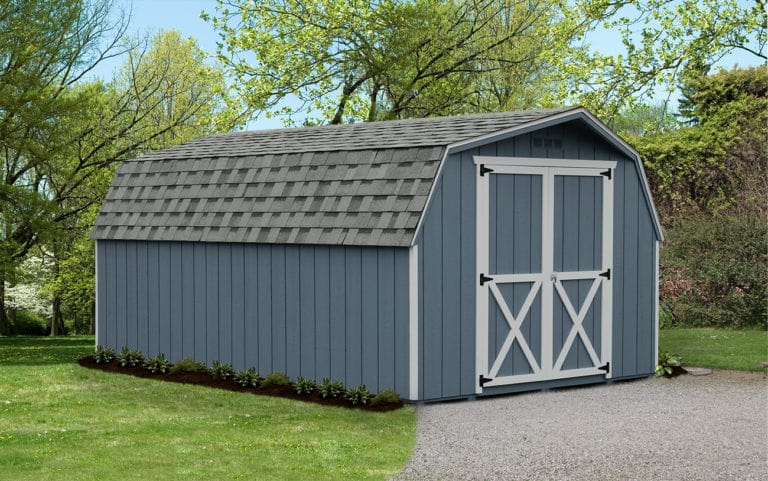
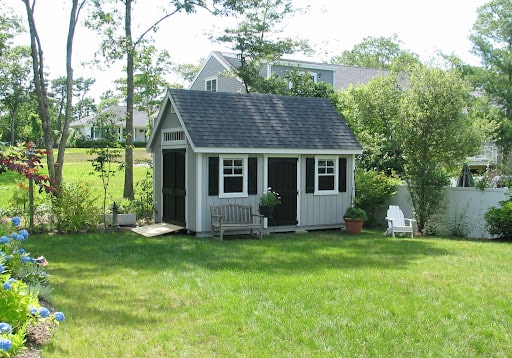
The shape of the physical shingle will be the same, but you can get various outdoor structures that come in different shapes that complement the existing style and lines of your home. 

By adding customizations and personal touches to your outdoor structure, with even the smallest details such as architectural shingles, you will boost your home’s curb appeal and contribute to an aesthetically pleasing landscape.


Get The Best Value

Knowing the difference between architectural shingles vs. 3-tab shingles is essential. Looking for an exterior upgrade? Browse all of Penn Dutch Structures’ backyard structures.

So you’ve just bought a new garage. Your yard feels organized, and your vehicle is tucked away from the weather elements. But how are you protecting your items and ensuring your home is safe?

In previous blogs, we’ve talked about how to secure your sheds, but there are a lot of valuable items in your detached garage that should be just as protected. 

Below, we’ll highlight some recommended tools and brands, and tips that help enhance your detached garage security and make you feel safer.

Placement of Your Detached Garage

As you’re preparing for the installation of your detached garage, consider where it sits in terms of the street. Is it easily accessible? Are people walking by able to see into the space? You don’t want to be advertising what’s inside your garage. 

Your garage should be placed for practical use, a place where you can easily access it and use it regularly. But, it’s important to make sure the detached garage can’t be accessed easily by neighbors or people walking by.

Securing the Outside of Your Garage

The first step in securing your garage is to check the outside surroundings of the area. This is an important step to complete because the outside of your home can provide a lot of indications and information about the security of your home. 

A potential intruder will be looking and scanning the property for certain boundaries that would hinder them from getting in. If they see these products, they will likely be turned away from trying to get on your property.

Exterior Lighting

Adding light to your garage and the surrounding area makes it less vulnerable to intruders. Along with enhancing your security, exterior lighting can also add an elegant layer to your landscaping. There are a variety of different lighting options and styles that can match the rest of your home, so they don’t stick out like a sore thumb. 

We’d also recommend installing motion sensor lighting so whenever movement occurs around your garage, the entire area will light up. 

As an additional security tip, you can install interior lighting as well. That way, if something, or someone, does get into your garage, the inside will light up and you can be alerted of any activity.

Security Camera

Security cameras for detached garages are able to let you see what’s happening around the area, even when you’re away. This helps you feel more comfortable when you’re leaving your home for an extended period of time. 

There are a lot of options for security cameras or security systems for your detached garage. You should find something that works for your yard and can effectively capture the necessary landscaping to ensure your home is secure.

Alarm System

The final product that helps you have a well-rounded security system and increases protection for your home is an alarm system. An alarm system has the ability to give you an immediate notification or alert if someone is lurking around your home. 

Just like a security camera, this system can provide assurance that your home is well protected even when you’re away. 

Although a majority of these products are used for an intruder, exterior lighting, security cameras, and alarm systems can also help you if an animal is getting into your detached garage. They can sometimes be just as damaging to your home.

a white garage with two white garage doors.

Strengthen Your Garage Door Security

Now that you have a list of security products you can use to protect your home, we’ll move into additions you can consider when designing your garage to enhance its security. Having a secure garage door and surrounding area creates a barrier for anyone looking to get into your garage.

Using a Garage Door Opener

A common device homeowners use to ensure they have a secure garage door is a remote control opener. This product also increases convenience because you can open your garage door while in your car, on a mower, or with your hands full. 

It also makes it extremely difficult for someone to manually open your garage door. Which is ultimately going to make your door, and home, more secure. To take your security up a notch, there are smart garage door openers available. They will alert you when your garage door opens so you can be aware of any irregular activities.

Decorating with Windows

As we mentioned earlier, you don’t want to advertise to the world what’s inside your garage space. But that doesn’t mean you shouldn’t have windows for your decorative style. The question is, how do you create a balance between security and aesthetics?

You have a couple of options when it comes to increasing your window security. You can purchase a security or tinted film to put on your windows or add blinds or curtains. Blinds or curtains can add a pop of color or be more in tune with your decorative style to your garage. Both options will obscure people’s view of your space.

a yellow garage with two white garage doors and matching windows above each garage door.

6 Additional Tips to Enhance Your Detached Garage Security

The last section of our detached garage security guide will leave you with 5 tips we recommend you start implementing today. 

#1. Never Leave Your Garage Door Open and Unattended

If you’re going to be away from your garage for a long period of time, make sure you’re closing and locking your garage door. Even in the Summer, when you’re working outside and going in and out of the space, it’s best to be aware of your surroundings and have your garage door closed if you’re not in a direct vicinity. 

When your garage door is open in broad daylight, it allows people walking by to easily see into the space and view any valuables that they could be interested in.

#2. Keep Your Garage Organized

Now, let’s take that first recommendation a step further. Let’s say someone does see into your garage and notices that everything is just kind of thrown in there and not organized. They may be more likely to take something from a messy garage. 

By keeping the interior of your garage organized and well-maintained, it gives off the impression that you know what’s in your garage space, and where. So, you’ll be more likely to notice and report something if it goes missing.

#3. Regularly Change Your Garage Opener Code

Previously, we mentioned the benefit of implementing a remote garage door opener to enhance your detached garage security. This is a great idea, but you should regularly change the code in case it falls into the wrong hands. 

Let’s say you’re going on vacation and have someone you trust house-sitting. If you give them your code, make sure you immediately change it once you’re back. In normal circumstances, we recommend changing the code at least twice a year.

#4. Include Your Garage Under Your Homeowners Insurance

Luckily, all garages, detached or attached, are included in your homeowner’s insurance. Your detached structure will be under Coverage B. This is important to have so that in case of a break-in or robbery, you can get money for the damages.

A tan garage with green trim and small shrubs surrounding the base.

#5. Add Plants and Trees to Add Privacy to Your Home

This can be a visually appealing and natural way to make your home feel more secure and private. Thick hedges, tall trees, and vines can obscure the view into your backyard and give neighbors and people passing by less motivation to explore your home.

#6. Think Like a Robber

The last recommendation we have is to think like a robber. This is a proactive way to keep your home protected. Every so often, do a scan of your landscaping and backyard to see if there are any holes in your security. 

You can ask yourself the following questions.

  • Is there an easy way someone can see into my garage from the road?
  • How can someone get into my garage? Are those areas secure?
  • Who knows the code for my garage? Is it time to change it? 

It’s crucial that you invest in detached garage security and you’re taking the necessary steps to keep your items protected. Although there will be upfront costs, in the long run, you’ll feel more confident in knowing your valuables are safe.


Still think your garage is too unsafe?

Penn Dutch Structures offers a wide variety of garage doors that are built with safety and security in mind.

An elevated hunting blind is a permanent, enclosed structure raised 5–10 feet off the ground, offering 360-degree visibility, scent concealment, and weather protection. Unlike temporary tree stands, they are ideal for private land, rifle hunting, and youth hunters due to increased safety and stability.

Hunting is a long-held pastime that many people use to provide food for their families or build special bonds between generations. In South Central and Southeast Pennsylvania and Western Maryland, this includes fowl and deer hunting. People appreciate the tradition and skill that are involved in hunting. 

Whether bow hunting or rifle hunting, this blog outlines the benefits of utilizing elevated hunting blinds for a successful hunting season.

Tree Stand vs. Elevated Hunting Blind

Before we dive into the benefits of elevated hunting blinds, you’ll first need to make the decision of whether you want a tree stand or an elevated hunting blind. The biggest difference is an elevated hunting blind sits on the ground, while a tree stand sits in a tree

One of the downfalls to tree stands vs. elevated hunting blinds is they can’t be as secure or as structurally sound. It’s harder to find a strong tree that supports your weight, hunting gear, and tree stand. On the other hand, an elevated blind is a more permanent, secure structure. 

A benefit to tree stands is that some are made to allow hunters to be more mobile and adaptable so you can quickly change areas if necessary. Lastly, both tree stands and hunting blinds can allow for 2-man options, or be made for just yourself.

Tree Stand vs Elevated Hunting Blind Comparison Chart

FeatureTree Stand ​Elevated Hunting Blind​
Ground ContactMinimal (tree-attached)Ground-based platform
Scent MaskingLimitedHigh (with materials + pre-season setup)
ComfortExposed to elementsEnclosed, weatherproof
VisibilityHigher risk to animals (open silhouette against sky, movement at eye level) Lower risk to animals (above deer eye level, enclosed walls hide motion)
InstallationTree-dependentPermanent, customizable

Benefits of Elevated Hunting Blinds

All hunting blinds have the advantage of protecting you from the elements, providing a warm space to wait out your hunt and space to keep your equipment dry. Here are additional benefits you’ll find when using an elevated hunting blind.

Makes You Less Visible

An elevated hunting stand not only keeps you out of the eye level of deer and other animals, but it also gives you a better view of the area so you can get a full picture of your surroundings. When you’re on the ground, you may be impaired by bushes, fallen trunks, and leaves. 

With an elevated view and windows all around your blind, you get a 360-degree view of the area. So you’re aware of everything going on from every angle. This gives you a great advantage to see any and all opportunities for a great shot. 

Finally, our elevated hunting blinds come in camouflaged designs to better blend into the outdoors and keep animals from spotting your presence. Within your hunting blind, you don’t have to be as conscious of your movements and sounds you make as you’re shuffling around.

Conceals Movement

Whether you’re loading a bow or positioning your rifle, hunting blinds help conceal the slight movements you make. Which includes movements that seem natural to you, but can cause an animal to become more alert of your presence. 

Deer have the ability to detect the slightest movement 4 times faster than a human being. So, even the tiniest and quietest movements will put a deer on edge and make them more aware of the surroundings.

Masks Your Scent

Animals are immediately going to recognize an unknown scent and stay far away from it. The human body itself produces a lot of VOCs, or natural smells that can be picked up very easily by an animal. In order to avoid this aversion, protect yourself within an elevated hunting stand. 

Many blinds are constructed with scent-blocking materials which limits one of an animal’s keenest senses. We also recommend installing the blind at least a month prior to hunting season and covering the base of your stand with branches, leaves, and brush. This helps protect the new scent and allows deer and other animals to get comfortable with it prior to hunting season.

Octagon Elevated Amish Built Deer Blind

Remains in Place

As we’ve mentioned above, even the slightest movements will make an animal more aware of its surroundings. In an elevated hunting blind, you’ll be sitting and hunting in a permanent structure so you won’t have to be shuffling around and creating lots of movement. 

Since it’s a permanent structure, animals eventually become complacent to your presence, and the hunting blind, so it’s no longer viewed as a threat. The hunting blind will become a natural element in the environment and animals won’t give it a second thought. 

With that being said, make sure you’re doing your research and finding the right spot for your elevated hunting stand. Scout out paths and travel habits, as well as sleeping and eating patterns. This research will help you be proactive and ultimately more successful during your hunts. 

Also, by investing in a permanent structure, you can put it in a secure and secret place near a log cabin or hunting cabin for even more convenience.

Structurally Sound

Quadpod stands are used in many elevated hunting blinds and are structurally sound and a great choice when safe trees are not as readily available to you. And as we’ve discussed already, hunting blinds are a more permanent structure and ultimately the more reliable choice.

Makes Hunting More Comfortable

Hunting days are long, and in order to be successful you need to be as quiet as possible. Sitting perfectly still and quiet on the ground or up in a tree can become quite uncomfortable. Wait for the right shot and stay comfortable in an elevated hunting stand. 

Also, you must consider the different weather elements. Throughout the day, you may experience rain, wind, or snow. It becomes an unfavorable experience if you’re out in the open. An elevated hunting stand has a secure roof and siding so it better protects you from the weather.

Elevated Hunting Blind Designs

There are a couple of different heights and shapes that your elevated hunting blind can come in. The height that works best for you will depend on where you’re hunting and your comfort. The shape depends on the area you want to install it in and what works best for you. 

Your blind should be high enough where you’re not at eye level with animals but make sure it’s not too high where you feel the effects of wind or aren’t comfortable being that high off the ground. 

You will also need to consider the size of your hunting blind. Are you typically hunting by yourself? Or should there be room for two hunters? At Penn Dutch Structures, we have a variety of shape options, either can be chosen based on the hunter’s preference. 

The windows in your elevated hunting blind design also play a key role. You will need a lot of natural light so you can see your equipment and area well. And with a higher shooting window, you shoot at a downward angle so if you do miss, there’s less chance of safety risks.

Square Elevated Amish Built Deer Blind

Elevated Hunting Blind Accessories

Once you have the ideal structure, it’s time to get your elevated hunting blind accessories. These accessories will help you with your game and allow you to be prepared for any situation.

  1. Shelf and Shooting Rest. Have a secure spot to support your shooting and ultimately give you a more precise shot. 
  2. Shooters Chair. Rather than standing or sitting on the ground, use a shooter’s chair for maximum comfort. 
  3. Shooting Bag. Rest your gun on a shooting bag to keep a steady hand and have a more accurate shot.  
  4. Clear Window Panels. Protect yourself from weather elements and better mask your scent with clear window panels.  
  5. Floor Mats. This is another accessory that heightens your comfort and reduces the risk of slipping and falling when you’re in the elevated hunting blind. 


Interested In Getting the Most Out of Your Hunting?

browse our in-stock inventory or have a custom-designed stand built.  Visit our Glen Rock, PA or Finksburg, MD locations.

Octagon Elevated Amish Built Deer Blind

Picture this: it’s a warm Summer day and you’re lounging out on your patio. You look out onto your yard and see a whole host of tools and equipment scattered around. You think to yourself, maybe it’s time to clean things up and boost your home’s curb appeal. 

You can clean up your yard, boost your curb appeal, and maybe even find a new hobby to enjoy by purchasing a new outdoor shed. There are countless types of shed designs for you to choose from. We’ll outline them below so you can find one that matches your home and exterior style.

Choose a Landscaping Style

Before we dive into the individual types of shed styles that Penn Dutch Structures offers, we should first look at the bigger picture. It’s important to accentuate your landscaping style with a new shed, so it won’t stick out like a sore thumb. 

There are hundreds of different inspirations that can create your ideal backyard. So whether you’re looking for a backyard filled with greenery and a lovely garden, or it’s modern with clean lines or bold with different pops of color, you should find a new shed to complement your preferences.

The Purpose of Your Shed

As part of defining your landscape structure, you should also determine how you’ll be using your new shed. Will it be a storage space to keep your backyard clean? Will you turn it into a she-shed or man cave so you can start some new hobbies?

an A-frame shed with a small garden in surrounding the shed.

A-Frame Shed

So let’s dive into the different styles of shed designs you can choose from. We’ll start with the A-Frame shed. There are three different types of A-Frame style sheds offered at Penn Dutch Structures. They are A-Frame, A-Frame Elite, and Garden A-Frame.

The main difference between the three of these shed styles is the size of each and the roof pitch, or the steepness of the roof. There is a roof pitch associated with all of our sheds, so let’s break down what that exactly means. 

The roof pitch numbers highlight how high the roof goes for every 12 inches. So a standard A-Frame shed style has a roof pitch of 5 over 12. If we compare this to the roof pitch of an Elite shed, which is 8 over 12, and then a Garden shed, which is 11 over 12, you’ll see that each is slightly steeper than the one before. 

The higher the roof pitch, and ultimately the steeper the roof, means there’s more headspace within the shed. This is why, historically, garden sheds with steep roofs are used to store tall garden tools, and other smaller outdoor equipment. 

No matter the specific A-Frame style shed you choose, you have the option between top-grade wood or vinyl as the material. Each style requires very little maintenance and is very durable to withstand a variety of weather conditions.

a cape shed with green trim and shutters.

Cape Shed

Similar to the A-Frame and a majority of the Penn Dutch Structures’ sheds, the Cape shed style will come with double entrance doors and at least one window with shutters. For sheds larger than 8’ x 12’, two windows will be included. 

There are two different Cape shed styles, Cape and Cape Elite. The roof pitch is a key difference between these two styles. The Cape shed has a roof pitch of 7/12 whereas the Cape Elite style has a roof pitch of 8/12. 

The type of shed is a classic shape and style that can either blend in with your existing landscape or become a bold statement in your backyard.

a red carriage shed with white trim and a small porch attached.

Carriage Shed

A carriage shed style is known to have an offset roof, similar to the Quaker style that we’ll discuss later in this blog. The benefit of an offset roof is added headspace so again, larger tools and equipment can easily fit within this shed design. 

On our carriage shed styles, the average roof pitch is 6.6 over 12. This means that the roof rises 6.6 inches for every 12 inches. Then, the steeper part of the roof is 7 over 12. You’ll continue to see this roof pitch number in multiple shed styles and can use this same methodology for every style.

a white chalet shed with a front-facing garage door.

Chalet Shed

The Chalet shed designs are known for their high roof pitch, which is typically a 12 over 12. Because of this high roof, you can put a loft for extra storage or your chalet can be used as a detached garage with an overhead door. 

At Penn Dutch Structures, your Chalet shed can be as small as 10’ by 10’ or as large as 14’ by 40’. You’ll want to find the perfect size that allows for maximized space for storage but doesn’t overwhelm your exterior landscaping. 

As a part of the customization process, you’ll be able to choose siding and trim colors to match the rest of your landscaping and your home’s style. You may also decide to add a flower box, ramp, or larger windows to further customize your structure.

a classic shed style with a double entrance door and two windows.

Classic Shed

The Classic shed design is a timeless style that can blend into a variety of landscaping designs. This type of shed can be as small as 6’ by 6’ or as large as 14’ by 40’ which means you have flexibility so you can accommodate everything you need. 

There are multiple types of shed roofs that you can choose from with the Classic shed design. Traditionally, there are two sides to your roof that meet to create a peak. With this type of shed, you have the option of choosing multiple peaks to create more dimension to your landscaping. 

At Penn Dutch Structures, you also have the option to upgrade your shed to the New England Deluxe Wood Trim Package, which is 5 inches wider and available in 13 different colors. We also have add-ons of various styles of dormer packages.

a cottage style shed with a double entrance door and one window with green shutters.

Cottage Shed

The Cottage shed design has a much flatter roof than other types of sheds, with a roof pitch of 5/12, so it can blend seamlessly into your backyard’s style. Just like a majority of Penn Dutch Structures’ sheds, the smallest size is 6’ by 6’ so it can fit into a garden or you can choose our largest size of 14’ by 32’ that fits well in your backyard. 

You can upgrade your Cottage shed with New England Deluxe Trim which offers a 5” wider trim and 13 different color options.

a blue dutch barn shed with white trim around the double entrance doors.

Barn Shed

Both the Dutch Barn sheds and the Mini Barn sheds showcase a unique style of shed compared to the rest of our products. If you like the aesthetic of a classic farm property but don’t have the space for a large barn, this is the perfect type of shed for you. 

These barn shed designs have a Gambrel barn-style roof which has four roof panels instead of two. These extra panels allow for more space and are ideal for tractors and large equipment to safely fit in the shed. 

Typically, Dutch Barn sheds come with a 6’ or 6’ 6” high side wall. You can opt to include the Wide Trim Package and add a loft to your Dutch Barn for additional storage space. This add-on is optional and can be fully customizable to match your needs. 

Mini Barn sheds, which have a 4’ high side wall, are the ideal size for small storage spaces that can hold basic gardening tools or equipment. They come with double entrance doors so there’s plenty of space to navigate a lawn mower or smaller tractor. 

a villa shed style with a small mulch garden in front of each window.

Villa Shed

The villa shed design is a modern shed and one of our newest designs from Penn Dutch Structures. This shed allows you to store your equipment in style, or have a space to do some of your favorite hobbies. 

This type of shed roof is different from the others and is a Hip roof with four sides, unlike the traditional Gable roof, which only has two sides. The roof pitch is measured at 7/12. 

These sheds can also be made large enough to include an overhead garage door that can be upgraded with a ramp for easy access for your mower or small tractor. 

a quaker shed with red trim and doors and two windows.

Quaker Shed

The final type of shed Penn Dutch Structures offers is a Quaker shed. This style has a roof overhang which provides a layer of shade and protection to the exterior of your shed. The higher front side is 7’ and the back side measures to 6’. These roof styles are great for flower boxes hanging out the window and make for a grand statement for your landscaping. 

The Quaker shed can be upgraded to include transom windows which are windows that are on the doors. They come in a variety of styles and are used to let in more light into your shed. This is a great choice if you’re using your shed to store plants or are using the shed as a creative art studio.


Customize Your New Shed

Ready to revamp your outdoor space? Reach out to our team today!

an a-frame shed with a small garden surrounding it.

As you’re driving down the back roads, you may notice taller barns and sheds have weathervanes sitting on top of them. Now more than ever, we see them as decorative pieces. But throughout history and even today, they can be a useful tool for determining the weather and wind patterns. 

Continue reading to get an in-depth look into weathervane history. You might even be surprised by some of the new information!

Where Does the Word Weathervane Originate?

The weathervane definition is “a revolving pointer to show the direction of the wind, typically mounted on top of a building”. To dive deeper into the word, the second half “vane” comes from the Old English word “fana” which translates to flag or banner. This has since inspired flags to be a common weathervane ornament. 

Let’s Start From the Beginning: Where Did Weathervanes Come From?

In order to start at the beginning, our weathervane history timeline begins around 48 B.C. Andronicus was a Greek astronomer who created the first weathervane. The original design was a bronze structure to look like the Greek God Triton, the ruler of the sea. 

The first weathervane was believed to be up to 8 feet long and sat on top of an 8-sided building, the Tower of the Winds, which represented the 8 Greek winds. In ancient history, the winds were known to have divine power so weathervanes became an integral part of society’s life. 

Throughout history, societies have used wind vanes and weathervanes to decorate the top of their temples and churches, which usually depicted their gods. As we said, the gods were known to control the winds and societies wanted to make sure they were honoring them to ensure they have favorable weather. 

Other ways weathervanes were used were for navigating the seas. Viking ships used them not only as a status symbol but also to help them find their way. Even today, Norwegian and Swedish ships still use weathervanes to direct their travels.

What Does a Weathervane Do?

Even with the evolution of the methodology of the weathervane, the purpose has stayed the same. A weathervane helps you grasp a better understanding of weather patterns and when incoming storms are rolling in. 

Beyond your own use, a weathervane may be used more often than you think. Weather stations use them to help predict storms, as well as use them as indicators for when there’s a higher chance of wildfires. 

And as we said before, sailers and ships still regularly use weathervanes to understand ocean currents and as a navigational tool. 

Now, you’re likely not traveling the seas or predicting the weather for a news station. So, what does a weathervane do for you? 

Farmers can use weathervanes to get insight into the weather and know how to plant their crops for the best harvest possible. If you own a horse barn, knowing when a storm is coming can help you prepare your horses and your barn appropriately. 

As weathervanes have served this purpose for hundreds of years, they have started to shift into a more decorative purpose as well. We’ll discuss this later in the blog, but some people decide to decorate their roofs with a weathervane. You can customize the design to represent a specific animal or a prime feature of your property.

a silhouette of a weathervane decorated with an arrow and a horse.

Common Weathervane Types

Penn Dutch Structures specializes in classic weathervanes and ours come with a variety of ornaments and sizes. But there are other types of weathervanes that are used in a lot of different places.

  • Classic Weathervane. This is the most common weathervane type and has been used for centuries. You will find these on top of buildings and they can be used not only as functional pieces but also as decorative ones. 
  • Wind Sock. A wind sock usually won’t tell you what direction of the wind in terms of North, East, South, or West but some wind socks will tell you the speed of the wind. These are typically placed on runways or near helipads. 
  • Digital Weathervane. Another type of common weathervane is a digital one, which is typically used for weather forecasting and stations. This is the most advanced version of a weathervane.

Parts of a Weathervane

When you first see a weathervane, there are a lot of little components that work together to make the tool useful. How do they work together? In this section, we’ll outline each component below. 

  • Ornament. This large piece of the weathervane is decorative and can represent something specific to your home or barn.
  • Arrow. Attached to the ornament will be an arrow, both the ornament and the arrow will move according to the direction of the wind. 
  • Directions. Your weathervane will have North, South, East, and West on it and these will be fixed on your weathervane rod. 
  • Globe. There will also be a small globe on the rod, that sits just below the directions. This is just a decorative piece and isn’t used to determine the direction of the wind. 

How to Read a Weathervane

Now that all the components of a weathervane are outlined, we’ll highlight how they all work together so you can better understand how to read a weathervane. 

The ornament and arrow will be connected to each other and will sit just above the directional points. They point towards a specific directional point which indicates where the wind is coming from. For example, if the arrow is aligned with the “S” it means there is a south wind, and the wind is coming from the south and moving north.

a weathervane sitting on top of a cupola that is pointing southwest.

Where to Put a Weathervane

Weathervanes should be placed on the tallest building you own, so you can receive the most accurate information about where the wind is coming from. Typically, a weathervane is accompanied by a decorative cupola which helps increase its height. 

At Penn Dutch Structures, we have multiple sizes of weathervanes that can be placed on a variety of buildings. From larger buildings to garages, sheds, and gardens, you’ll be able to find a weathervane for you.

Reasons to Have a Weathervane

Now that you’ve learned a lot about weathervane history, it might be time to get one of your own! Below, we’ll list out a few reasons you may decide to buy a weathervane for your property.

  • Understand Weather Patterns. As we’ve stated earlier in the blog, incorporating a weathervane into your roof design can help you have a better understanding of when an upcoming storm is approaching. Ultimately, they can help you better prepare your property and any animals you have so the negative effects of the storm are less severe. 
  • Add a Personal Touch. With a ton of different design options, you can have a weathervane that represents your home or your property. Choose between farm animals, birds, decorative arrows, or human figures. 
  • Boost Curb Appeal. Any additions to your landscaping are known to boost your home’s curb appeal. Even if you are just looking for a decorative weathervane, it will help you have a more put-together exterior. And ultimately, this will increase your home’s value in the long run.


With a New Depth of Weathervane History Knowledge

Browse Penn Dutch Structures’ weathervane collection to find one for your own property!

horse with arrow copper weathervane
Horse with Arrows Copper Weathervane

As we’re getting ready for more outdoor hangouts and lounges by the pool, it’s time to design your patio into a welcoming space. You’ve probably spent some time laying out different rooms inside your house but maybe haven’t given much thought to your patio or deck. 

As you begin to think about how to decorate your patio, consider the shape, size, surfaces, and furniture materials. After reading this blog, you’ll become inspired to start decorating your own space!

Decorating for Your Patio Shape

Before we get into the best patio accessories, it’s important to look at your space as a whole. Generally, there are three different common patio shapes, the shape of your patio helps you decide what furniture will look best.

  • Rectangular. A rectangular patio allows you to use more of the space in comparison to other patio shapes. 
  • Circular. Typically a smaller patio or circular patios often have a centerpiece of some kind, for example, a fire pit or dining table. 
  • Free-Form. An irregular patio shape forms more naturally with your landscaping and can be unique to your home. A free-form shape can be easily adapted to fit your design aesthetics and needs. 

As you begin decorating your patio, think about the shape of your patio and the shape of the furniture you want. Your patio design should create harmonious lines with differing shapes.

Determine Your Patio’s Purpose

What will you be doing on your patio? 

Considering how you will use your patio helps you identify key accessories you need to include. For example, if you’re planning to have cookouts and dinners on your outdoor kitchen patio, you’ll need to incorporate appliances and a table into your design. 

If your patio is going to be used for you and your guests to lay around a pool or suntan all day, consider lounge-style chairs and maybe a shaded area to escape the sun every once in a while. If your patio doesn’t have natural shading with trees, you can include patio curtains attached to a pergola

No matter the purpose of your patio, it’s important to keep in mind key interior design elements that can naturally flow into your outdoor space. This ultimately creates a cohesive look throughout your entire home.

A pergola with an outdoor kitchen underneath and a pool on the side.


Decorating With Your Patio Surface In Mind

In order to support your cohesive look, you should look at all the elements of your patio, including the surface material. The spectrum of patio surfaces ranges from foundational and simple to more decorative. 

Depending on your style, you may want to put more decorative elements on your patio and keep the surface more simple. Or, have a busier patio surface with designs and accent that with simple furniture. Balancing the two allows you to create a calming and aesthetically pleasing space rather than feeling busy and overwhelmed.

Vinyl or Wood Furniture, or A Mix of Both?

While keeping your style and patio surface in mind, your larger furniture pieces will likely be vinyl or wood, or a mix of both. Smaller furniture can be a wide variety of materials, and it’s best to mix and match to create a balanced look. 

Wood Furniture. This type of furniture creates a natural and outdoorsy look for your patio. This material is very versatile and sustainable. With wood furniture, you can stain or paint it whatever color you want so you’re perfectly matching the rest of your outdoor patio decorations. 

Vinyl Furniture. Although a less natural look, vinyl is virtually maintenance-free which makes it an attractive material to homeowners. These pieces of furniture are also resistant to weather elements and can withstand the test of time. 

Additionally, there are a variety of colors to choose from to match the rest of your patio, but you can only paint your vinyl furniture once whereas a wood furniture piece can be repainted whenever your style changes.

How to Decorate a Patio Based On Size

The size of your patio will also play a role in your outdoor patio decorations. You want to make sure you’re filling your space for a purpose and getting decorations that don’t make your patio feel or look too crowded. 

Below, we’ll highlight some features to consider when decorating for a smaller versus larger patio.

A smaller patio with three chairs and a fireplace in between them.

Small Patio Decorations

If you have a smaller patio and limited space, the best patio accessories will be aesthetically pleasing and functional. So a majority of the furniture you pick out should also serve a purpose. This maximizes the space and ensures you and your guests aren’t feeling overwhelmed or crowded with unnecessary furniture. 

Here’s our list of some must-haves for your small patio decorations. 

  • Outdoor rug. Better define your space and keep it cozy with an outdoor rug. There are a wide variety of shapes, patterns, and materials of rugs you can choose from to match the rest of your space. 
  • Light Colored Furniture. White or neutral colors will help your patio feel larger and more open. This can also be done with white walls or a fence surrounding your patio if that’s applicable. 
  • Firepit. Create a focal point and intentional gathering space with a small firepit on your patio. By adding a firepit, you can also use the space longer and in colder weather while creating a sense of ambiance for you and your guests.  
  • Folding Chairs. With especially smaller spaces, folding chairs can be a temporary solution for larger gatherings without being permanent fixtures. Penn Dutch Structures Country Garden Poly Furniture offers a wide variety of outdoor seating, including folding chairs. 
  • Large Plants. Maintain a sense of privacy with large plants surrounding your patio. Taller plants like Cherry Laurels, can be naturally beautiful and shield your patio space. 

In a smaller, more secluded space, privacy can be an important factor. Plants, panels, and fencing can all be used to make your patio more intimate.

Large Patio Decorations

Sometimes, having a larger area can be daunting if you’re not sure how to effectively use it and design a welcoming space. Below, we’ll list out some of our best patio accessories that can help you fill the space without it being crowded. 

  • Pergola or Pavilion. If your patio is larger, you can stay outside longer and be shaded from intense sunlight with a pergola or a pavilion. Also, it can define your patio space and create a structural design. 
  • Dining Table. There are a few pieces of furniture that can act as your patio’s focal point. A dining room table can bring people together and be a functional piece for your patio. Later in this blog, we’ll give some examples of how to decorate your patio table. 
  • Large Plants. Incorporating greenery into your patio helps it feel welcoming and cohesive with the rest of your landscaping. Depending on your style, there are a variety of plants to include in your patio design. 
A close-up of a patio table set with a floral centerpiece and pillows on the benches.

How to Decorate Your Patio Table

No matter the size of your patio, you will likely have some sort of table in your space. We’re here to give some insight into the best patio accessories for your table. 

Your table decorations may change based on the season or if there’s a special holiday or event you’re celebrating. But you should have a standard design that stays out for the majority of the season. 

There are a few decorations you can add to the top of your table to bring out a bit of personality and elegance. As you begin decorating, remember to keep in mind what you’ll be using the table for. Is it more of a decorative piece, or will you be using it as a functional table to eat outside? 

  • Umbrella. If you don’t have a shaded pergola or patio curtains above your patio, you can put an umbrella on your dining table to keep the area shaded. This can make the area more intimate and allow you and your guests to stay out of the sun during the day. 
  • Centerpiece. Just like having a focal point in your entire patio design, you can also have centerpieces, or a focal point, on your table. Centerpieces could include candles, a floral arrangement, or small light fixtures. 
  • Placemats. If your table is a functioning dining table, finding a set of placemats that match your decorations is essential. As you are searching through different styles, find ones that match your interior home’s aesthetic and are versatile for any occasion. 
  • Outdoor Lighting. Whether you’re using lighting as a centerpiece or incorporating it around your table, it’s one of the best patio accessories. Choose between lanterns, spotlights, string lights, step lights, or even small lamp posts for your space. 

Whether you’re decorating a small, circular patio or a large rectangular space, it should represent your home’s style and design. Create a similar aesthetic and welcoming space for you and your guests whether they’re inside or outside your home. And don’t forget to add your own personal touches!


Want More Ideas on How to Decorate Your Patio?

Browse Penn Dutch Structures’ backyard entertainment products for more inspiration.

A free-form patio with a pergola on top and a table set underneath.
Pine Santa Fe Pergola

It’s almost time for backyard hangs, dinners on the grill, and growing your garden. As we approach the warmer Spring months, it’s time to make sure your backyard is ready. Part of this cleanup is your outdoor shed. 

We’ve created our yearly shed maintenance checklist to help you feel more prepared for the warmer months ahead. After this blog, you’ll have a better idea of what needs to be done and how you can maintain your shed care throughout the entire year. 

Interior Shed Maintenance Checklist

The first step of our shed maintenance checklist is to prepare the interior for the upcoming Spring season. This includes cleaning it out, taking note of your shed’s inventory, and making the space an unwanted home to critters and pests. 

#1 Clear Out and Organize

It’s likely that during the colder months, you haven’t used your outdoor storage shed much. Now that you are starting to prepare for the warmer weather, it’s a great time to take inventory and clear out unused equipment and tools in your shed. 

Start by clearing out everything from your shed. Then you’ll have the opportunity to clean the shed floors. A majority of Penn Dutch Structures’ shed floors are plywood, so it’s important to not put too much moisture on the floor as that will cause the wood to rot. 

If there’s minimal debris and leaves on your shed floor, you can simply use a broom to sweep everything outside. If the shed floors are especially muddy, you can combine a small amount of water with white vinegar and coconut oil to mop the floors. 

In order to maintain this cleanliness throughout the entire Spring and Summer season, clean your shed floors regularly. This will also be a useful shed care tip to remember during tip #2 on our checklist. 

With everything still out of your shed, it is an ideal time to reorganize the space. By using shelves, cork boards, and storage racks, you can keep your shed decluttered throughout the year. Having organization tools set up within your shed maximizes the space

Organize your things in a way that makes sense to you. Maybe it’s by how often you use certain tools, or you categorize your items so all your gardening tools are together and all your hardware tools are in one place.

#2 Make Sure No Pests Have Settled Into Your Shed

Anything between spiders, insects, and small rodents can make your shed their home. Especially if your shed has been left completely unattended during colder months, critters may have needed a warm spot to stay. 

Listed below are some shed care tips and tricks to make your shed less welcoming to pests

  • Clean your shed floors weekly so dirt doesn’t build up. 
  • Don’t store any food, including birdseed in your shed. 
  • Improve the lighting in your shed to help reduce the number of dark corners, where bugs and rodents can easily hide. 

Depending on what type of shed you have, vinyl or wooden, it will be more susceptible to insects. So be prepared to have more maintenance done with a wooden shed compared to a vinyl shed.

#3 Inspect Your Windows and Doors

Although this next step is under the interior shed maintenance section, your windows and doors should be cleaned on the outside as well. The same shed window care tips apply. You can clean the windows with your regular window cleaner. 

You will also want to inspect the window panes and door frames for any leakage to ensure that there isn’t any water damage. Generally, the cause of leaking windows is old caulk or seals. Over time, you may notice that the caulk is dried out and cracking. The solution to leaking windows is to replace the caulk or seal.

One side of a wooden shed with lots of gardening materials, boots, buckets, and wooden crates.

#4 Regularly Clean Tools Going In and Out of Your Shed

This next shed upkeep step is to ensure that the transition from each session will be easier moving forward because you’ll regularly clean tools and equipment going in and out of the space. 

Anytime you use a gardening tool or a piece of equipment, clean it off before storing it back in your shed. This will not only help you keep dirt out of the interior but also help keep the space pest-free. 

If you have metal tools, you should keep a bucket of damp sand within your shed to quickly clean the tools after you’re done using them.

Exterior Shed Maintenance Checklist

Now that your interior is ready, it’s time to focus on the outside of your shed. This will be what people see first when they visit, so you’ll want to do some touchups to prepare for the Spring season.

#1 Check Your Shed’s Security

As part of our shed maintenance checklist, we recommend updating your shed lock. Your shed holds valuable inventory for your home, so it’s essential that it is well secured. There are different types of shed locks, what you choose will depend on what level of security you need for your shed.

#2 Clean the Exterior

If you purchased from Penn Dutch Structures, your shed is either wooden or vinyl, so the way you clean the exterior may slightly differ. 

Wooden Sheds. The best tool to use on the exterior of your wooden shed is a power washer. Just like when you’re cleaning your shed floors, make sure your power washer is on a lighter setting that won’t damage the wood siding. 

Vinyl Sheds. Vinyl sheds don’t need as much maintenance as their wood counterparts, but sometimes they may need a good cleaning. A mixture of water and vinegar will suffice to clean your exterior. 

By cleaning the outside of your shed, you can help get dirt and debris off and keep your shed looking brand new.

#3 Repaint

A fresh coat of paint can either be more of a shed upkeep task that just covers any chips or cracks, or you can take the time to repaint the entire exterior to give the shed a completely new look. If your shed is closer to your home, you may want to paint it to match the rest of your exterior. Or you could decide to add a pop of color to your landscaping through your shed’s color.

#4 Check the Roof/Shingles

Especially if you live in an area with heavy snow or strong weather conditions, your roof might need some updates from the winter months. Generally, there are three different types of shed roofs. 

Metal roofs are able to withstand extreme weather conditions, so it’s likely you’ll just need to clean it off to prepare for the Spring season. 

Architectural shingles are the thicker option of the two types of shingles, so they can withstand strong winds with a sturdier and stronger adhesive. 

3-tab shingles are the most cost-effective option but are known to buckle and blow away. If you have 3-tab shingles, make it a priority to check your roof regularly for any damage.

Around Your Shed: Landscaping Checklist

Now that you have the steps to clean your interior and exterior, it’s time to make sure your landscaping matches! As you prepare for the warmer weather, clean up your garden and bushes. This will not only help your yard look great, but can help maintain your shed’s cleanliness. 

There are a few shed care tips that can help your backyard look great and keep your shed clean. 

  1. Trim low-hanging branches to avoid leaves building up on your shed’s roof. 
  2. Use rocks or mulch up against the shed rather than soil. This helps the water go through the garden rather than build up and create moisture damage against your shed. 
  3. Don’t stack firewood against your shed. When you stack firewood against your shed, it causes algae and mold to grow. 

Surrounding your shed, you may decide to have a garden or an entertainment outdoor structure. This brings your entire landscaping together and creates a beautiful space for the Spring and Summer seasons.


Ready to Take Your Landscaping a Step Further?

Browse our large sheds and other backyard structures

Garden A-Frame shed with a small garden surrounding it
Garden A-Frame

After you choose the perfect structure, it’s time to prepare your site for its arrival. This entails a bit more than setting up a few cones to mark the proper placement. Additional work is necessary to prepare a proper shed base that will help ensure smooth delivery and installation. 

After reading this blog, you’ll be able to prepare your site for a new shed and feel confident in your responsibility for a successful installation process. We’ll also answer some common questions you may have leading up to your delivery day.

Preparing Ground for Your Shed

The first step in having a shed or large structure that looks its best for years to come is installing a quality shed base. Although Penn Dutch Structures does not excavate or prepare the site foundation, we work closely with Bedrock Siteworks.  

In most cases, your installation site will need to be leveled in preparation for your new shed. Site grading and excavating help level your space so it’s easy to place a shed foundation. Another service that goes hand-in-hand with site grading is installing a retaining wall. This may be necessary if intense site grading is needed on your land. 

Once there’s a level surface, the next step is placing a foundation for your shed or large structure to sit on. When deciding what type of material to use, we recommend using a stone-based foundation on wood floor structures. 

Incorporating and selecting an appropriate material for your shed foundation will ensure that your structure doesn’t shift over time. Also, certain building materials can help drainage so your shed won’t rot from rain and moisture.

Homeowners Association Requirements

You’re probably familiar with Homeowners Association (HOA) Requirements if you’ve purchased a shed already. There may be additional restrictions on the size and placement of your shed or large structure. 

Specifically, the HOA could require you to put your shed a certain distance away from your different property lines. In order to prepare for delivery and installation day, make sure you know exactly where your property lines are so you can meet these expectations. 

Guidelines and rulings will be different depending on where you live. In some cases, regulations are made based on residential committees. It’s important to look up your local HOA to guarantee you are meeting all requirements. You can find more information about Pennsylvania’s Homeowners Association here

Cost of Site Preparation

The total cost of your site preparation will depend on whether or not you need professional help. For example, if you need to severely regrade your land to level it out, it will cost more than simply installing a shed foundation. 

The most cost-effective material is a gravel base for your shed. An area that is mostly flat, will cost between $5.00 to $9.00 per square foot. Since there are more types of concrete foundations, there is more variation in the cost. 

Some things that may affect your preparation costs are the location of your structure, which includes how far back it is compared to your property lines, any permits that you need in order to have the shed, and finally the total footprint or size of your structure. 

Answering Your Questions

Now that we have outlined preparing the ground for your shed, it’s time to answer some frequently asked questions we get from our customers. If you have additional unanswered questions, you can contact us, or reach out to the company that’s doing your site preparation.

How much gravel do I need for my shed?

On average, you will need between 3 to 4 cubic yards or 5 tons of gravel for your shed foundation. This amount may differ depending on the size of your structure, so if you’re installing a larger garage, you may need more gravel. 

If you’re planning to build your gravel base for your shed yourself, we’ve included a formula that can help you determine how much gravel you’ll need. If a professional is helping you, they’ll be able to tell you how much is needed! 

To calculate how much gravel you’ll need, multiply the shed foundation’s square footage (length x width) by the depth of your gravel in feet. Then divide this number by 27 to get the cubic yards needed. To get this amount in tons, simply multiply your cubic yards by 1.4.

What’s the difference between a gravel vs a concrete shed base?

In most cases, a concrete base is only necessary for a garage or large structure that doesn’t have a pre-built floor. A shed foundation can be gravel or stone. Although a concrete base is a better choice for a larger structure, we recommend using gravel whenever you can. 

Gravel and crushed stone allow for more drainage and prevents moisture from building up underneath your shed. As rain falls from the edge of your structure’s roof, it deflects off the ground and splashes onto the siding of your shed. 

Over time, this causes the doors and lower siding to mold and rot. When you prepare a shed foundation using stone, water and moisture are absorbed into the ground rather than staying on the side of your structure.

Should a shed base be bigger than the shed?

When deciding how large to make your shed foundation, use the guidelines underneath your specified Penn Dutch design. A shed base should be the exact shape and slightly bigger than the structure. Your base should be at least 12” wider than each side of your shed. 

Access to Your Installation Site

Before delivery and installation day, it’s crucial to examine any potential obstacles that may interfere with a smooth delivery and installation process. If you’re worried about access to your site, we are able to come and do a full site check prior to installation.

The final installation site must be clear of; 

  • Narrow walkways or stairs
  • Fences
  • Shrubs or elaborate landscaping
  • Low-hanging tree branches
  • Power lines
  • Additional structures such as carports, arbors, and swing sets 

In addition to thinking about the size of your structure, you’ll also need to consider the size of the delivery trailer and how it will maneuver through to your installation site. If the route is full of turns and tight bends, you want to plan accordingly before they arrive. 

If your structure is 10′ wide or wider, we will need an additional 2′ width to access the site with the trailer. And this is if the route is relatively straight. To ensure a smooth delivery, it’s best to talk with your dealer about the specific location of installation and how the trailer will move through your landscape.

Delivery FAQs

How are the sheds delivered?

At Penn Dutch, we make certain that your structure is delivered with care and precision so we don’t damage the structure or your property. It is then your responsibility to prepare the site for your shed, so we can make the installation and delivery as smooth and efficient as possible. 

Depending on the size of your shed, it will be delivered assembled or in separate pieces. In order for us to successfully deliver your fully-assembled structure, the access point to your shed foundation must be clear.

Do structures arrive already assembled?

Sheds and other structures up to 14’ by 44’ are delivered already assembled. Sheds that are too tall to transport will require partial assembly at the final site.

What if I have an existing structure that I need to relocate?

When you request relocation of one of your structures, we will ask for photos of the structure so we can bring the proper equipment to relocate it. We will also require the following: 

  • The structure is emptied prior to relocation.
  • There is clear access to where the new structure will be going. 
  • The structure is less than 11’ tall, all other structures we are not able to relocate. 

Have additional questions about your shed’s delivery? Visit our FAQ page.

A large tan detached garage that's sitting on a lifted shed foundation.

A new shed or large structure helps make your landscaping look more organized and polished. Once you prepare the site for your structure, you’re well on your way to getting your dream backyard.

Still have questions about how to successfully prepare your site for a shed? Contact our sales representatives to find your answers.


Still Have Questions?

Contact our sales representatives to find your answers.

A tan shed with a brown roof sits in a yard with plants out front.

There are many different reasons purchasing a shed can be a long-term investment. Whether it’s a secure storage shed, a classic man cave, or an elegant she-shed, you’ll want to make sure your structure is going to last. One of the main factors to consider when browsing shed options is its siding. 

Comparing wood vs. vinyl siding can seem overwhelming because of their unique advantages and disadvantages. However, after reading this blog, you’ll be able to confidently weigh the differences between wood siding pros and cons and vinyl siding pros and cons.

Comparing Wood Siding vs. Vinyl Siding

The easiest way to compare wood siding vs. vinyl siding is to break down the most important factors. Looking at the overall advantages and disadvantages of each material will give you a clearer picture of what shed siding is better suited for you and your outdoor space. This can be done by considering 4 main elements, which we will discuss below. 

1. Appearance

The appearance of your shed can say a lot about your outdoor space. When choosing which siding is best for you, consider thinking about the aesthetic you wish to incorporate into your backyard theme or design

For example, some homeowners prefer a more authentic, natural look which will drive them to be more attracted to wood siding. Others may want to complement or match the exterior of their home to their shed, which may be easier to do with a vinyl siding shed. 

It’s important to remember that when it comes to the appearance of your structure, there really isn’t a right or wrong answer— it’s completely up to you and your style. 

2. Durability

When buying a new shed, you want to be able to depend on it to last, which is why looking at vinyl siding durability vs. wood siding durability is important. There are two main factors you’ll want to consider when comparing these:

  • Rot resistance
  • Insect resistance

Any type of vinyl siding will be completely rot- and insect-resistant. Certain types of wood such as cypress, cedar, and redwood are naturally rot-resistant and insect-resistant. Engineered or composite wood is also extremely durable since it receives protective finishes in the factory. 

However, it’s important to note that all types of wood, including those mentioned above, will require regular maintenance to remain intact while vinyl siding requires little to no maintenance over the years. 

3. Price

Is wood siding cheaper than vinyl siding? It’s one of the most common questions asked by homeowners looking for a new shed. Unfortunately, the answer may not be as simple as you’d like. Generally speaking, the wood siding shed cost will be significantly less than the vinyl siding shed cost. However, it’s important to consider the costs of your shed in the long run as well as upfront. 

For example, some people may prefer to spend more money on a vinyl siding shed because they are known for their low maintenance and may not require as many repairs or touch-ups in the future. On the other hand, some homeowners would rather spend less on a wood siding shed upfront and choose to put the extra work in so it stays in good condition for years to come. 

4. Life Span

At Penn Dutch Structures, all sheds are built with quality materials that are made to last. However, you will find that wood and vinyl sheds have different lifespans. Even if you’re dedicated to maintaining your siding, the average wood shed will last a minimum of 20 years. On the other hand, vinyl sheds can last much longer, staying in good condition for up to 25+ years. 

Classic a-frame white and black shed

Wood & Vinyl Siding Options

Whether you’re remodeling an old shed or looking for something new, you want to make sure you’re happy with the end result. Because of this, it’s important to take the time to narrow down what you’d like the final product to look like. 

Both wood and vinyl sidings offer a variety of options from board or plank styles to exterior colors. Continue reading to see what kind of choices you have as you decide on your shed siding. 

4 Types of Siding Styles

The most common types of siding styles are available in wood or vinyl options. This means the installation of your siding won’t depend on the type of material you decide on using. Below, we’ve listed the 4 most popular siding styles you can choose from. 

  1. Clapboards

Clapboard siding, also known as bevel siding, comes in long, thin planks that are installed horizontally into the structure’s exterior walls. This style of siding is unique because the boards are created at a slight bevel angle, resulting in planks that are thinner at one end. When the siding is installed, the thicker bottom edge overlaps the thinner upper edge. 

  1. Tongue-and-Groove 

Tongue-and-groove siding features planks that have interlocking or overlapping joints. When the planks are created, they’ll be designed with a tongue along one edge and a groove along the other. 

This design allows the boards to fit securely into one another when they are installed. One of the advantages of this type of siding style is that the planks can be installed horizontally, vertically, or diagonally depending on your preference. 

  1. Board-and-Batten

One of the most traditional siding styles is board-and-batten. This style consists of wide boards and narrow strips (battens). It gets its name from the technique used during installation. 

While the wide boards are nailed vertically to the exterior walls, the battens are used to cover the vertical seams between each board. People prefer this type of siding because there’s no standard size. 

  1. Shingles

Using shingles, or shakes,  as your siding will give your structure a quaint, cottage look. The shingles are installed individually so they overlap each other, resulting in an excellent job of shedding rainwater. The nails will be completely covered, allowing for a clean-cut look. 

A-frame garden shed

Types of Wood Used For Siding

There are many species of wood people can use as siding for their sheds. The price and maintenance needs will vary depending on the type of wood you choose, so make sure you weigh all the wood siding pros and cons before making a final decision. 

  • Cypress
  • Cedar
  • Fir
  • Spruce
  • Pine
  • Redwood
  • Engineered (Composite)

Types of Vinyl Siding 

While vinyl siding is made up of the same material across the board, you still have a chance to customize your choice. When discussing vinyl siding pros and cons, you’ll come to realize a big perk is that you have a variety of color options to mix and match. 

  • White
  • Sage
  • Pewter
  • Gray
  • Cream
  • Clay
  • Blue
  • Birchwood
  • Almond
  • Aspen
  • Camel
  • Mountain Berry
  • Sandalwood
White
Sage
Pewter
Gray
Cream
Clay
Blue
Linen
Almond colored siding
Alabaster
Aspen
Aspen
Camel
Camel
Mountain Berry
Mountain Berry
Sandalwood
Sandalwood


Build Your Dream Shed

Now that you have an idea of what type of shed you want for your backyard space, take a look at the shed styles and sizes we offer today.

Backyard carriage style shed
Backyard Carriage Style Shed

Nothing makes a child smile bigger than a brand new backyard playhouse. It’s a great investment for parents or grandparents who have little ones running around, but what do you do when they have no more use for it? Just because your kids may have outgrown their playhouse, doesn’t mean you have to. 

Instead of letting it go to waste, why not turn your playhouse into a shed that you can use for years to come? In this blog, we’ll provide you with creative ideas you can use when you decide to turn your playhouse into a shed, plus some simple steps that will help you get started. 

How to Repurpose Your Playhouse in 5 Steps

Before you begin to turn your playhouse into a shed, you’ll need to take care of a few logistics. Below, we’ve listed some of the recommendations we have for homeowners who want to get the most out of their repurposed playhouse. 

1. Repair Any Structural Issues

Most likely, your old playhouse has been through years of wear and tear. Because of this, you’ll want to make sure you take care of any damages that could cause problems in the future. 

We recommend you take some time to examine the exterior and interior of your playhouse and make note of any repairs that need to be tackled. If you’re not sure what to look for begin by checking the following things:

  • Roof– Make sure the roof doesn’t have any leaks that could result in interior damage or rot. 
  • Windows– If there are windows, make sure they aren’t broken or cracked. 
  • Floors– Check the floor for cracks, splinters, loose pieces, or rot damage.

Turning your playhouse into a shed will only be a successful project if it’s durable and dependable. Think of your repairs as investments. Take your time with them so they’ll hold up in the coming years. 

2. Install Thermal Insulation

This step may or may not be necessary, depending on what you plan to do with your repurposed playhouse. However, adding thermal insulation allows you to be comfortable all year round, and creates a space to spend time and work rather than a simple dumping area for old equipment. 

Thermal insulation will keep your shed cool in the summer and warm in the winter, making it a great place to work on projects no matter what the temperature is outside. It’s also an eco-friendly way to be more energy efficient and save you money in the long run. 

If you do choose to install thermal insulation, you’ll want to consider adding weatherstrip adhesive to your door or windows. This will make sure there are no leaks or drafts coming from outside. 

3. Install Electricity

Similar to adding insulation, installing electricity isn’t absolutely necessary, but if you plan on getting a lot of use out of your shed, you may want to consider it. Electricity will allow you to install proper lighting, heating, and electrical sockets. This can become very beneficial if you want the space for projects. 

Once you have electricity, you can decide what type of lighting is best suited for your space. When you’re choosing your lights, you’ll want to consider a few factors such as

  • Energy efficiency– What’s the most efficient and cheapest way to light your space?
  • Brightness– How many lumens does your light have? 
  • Usage life– How long will your light last?
  • Color and temperature– Do you want a “warmer” or “cooler” appearance?
  • Wattage– What amount of electricity will be used?
  • Installation– How will you install your lights?

Keep in mind that if you’re not trained in this area, you will most likely need a professional electrician to help you with this step. 

4. Add a New Coat of Paint

It may seem simple, but a fresh coat of paint can make all the difference. When you renovate your old playhouse you should put a piece of your personality into it. This is your chance to get creative. 

Look at some popular shed colors and decide what style you want. If you’re not sure where to begin check out some of the color schemes we’ve listed below.

Once you choose your color scheme, make sure you follow the proper guidelines when painting an outdoor structure like a playhouse or shed. Doing this will ensure that the paint continues to look fresh over time.

5. Add Shelves For Storage

The most common way to create more storage space anywhere is to install extra shelving. Adding shelves greatly increases your storage capacity, and with the proper instructions, you can do it by yourself. 

As you begin your renovation process, inspect the playhouse interior walls. Doing this will allow you to map out the most practical place to add shelves. Before installing anything, ask yourself a few basic questions:

  • How high do you want the top shelf?
  • How wide will each shelf be?
  • How much space do you need between each shelf?

The way you measure and mark the walls of your playhouse will heavily depend on the type of shelves you want to install. Make sure you have a plan before you begin making any significant changes. 

Also, it’s good to know that if you don’t have time to build your own shelves, or you’re not a DIY kind of person, there are great storage shelves available in all sizes and styles.

Red and white shed with porch.

Playhouse Conversion Ideas

Before you begin to turn your playhouse into a shed, you should have a clear idea of what you want to use the space for. Whether you’re looking to create a space for gardening projects or somewhere to kick back and relax, we have a few unique ideas that are guaranteed to add value to your backyard

The Man Cave

The concept of a man cave isn’t new, but that doesn’t mean it’s any less appealing. This is a great idea for men who need a place to watch sports, work out, or have a guy’s night. Consider adding a minibar, some classic games, and of course, a comfy seating area where you can put your feet up for a few hours. 

The She Shed

This idea is exactly what it sounds like. The she shed is a trend that popped up a few years back, and it’s still going strong. Known as the man cave for women, this is a space where you can focus on yourself. Whether it’s an art studio, yoga studio,  or a place to cozy up with a good book, this space is designed to make you feel comfortable and relaxed. 

The Gardener’s Workshop

If you want to stick to the classic garden shed, that’s okay too. Create a new and improved area where you can work on outdoor projects. You deserve a natural and stylish place to focus on your plants, flowers, and other backyard chores. If you have a themed backyard, consider styling your new shed to complement whatever design you already have.


Interested In Purchasing A New Shed?

Check out our selection of Amish-built shed styles that come in various sizes to fit into any yard.

Elite a-frame gray shed.
Elite A-Frame Shed

For years, outdoor weddings have been trending because of their cost efficiency and natural beauty. Incorporating a backyard wedding gazebo into your plans has become key to a successful celebration. 

In this blog, we’ll review everything you need to know before installing a backyard wedding gazebo, as well as some gazebo wedding decor ideas you can use for inspiration.

Wedding Gazebo Styles

Before you begin thinking about outdoor gazebo wedding decorations, you need to decide what type of gazebo fits your occasion. Below, we’ve outlined some factors that you should consider when researching wedding gazebo styles. 

Shapes

The first thing you need to decide on is your gazebo shape. Typically you can pick from:

  • Oval
  • Octagon
  • Rectangle
  • Dodecagon

When debating which shape would work best for your wedding celebration, consider the size of your backyard as well as where you’re planning on putting your gazebo. Specific shapes will likely fit into your space better than others. 

Roof Styles

The next factor to consider is your roof style. Your options usually include:

  • Pinnacle
  • Standard
  • Pagoda Roof w/ Cupola
  • Cupola
  • Bell Style

As you think about your gazebo roof style, try to envision which will fit the overall aesthetic of your wedding. In a more traditional style wedding, a pagoda roof with a cupola is a classic and elegant choice.

Also, keep in mind that you can add a permanent roof decoration to any styled roof. This includes cupolas, finials, and/or weathervanes.

Shingles

After determining your roof style, next, it’s time to pick shingle colors. Options you’ll see include:

  • Weatherwood 
  • Harvard Slate 
  • Charcoal Gray 
  • Dual Brown
  • Dual Gray
  • Dual Black
  • Driftwood
  • Earthtone Cedar
  • Aged Redwood
  • Cedar Wood (wood only)

When picking a shingle type for your backyard wedding gazebo, think about the color scheme you’ve chosen for your wedding as well as the season. You may want a lighter color for a Spring or Summer wedding and a darker color for a Fall wedding

Railing Styles

Similar to your roof style, your railings should correspond with your wedding theme. Consider railing styles you like such as: 

  • Baroque 
  • Colonial 
  • Dutch 
  • New England 

You want to make sure your railing style fits your roof style. For example, Dutch railings offer a minimalist and natural look whereas colonial and New England railings offer more detail and provide an extravagant look. 

Post Styles

The post style of your gazebo usually goes hand-in-hand with the railing style. There are only two options you can choose from:

  • Standard 
  • Turned 

Generally, people who choose a Dutch-style railing will go with a standard post, sticking to the simple style. Conversely, if you decided on a more detailed railing, you may want to consider choosing the turned post. 

Brace Styles

While often overlooked, the braces of your gazebo can do a lot to add to the overall style. You can choose from a variety of options such as: 

  • Dutch 
  • Colonial 
  • Victorian 
  • Standard

Just as you want to be consistent with your railings and posts, your braces should also be cohesive with your gazebo style. For example, Dutch railings and standard posts look best with Dutch or standard braces, and so on. 

Modern wood gazebo

Wood Gazebos

After you’ve decided on your wedding gazebo style, it’s time to decide whether you want a wood or vinyl gazebo. Depending on which material you choose, you’ll have different options for things such as color/paint, decking/flooring, or in some cases roofing. 

Below, we’ve outlined the custom elements you can choose from if you decide on a wood gazebo. 

Paint & Stain 

One of the perks of a wood gazebo is the natural and authentic look it will add to your wedding decor. Dealing with wood means you can go the route of paint or stain. Some of the most common paint/stain options are as follows: 

  • Almond Paint
  • White Paint
  • Canyon Brown Stain
  • Cedar Stain
  • Golden Oak
  • Cinder Stain
  • Mahogany Stain
  • Sepia Brown
  • Mushroom
  • Sky Gray

When choosing a paint or stain for your backyard wedding gazebo, you can draw inspiration from your wedding theme. A more rustic-styled wedding may call for a darker stain while a white or lighter color may be more appropriate for a formal wedding. 

Decking 

The options for wood gazebo decking usually consist of composite or cellular PVC. There are a variety of color options available for whichever decking material you decide to use: 

  • Brown Composite
  • Cedar Composite
  • Chestnut Composite
  • Sand Cellular PVC
  • Stone Cellular PVC

The main difference between composite and PVC comes down to appearance. If you’re looking for a more authentic wooden appearance your best bet would be to choose a composite deck since PVC can tend to look more enhanced. 

Metal Roof (Standing Seam or Ribbed) 

Another option you have if you choose a wood gazebo is to opt for metal roofing instead of shingles. This type comes either ribbed or standing seam and in an assortment of colors such as: 

  • Red
  • Bronze
  • Slate Blue
  • Evergreen
  • Black
  • Charcoal

There are some advantages to using a metal roof vs. shingles, such as durability and maintenance. Metal roofing also has a very distinct appearance, and depending on your theme, it may be more suitable. However, it is important to note that in some cases metal roofing can be more costly. 

Traditional white gazebo

Vinyl Gazebos

Just as there are certain elements you can customize for wood gazebos, the same can be said for vinyl gazebos. While wood gazebos can offer a natural and authentic look, vinyl gazebos are praised for their crisp, modern, and polished appearance.

Below, we’ve listed some of the unique features you can choose from when purchasing a vinyl gazebo.

Color Options

While the color options for vinyl gazebos are abundant, the most common choices include: 

  • White
  • Almond

These colors both offer a bright and beautiful look to any type of wedding decor. You may be worried about the light colors becoming dirty, but one of the advantages of vinyl gazebos is that they require very little maintenance and they’re easy to clean

Flooring

The flooring for vinyl gazebos also offers a variety of color options. These colors range from natural browns and grays to darker caramels and tans. Some of the common options are: 

  • Brown
  • Gray
  • Cedar
  • Redwood
  • Caramel
  • Tan
  • Amberwood
  • Slate
  • Cypress
  • Rosewood
  • Walnut

Your choice of flooring for your vinyl gazebo depends solely on what you prefer appearance-wise. Consider your wedding color scheme and decide which flooring color fits with the overall theme best. 

Wedding Gazebo Decor

Once you’ve chosen the gazebo for your wedding, it’s time to focus on the decorations. Outdoor weddings offer you unique options for decorating, especially if you have a gazebo to work around. Below, we’ve shared a few of our favorite wedding decor ideas you can use with your new gazebo.

Classic white gazebo

Wedding Gazebo Draping

One of the most popular techniques for outdoor gazebo wedding decorations is using drapes or curtains. Adding delicate fabrics from the top of your gazebo will give your wedding a whimsical and elegant look. 

You can tie your curtains back with ribbon or let them flow free Either way, you’re incorporating a simple, yet beautiful addition to your wedding decor. The best types of fabric to use for wedding gazebo draping are tulle, cotton, or linen. 

Wedding Gazebo Flowers

It’s not a wedding without flowers. Having your wedding outdoors means you can take advantage of the natural greenery and flowers surrounding your space, but you also have the opportunity to add more if you’re using a gazebo. 

Hanging flowers or vines can be gorgeous additions to your gazebo posts or railings. You can also position potted plants or planters around your gazebo’s perimeter if you have a certain flower arrangement you desire. 

Wedding Gazebo Lighting

Whether your wedding is taking place during the day or as the sun goes down, adding delicate lights can do wonders for the aesthetic. Hanging string lights around your gazebo is an easy task that will bring your decor to a new level. 

If you’re looking to create a luxurious style outdoors, consider installing a hanging chandelier as a focal point in your backyard wedding gazebo.

No matter what type or style of gazebo you choose for your wedding celebration, there’s no doubt it will bring your decor to the next level. Plus, you can continue to enjoy the benefits of your gazebo even after the wedding is over.


Build Your Dream Gazebo

Interested in purchasing a custom-built gazebo? Check out our custom gazebo builder tool to start designing your dream event gazebo today.

16′ Octagon, Country Style Tan Vinyl Gazebo With Black Shingled Pagoda Roof In A Backyard Garden
Country Style Vinyl Gazebo

Having a traditional wood swing set brings a timeless charm, and fun, to any outdoor space, but how do you know which one is right for you? Choosing the right type of wood for your swing set can be overwhelming. 

In this blog, we’ll help you decide what is the best wood for an outside swing set and what factors you should consider. 

4 Things to Look for When Choosing Wood Playground Lumber

When deciding what is the best wood for an outdoor swing set, there are multiple factors you should consider. Buying a swing set is a great way to elevate your backyard and encourage your kids to spend more time outdoors

However, you want to make sure the swing set you’re purchasing is the right fit for your family and outdoor space. Below, we’ve covered the 4 main factors you should think about before making any final decisions. 

1. Rot-Resistance

Redwood

Redwood trees are known for their naturally occurring complex astringent chemicals called tannins. They are concentrated mostly in the tree’s bark, protecting the living plant, and in the heartwood, the dead core of the tree. Tannins protect the tree from wood rot caused by fungi and insects. 

Today, most trees harvested are “second growth” which means they have a high percentage of sapwood. Sapwood is the living ring between the core and the bark of the tree, it transports water from the roots to the leaves. 

This means that while redwood swing sets are rot-resistant, you may find that some of the available lumber from these trees isn’t as resistant as you think. When purchasing it, you can specify that you want heartwood but it may be more costly. 

Another important thing to know is that redwood swing sets shouldn’t be in direct contact with the ground because it can cause them to degrade and rot. 

Cedar Wood

Similar to redwood, cedar wood also has tannins that protect it from wood rot. However, it should be noted that cedar wood doesn’t have as many tannins as redwood which means it won’t hold up as well over time. 

Cedar wood is even more so harvested from smaller “second growth” trees which have a high percentage of sapwood. It should be noted that cedar wood swing sets shouldn’t be placed in direct contact with the ground, like redwood. Doing this may cause the wood to rot and degrade sooner, especially because it doesn’t contain as many tannins. 

Pressure-Treated Pine Wood

In many cases, pressure-treated pine wood is known as the most rot-resistant wood. Pressure-treated pine is chemically treated to resist rot. The boards go through a process where they’re placed in pressurized tanks. In these tanks, preserving chemicals are forced into the wood’s fibers.

Pressure-treated lumber typically comes in two grades: above-ground and ground contact. The main difference between the grades is that ground contact lumber retains more chemical treatment, making it able to be placed in direct contact with the ground. 

If you do choose above-ground grade lumber for your pressure-treated pine wood swing set, you shouldn’t place it in direct contact with the ground, similar to redwood and cedar wood. 

Note: To avoid placing your swing set directly on the ground, consider using alternative materials such as artificial grass, sand, wood chips, or rubber mulch

2. Insect-Resistance

Redwood & Cedar Wood

When it comes to insect-resistant wood, redwood and cedar wood swing sets have the same properties and characteristics. 

While the tannins in these types work to naturally repel termites, they can still eat through the wood, and even the heartwood, if they have no other alternatives. This is rare but should be taken into consideration. 

Carpenter bees and carpenter ants can pose an issue because they aren’t deterred by tannins and don’t eat the wood they nest in. Since redwood and cedar wood are both softer woods, it makes it easier for these insects to dig into the wood and build tunnels or nests. 

Pressure-Treated Pine Wood

Pressure-treated pine works very well to repel termites because the chemicals used to treat the wood are deadly to them if ingested. Similar to redwood and cedar wood, pressure-treated pine wood swing sets do not deter carpenter ants and bees. 
While pressure-treated wood doesn’t have tannins, the chemicals in the treated wood don’t kill the insects either because they don’t eat the wood they nest in.

Custom outdoor wood swing set

3. Appearance

Redwood

People tend to be attracted to redwood because of its unique color. If you’re purchasing heartwood, you’ll typically be choosing colors ranging from pinkish-brown to a deeper reddish-brown. If you opt for the sapwood you’ll be choosing colors that range from pale white to yellow. 

However, it’s important to remember that whether you choose heartwood or sapwood, some maintenance is required to keep your redwood swing set’s color. Without the proper upkeep, it will likely turn to a silverish-gray. 

Cedar Wood

Cedar wood is also known for its range in color. Certain cedar wood swing sets have a deep reddish-brown color, similar to redwood. However, you’ll find that most cedar wood options have a yellowish tone. 

If you plan to paint or stain your swing set, choosing a lighter yellow shade of wood is your best option. Keep in mind, just like redwood, cedar wood swing sets will lose their color if not taken care of properly.

Pressure-Treated Pine Wood

Pressure-treated pine may not be as popular for its color, compared to redwood and cedar wood, but it’s still appealing to many homeowners. The heartwood options are light brown while sapwoods range from yellow to off-white. 

One thing to remember is that the process of pressure-treated pine leaves the wood wet, making it difficult to paint. If you decide you want to paint your pressure-treated pine wood swing set, you’ll need to ensure it dries completely before doing so.

4. Maintenance & Upkeep

Swing set maintenance is important, not only for your structure’s appearance but also to ensure anyone using it is safe. If you’ve ever had to restore your outdoor furniture, you’ll find that swing set upkeep is very similar. 

When cleaning and/or removing mildew, you can use a stiff-bristled brush. If you’re only cleaning your swing set, feel free to use soap and warm water. However, if there’s stubborn mildew you may want to consider using a stronger cleaning solution. 

After some time, you may want to restore the swing set’s color. For redwood swing sets,  you can clean the set (using the instructions above) and then apply a solution consisting of 4 ounces of oxalic acid crystals and warm water. Once the wood is dried thoroughly, rinse the solution with warm water. 

If you have a cedar wood swing set, the process is fairly similar. However, instead of using the solution mentioned above, you can use a heavy-duty cleaner/stripper to remove any stains or discolored spots. Again, after the wood is dried thoroughly, rinse the solution off with warm water. 

Restoring color to pressure-treated pine wood swing sets is even simpler. Instead of using a cleaner/stripper or homemade solution, you can use liquid dishwashing soap. Apply the soap and water to the wood and let it sit for 15 minutes before rinsing it off. 

It’s also recommended that you use wood sealers on your swing sets annually. When you’re doing this, you should also check for any wood rot, cracks, or splinters. Rot will be most common where the swing set meets the ground. 

Traditional outdoor wood swing set

When deciding what is the best wood for an outdoor swing set, it’s important you take into account your personal preferences. Each type of swing set wood has its advantages and disadvantages, it comes down to what you believe would be the best investment for your home.


Find Your Perfect Wood Swing Set

Don’t wait to bring your backyard to life. Check out the variety of high-quality wood swing sets we have to offer today.

Challenger 22'x19' Playset (AKA 5x5 Challenger) with 5x5 Tower, Step Ladder, Hand Rail, 5x5 Sandbox, Wood Roof, Green Poly Slats, Captain’s Wheel, Rock Wall, 7’ Tornado Tube Slide, 10’ Wonder Wave Slide, 4-Position 8’ high Swing Beam, Two Belt Swings, Trapeze, Plastic Glider, & (6) Anchors
Challenger Wooden Swing Set

Pergolas are great additions if you’re looking to add shade to your backyard, but they have other great uses too. Outdoor kitchens have become increasingly popular, and as a result, people are finding that using pergolas can make their kitchen designs even better. 

In this blog, we’ll share tips to consider when building your outdoor kitchen pergola as well as some design ideas that you can use for inspiration.

6 Pergola Outdoor Kitchen Design Tips

Creating a pergola kitchen can greatly increase your home’s curb appeal and upgrade your resale value. Knowing the right things to look out for before and during your design process will ensure your project goes smoothly and guarantees you end up with the space you deserve. 

Below, we’ve provided some helpful tips you can keep in mind when planning your outdoor kitchen designs with pergolas. 

1. Research Outdoor Kitchen Pergola Types

Outdoor kitchens are becoming more popular, but before you decide on how you want your outdoor kitchen pergola to look, you need to do some research. You want your space to be aesthetically pleasing, but also functional. 

In order to create the ideal outdoor cooking environment for your home, you’ll want to consider a few key elements such as your lifestyle, budget, and space. Try asking yourself, do you want a fully functional kitchen or a simple setup for occasional use? 

Once you determine what type of pergola kitchen space you want and/or need, you’ll be able to decide which amenities are essential and if your budget and style allow you to add some extra elements. Your setup can be as luxurious or simple as you’d like, it all depends on what you want to get out of it. 

2. Evaluate Your Space

Space is a very big determining factor in your pergola kitchen design. You have to be realistic and strategic when you’re planning your layout. You’ll want to measure the entire space you plan to build your outdoor kitchen. 

Knowing rough measurements will help you prioritize which accessories you need and which ones you can do without. If you live in a smaller area, you may want to consider attaching your pergola to your house. This will open up the area and ensure you aren’t wasting any space. 

3. Consider Portable & Permanent Options

Oftentimes, if you’re planning on building an outdoor kitchen under a pergola, you’re expecting it to be a permanent piece of your home. However, if you’re renting your home, you can still take advantage of creating a great outdoor dining experience.

There’s a variety of portable and permanent options available for outdoor kitchen pergolas. For example, if you don’t plan on moving anytime soon, you can build permanent counters, barbeque islands, or ovens. If you want something less permanent, try pairing a standalone grill with a portable cart that acts as a counter, or use a barbeque island that rolls.

Wood pergola with outdoor seating and fire pit.

4. Determine Your Cooking Style

Since your pergola kitchen is most likely the second cooking space you’ll have, you get to choose what your preferred cooking style will be. Do you prefer grilling fish or burgers? Maybe you would enjoy having a brick oven to cook pizzas. You might even want a tandoor oven or outdoor smoker

No matter what your preferences are, you want to make sure your design can accommodate your desires. Outdoor grills can range from gas, propane, electric, or even charcoal. You’ll also want to consider how you’ll be preparing your meals. 

Do you plan to prep indoors or outside? If you’re planning on doing everything outside, you’ll probably want to install a sink and proper counter space. Think about some of your favorite outdoor meals and ensure your space allows you enough room to cook, serve, and entertain your friends and family. 

5. Think About Your Environment

When designing your outdoor kitchen pergola, you need to be aware of where you’re located. If you’re somewhere that’s warm most of the year, creating a larger pergola kitchen and dining area is more appropriate. 

Living somewhere that gets cold in the winter months doesn’t mean you shouldn’t build an outdoor kitchen, it just means you need to be smart about your design. If you don’t plan on using your outdoor kitchen year-round, you may want to settle for a smaller area. You’ll also want to consider where you choose to place your pergola kitchen. Avoid areas that are too windy, hot, or cold. 

6. Commit to the Upkeep

As mentioned above, knowing your environment is important, not just for your design but also so you can be prepared for the maintenance involved. Outdoor kitchen pergolas are great additions to your home, but they do require upkeep. 

Before you build your pergola kitchen, you need to be committed to the work required to keep it looking good. This means taking the proper steps for protecting your outdoor furniture during the Winter and then preparing your patio space for the Spring

You’ll need to do some research depending on what materials you choose to use. Keeping up with any repairs will ensure your space continues to look new and ready for any guests you wish to entertain throughout the year. 

Custom wood pergola over outdoor kitchen.

Pergola Outdoor Kitchen Designs Ideas

Once you have done the necessary research and planning for your outdoor kitchen pergola, it’s time to start designing your space. Choosing the correct materials for your design depends on the maintenance required as well as your personal taste. 

Below, we’ve outlined three popular designs of pergola kitchens and shared the different materials you can use to complete your dream outdoor kitchen space.

Contemporary 

If you’re going for a contemporary or minimalist kitchen design, you’ll want to consider using slate or cast-concrete tiles for your flooring options. These tiles are great choices for an outdoor kitchen because they’re made to withstand natural elements and they present a modern, sleek look. 

Concrete, stainless steel, or granite are the perfect choice for contemporary styled outdoor kitchen countertops. These materials are stylish and all three are durable and effective, however certain surfaces, such as concrete, may require more upkeep than others, like granite.

Using a vinyl pergola may be the best option for you when creating a contemporary look. Vinyl pergolas don’t require much maintenance, and they allow you the options of different colors and styles. 

Tuscan

To create a Tuscan or Mediterranean-style outdoor kitchen, you should try using tumbled pavers, unhoned travertine, or stone-textured stamped concrete for your floors. These materials will give you the look of a Tuscan patio while still being highly durable and requiring little maintenance. 

Tile, quartz, or wood are all materials that fit into a beautiful rustic aesthetic for your countertops. Using tile provides you the opportunity to incorporate different patterns for a more eclectic look, while wood and quartz guarantee a clean, natural appearance. 

When creating a Tuscan-style outdoor kitchen consider purchasing a wood pergola. These can come in a variety of stains and finishes. Using wood will allow you to keep the natural and rustic aesthetic you’re trying to achieve. 

If you still do not know what pergola material is best for you, read our guide on how to choose between vinyl and wood pergolas.

Traditional

Choosing a traditional, old-English design means embracing darker flagstones or brick for your flooring. You could also consider using exposed aggregate concrete or cobblestone-stamped concrete. These materials are highly functional and are guaranteed to bring some timeless charm to your outdoor space. 

Porcelain, stone, or marble will provide your outdoor space with elegant and classy countertops. These materials work well outdoors because they’re known for their durability and can withstand most weather conditions year-round. 

Traditional spaces give you the opportunity to use either wood or vinyl pergolas. Depending on your personal style, you can determine which pergola material better suits you and your home. 

White vinyl pergola with an outdoor kitchen.

The important thing to remember is that no matter how you choose to style or design your outdoor kitchen pergola, there’s no doubt the addition will benefit you and boost your home’s curb appeal.


Create Your Dream Space

Interested in installing a pergola in your backyard? Discover the variety of pergola styles we offer and begin creating your dream space today.

12’ x 17’ Wooden Hearthside Amish Pergola With Superior Posts, Canyon Brown Stain With Fireplace, Overhead Lights
Heartside Amish Pergola

Looking to enjoy a place made just for you and anyone you choose to share it with, without the hassle of remodeling your actual home? Whether you’re finding the perfect shed for your outdoor space, or choosing to renovate a shed already in place, we have all the tips, tricks, and ideas you need to create your dream man cave shed.

Man Cave vs. She-Shed

You’ve probably heard of a she-shed, but have you thought about creating an outdoor man cave as well? She-sheds are for things like crafting, meditating, or countless other activities, whereas man caves may be focused more on gaming areas, hangout spaces, or even a workout area.

Man caves and she-sheds both follow a similar idea — it’s a place outside your home, that you can call your own. There are just as many
she-shed ideas to choose from as there are man cave ideas, but both require some planning.

9 Steps to Follow When Renovating Your Man Cave Shed

Once you’ve decided what purpose your renovated shed will serve, you can begin putting together some of your man cave shed plans. Here’s our recommended course of action to get started.

Painting shed with new coat and color.

1. Try a New Coat of Paint

A nice fresh coat of paint can make all the difference. Begin your shed makeover by giving it a new look, both inside and out. You can choose a color that matches or compliments your home, or even mix in a different color scheme depending on what you’ll be using your new space for. Either way, a new coat of paint will elevate your shed’s look. 

2. Seal Up Cracks

Before you begin making any big changes to turn your shed into a man cave, you need to ensure it’s ready to last. Sealing up any cracks, divots, or other damages helps you make your man cave look good as new. Once your shed is cleaned out, you can use weatherstripping to keep your space sealed up from any dust, bugs, drafts, or other problems.

3. Add Windows

Even though your man cave may have originally been a shed, that doesn’t mean you can’t make your new space feel like home. There are many great man cave shed interior ideas but the most important may be adding windows. You can brighten up the inside to create a more relaxing and livable space. Plus, windows can also help with ventilation and air circulation if necessary.

4. Install Insulation

Ensure you’re comfortable inside your shed during every season by installing insulation. Since you’ll be spending time in your new space, you want to make sure your belongings are protected from inclement weather or extreme temperatures. You may even consider adding drywall to create a real room inside your shed with proper walls.

Installing insulation into shed walls.

5. Add AC/Heating

Similarly to installing insulation, you may be interested in adding AC and/or heating. Mild climates may only require insulation, but when temperatures rise or fall, you’ll need to make some adjustments. Adding a small air conditioner and/or heater will allow you and any guests to remain comfortable while inside the man cave shed.

6. Install Better Lighting

Most average sheds don’t necessarily require decent lighting. You can add overhead lights and lamps to brighten up the area allowing enough light to enjoy any hobbies or activities. You can also add exterior lighting if you plan on spending time in your space when the sun goes down.

7. Revamp the Entrance

Guests should feel welcomed when they enter your renovated space, and the best way to do that is by revamping the entrance. Whether you’re adding a new coat of paint or purchasing a new door altogether, make sure it’s inviting and accessible. 

You can choose any door style depending on how you’d like to use the space overall, but don’t forget to properly seal your door to avoid any exterior damage.

8. Convert the Floor

Durable flooring is a necessity when it comes to turning a storage shed into a man cave. You want to ensure your floor is protected from mold, moisture, and other elements that cause damage. There are many types of flooring you can use in your shed such as: wood, concrete, vinyl, or even carpet. Whichever type of floor you choose, remember you can add throw carpets or rugs for maximum comfort. 

9. Install Shelves and Storage Spaces

No matter how you choose to use your new space, you’ll want to have areas for storage and organization. Installing shelves is a great way to add more room for items or decor.

Red Elite Dutch Shed

Man Cave Shed Ideas

Now that you know the steps to convert your space into a man cave shed, it’s time to decide how you’d like to use your new space. While there are countless ideas you can use for inspiration, here are our top 3 favorites!

Gaming Shed

Turn your shed into the ultimate game room for you and your guests. By adding a dartboard, television station, game tables, and countless board games, you can enjoy an entertaining space complete with all the necessary elements for a great time.

Workout Shed

Get your daily exercise in without having to deal with the hassle of going to the gym. Sometimes, having our own workout space is more beneficial than having a gym membership. You can convert your renovated shed into a workout area that includes all of your necessary equipment. 

Hangout Shed

Create a space where you can relax. Comfy couches, chairs, and soft carpets can help transform your shed into the perfect area for you to spend lazy Sundays or unwind after a long day at work. Incorporate your own style and some of your favorite elements to complete an oasis for yourself.

No matter how you choose to remodel your shed, remember to have fun and be creative with your ideas. Don’t hesitate to add details that make it the perfect fit for you!


Build Your Perfect Man Cave

Looking for a quality new shed for your outdoor space? Browse our selection of Amish-built sheds that are durable and dependable.

12' x 20' Classic with Reversed Gable – Vinyl
Classic Sheds

Every homeowner deserves to have an outdoor space where they can relax and enjoy themselves, and adding a pergola is the perfect way to do this. Whether you want to make your backyard into a shady sit-down space, or you’re looking to create a private patio area, a pergola has the potential to turn your outdoor space into a beautiful oasis.

Still, if you choose to add a pergola to your backyard, how do you know which one is right for you? Wood vs. vinyl pergolas is a hot topic, but with the right information, you can determine which one is best for you.

In this blog, we’ll cover the differences of wood vs. vinyl pergolas to help you know which one is the perfect fit for your outdoor space.

Wooden Pergola Details

Using wood as a material for pergolas is immensely popular due to its versatility and visual appeal. The natural and authentic appearance of the wood itself paired with the lower cost makes it a worthy contender when it comes to choosing pergolas.

There are, of course, advantages and disadvantages to using wood as your pergola material. It’s important to take into account a variety of factors to make sure a wooden pergola is the best fit for you.

Pros of Wooden Pergolas

There are many reasons people choose wooden pergolas over vinyl pergolas. One of the greatest advantages is their versatility. Wood can be stained or painted, and can be made into almost any style you desire.

Its versatility also means it has the potential to match multiple types of decor, whether you are seeking something more rustic or you prefer a modern wood pergola. Depending on the wood species, it is typically tough on insects and rotting, as long as it’s maintained properly. Wood also tends to be the cheaper option when choosing materials for your pergola. Finally, people are attracted to wood because of its natural look.

Cons of Wooden Pergolas

While there are countless pros to wooden pergolas, it’s also important to be aware of the cons. As a pergola material, wood requires the most maintenance in order to keep its appearance appealing.

Failing to keep up with maintenance will shorten the lifespan of your wooden pergola. The maintenance may include repainting or restaining periodically. Even though it is usually the cheaper option, wood prices vary greatly depending on which wood species you desire. In addition, the availability of wood species also varies.

Choosing the Best Wood for Your Pergola

Another thing to consider when looking at wood vs. vinyl pergolas is which type of wood is the right fit for you.

When choosing the best wood for your pergola, you must consider where you are located, your budget, and the overall appearance of your pergola. Depending on these factors, you can narrow down your wood options.

Pressure Treated Wood Pergola

Pressure treated wood is the most popular choice when the budget is a big factor. Not only is it easy to work with, but it’s also available at almost every home improvement store or lumber yard. The process pressure treated wood undergoes makes it more resistant to rotting, decay, and insects. This makes it a durable choice for outdoor wooden pergolas. However, pressure-treated wood doesn’t have the same natural look as other wood species.

Cedar Wood Pergola

Cedar wood is one of the most commonly used woods for pergolas. It’s popular for its naturally-appealing appearance as well as its durability. Not only is it a stunning wood species, but it is naturally rot- and insect-resistant. Depending on where you are located, it may be more of an expensive choice and have limited availability. Yet, a cedar wood pergola will give your outdoor space a natural and rustic look.

Tropical Hardwood Pergola

Tropical hardwood has become increasingly popular for solid wood pergolas. Being widely known for outdoor projects, this wood species is not only admired for its natural beauty, but also for its density and resilience to the elements. Unfortunately, tropical hardwood tends to be the most expensive and the most difficult to get.

Composite Wood Pergola

Composite wood is a popular pergola wood material for many reasons. It is the most eco-friendly choice and requires the least amount of maintenance. While it is weather-resistant, one of the cons of composite wood is its artificial and manufactured look.

Vinyl Pergola Details

10’ x 14’ Traditional Wood Pergola With Canyon Brown Stain

While it hasn’t always been the most traditional choice, using vinyl as a pergola material has become increasingly popular over the years. The flexibility in choosing different colors while also requiring little maintenance has made vinyl pergolas the first choice for many people.

Similar to wooden pergolas, there are advantages and disadvantages to choosing a vinyl pergola for your outdoor space. Make sure you take into consideration all the factors before you make your decision. 

Pros of Vinyl Pergolas

The main reason people are attracted to vinyl pergolas is the little maintenance they require. Unlike wood, vinyl never needs to be repainted or restained and will withstand the turmoils of natural elements far longer than wood is able to withstand. 

Vinyl is also mold-, insect-, and rot-resistant. When it comes to choosing your vinyl pergola, you are given countless options for colors, making it easy to match your backyard theme or style. 

Cons of Vinyl Pergolas

Unfortunately, vinyl pergolas also have their cons. While you are given many options pertaining to color, you can never repaint vinyl. This means whichever color you choose, you must keep unless you get an entirely different vinyl pergola

The other reason people are against vinyl is that it may lack a natural look depending on what colors you choose. It doesn’t have the same traditional and authentic look that wood provides. Finally, vinyl tends to be the most expensive option. 

Choosing the Best Vinyl Pergola Color

When debating between wood vs. vinyl pergolas, you will want to pay attention to your backyard theme. One of the great advantages to choosing a vinyl pergola is the color options you can choose from. Depending on the theme of your backyard, you have the ability to decide which color scheme you want to incorporate with your pergola. 

The placement of your pergola should also play a part in choosing the best vinyl pergola color. Its surroundings and the type of style you are trying to master will influence your choice.

Woodgrain/Natural 

You can still have a vinyl pergola and keep the natural look in your backyard. Using a woodgrain or natural color will give you a pergola that blends in with the elements in your backyard. 

Soft Hues

Keep it simple with soft hues. Shades like ivory and pale colors will give your outdoor space a clean and calm look. Appealing to the eyes, and easy to match, incorporating soft hues is a perfect way to add to your outdoor scene. 

Make it Stand Out

If you want your pergola to stand out, make it the focal point of your outdoor space by choosing a vibrant color. This could mean choosing a nontraditional color or simply choosing a white vinyl pergola. The stark white will add a contrast to the natural elements. 

Two-Tone

Choosing one color can be hard, so why not choose two? You can pick two complementary colors to create a two-tone pergola. This is a unique way to incorporate more colors into your outdoor space without overwhelming the eyes. 

Pergola Designs: Adding a Pergola to Your Outdoor Space

When looking at wood vs. vinyl pergolas, you want to think about how you are going to incorporate your pergola into your outdoor space. There is no doubt adding a pergola will elevate your backyard, but you want to make sure you place it in the right area for practical reasons, as well as visual appeal.

Poolside Paradise

If you have a pool or hot tub in your backyard, a pergola may be the final touch to creating your personal paradise. No matter what pergola material you choose, having a structure to provide some shade and shelter will no doubt add to the perfect poolside aesthetic. 

Outdoor Dining

Outdoor dining is not only a nice change to your regular routine, but it’s a refreshing way to enjoy a meal with family or friends. Make your outdoor dining dreams come true by adding a pergola. You can keep a table and chairs underneath, and even add an outside kitchen to make cooking easier. 

Shady Hangout

Having a shady hangout outside makes your backyard even more appealing. Whether you have a patio or not, adding a pergola will allow you to create the perfect place to enjoy the outdoors. Placing patio or lawn furniture underneath will make being outside irresistible.


Create A Backyard Worthy Of Your Home

Check out Penn Dutch Structures’ selection of wood and vinyl pergolas to find the perfect one for you.

10’x14′ Traditional White Vinyl Amish Pergola With Superior Posts and White, Brown EZ Shade System
Traditional White Pergola